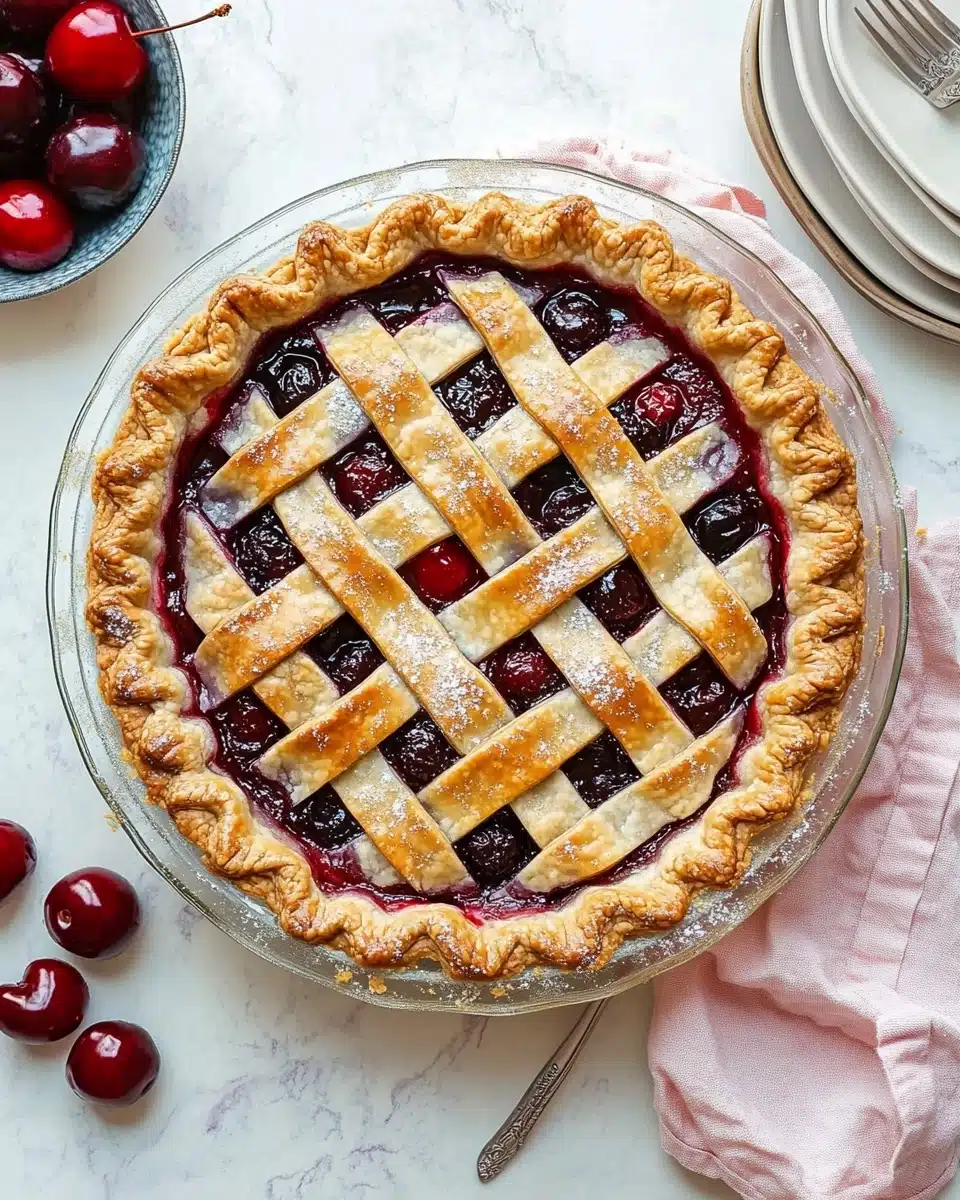
If you’re searching for the ultimate Homemade Cherry Pie Recipe, get ready—this is the one you’ll find yourself bragging about for years. With a crisp, flaky crust and a luscious, ruby-hued cherry filling that’s perfectly sweet and just a little tart, every bite tastes like summer nostalgia. Trust me, your friends and family will swoon over the gorgeous lattice top and irresistible aroma wafting from your kitchen!
Why You’ll Love This Recipe
- Bursting With Real Cherries: This pie delivers a juicy, vibrant flavor thanks to a generous helping of fresh (or frozen) cherries—no canned filling here!
- Tender, Buttery Crust: Whether you use homemade or an all-butter store-bought crust, the flaky pastry holds up beautifully to the luscious filling.
- Make-Ahead Friendly: Prep the filling and the dough ahead of time for a stress-free baking experience—perfect for gatherings and holidays.
- Showstopping Presentation: The golden lattice top and glistening fruit will make any table feel extra special, no matter the occasion.

Ingredients You’ll Need
Every part of this Homemade Cherry Pie Recipe is built from simple, honest ingredients. The secret is choosing quality fruit and not skimping on the details—a splash of extract here, a dusting of sugar there—and letting each one shine in flavor, color, and texture.
- Homemade Pie Crust or All Butter Pie Crust: The heart of a classic pie—flaky, golden, and sturdy enough to cradle that juicy filling. A homemade crust gives the best flavor, but a good-quality store-bought option works in a pinch.
- Fresh Cherries (4 1/2 cups, halved & quartered): The star of the show! Mixing halves and quarters gives a variety of texture for the most luscious slice every time.
- Granulated Sugar (2/3 cup): Sweetens the filling, drawing out the cherries’ natural juiciness. Adjust up or down if you use sour or extra-sweet varieties.
- Cornstarch (1/4 cup): The magic thickener that keeps your pie from turning into cherry soup—essential for that picture-perfect slice.
- Lemon Juice (1 Tbsp): Adds brightness and just a hint of tartness, balancing the sweetness beautifully.
- Pure Vanilla Extract (1 tsp): Rounds out and deepens the cherry flavor with a warm, aromatic note.
- Almond Extract (1/4 tsp): Just enough to add that bakery-shop hint of nostalgia and complexity—don’t skip it!
- Unsalted Butter (1 Tbsp, cold, cubed): Dotted under the top crust for a silky, rich finish and gorgeous shine.
- Egg Wash (1 egg + 1 Tbsp milk): Helps your crust attain that golden, glossy bakery finish.
- Optional: Coarse Sugar for sprinkling on the crust—adds sparkle and a satisfying crunch to every bite.
Variations
One of the best things about a Homemade Cherry Pie Recipe is how endlessly adaptable it is. Whether you need to accommodate special diets, make use of what’s on hand, or just feel like switching things up, there’s plenty of room to get creative.
- Frozen Cherries: No cherry pitter? No problem! Use frozen cherries—halve or quarter them while still frozen and follow the recipe as directed (you might need a slightly longer bake time).
- Switch Up the Fruit: Mix in a handful of blueberries or blackberries for a jewel-toned twist and a burst of new flavors.
- Almond-Free: Omit the almond extract if you have allergies or simply aren’t a fan—vanilla alone still gives a deep, classic aroma.
- Gluten-Free Crust: Substitute your favorite 1:1 gluten-free flour blend in the crust or opt for a ready-made gluten-free crust for a pie everyone can enjoy.
- Extra Tangy: Use sour cherries and increase the sugar to taste for that old-fashioned, tart punch!
How to Make Homemade Cherry Pie Recipe
Step 1: Prep Your Pie Crust
Start by preparing your homemade or all-butter pie crust. Make sure to follow the chilling instructions—this helps the dough stay flaky and easier to work with. Letting the dough chill for at least two hours (or even overnight) makes rolling and shaping the crust a total breeze.
Step 2: Make the Cherry Filling
In a large mixing bowl, gently combine your halved and quartered cherries with granulated sugar, cornstarch, lemon juice, vanilla, and almond extract. Stir until everything is coated and glistening. This simple combo lets the cherries really shine—cover and refrigerate it while you prep the crust to let all the flavors mingle.
Step 3: Roll Out Bottom Crust & Fill
Roll out one disc of chilled dough on a well-floured surface to about a 12-inch circle. Drape it into your pie plate, gently tucking and smoothing it in. Using a slotted spoon, transfer the prepared cherries (leaving juice behind) into the crust. Pop the pie (uncovered) in the fridge while you reduce the juice for an extra boost of flavor.
Step 4: Reduce the Cherry Juice
Pour the leftover cherry juice into a small saucepan and simmer gently for 3–4 minutes until it’s thickened and syrupy. Let it cool for five minutes—it’ll thicken even more. Pour this concentrated juice over the cherries in the pie shell and gently toss for even distribution, then dot the cold butter over the top. The pie goes back in the fridge while you move on to the topping.
Step 5: Lattice the Top Crust
Roll your second dough disc into another 12-inch circle. Using a pastry wheel or sharp knife, slice it into strips of varying widths (a mix of wide and narrow is especially pretty). Weave them over the pie in that classic lattice pattern, gently pressing the ends into the bottom crust edges to seal. Trim any overhang and crimp or flute the edges for a beautiful finish.
Step 6: Finish and Bake
Brush your pie generously with egg wash for a golden shine, and sprinkle with coarse sugar for a sparkling, bakery finish. Chill the assembled pie while you preheat the oven—this helps keep the crust from shrinking. Bake on a sheet pan for easy cleanup: 20 minutes at 400°F, then reduce to 375°F for another 30–40 minutes. If your edges brown too quickly, shield them with a pie crust ring. The filling should bubble for at least 5 minutes before you pull the pie from the oven.
Step 7: Cool Before Slicing!
The hardest part—let your Homemade Cherry Pie Recipe cool for at least 3–4 hours before slicing (trust me!). This wait lets the filling set up for perfect slices, instead of a delicious but messy puddle.
Pro Tips for Making Homemade Cherry Pie Recipe
- Chill Everything: Keeping your butter, flour, and even mixing bowl as cold as possible makes for an extra-flaky, tender crust every time.
- Juice Reduction Magic: Reducing the extra cherry juice before assembling the pie concentrates the flavor and keeps your crust from becoming soggy—an absolute must!
- Extra-Large Lattice Strips: Mixing wide and narrow strips for the lattice not only looks stunning but helps support the pie’s structure (and makes weaving easier, too).
- Don’t Rush Cooling: As tempting as warm pie is, letting it cool fully guarantees clean slices and a luscious, set filling.
How to Serve Homemade Cherry Pie Recipe

Garnishes
No need to go over the top—a simple scoop of vanilla bean ice cream, a dollop of softly whipped cream, or even a drizzle of heavy cream is pure perfection with your Homemade Cherry Pie Recipe. A light dusting of powdered sugar and a few fresh cherries on the side give a bakery finish if you’re feeling fancy.
Side Dishes
Pair this pie with other picnic or holiday classics—think lemonade, iced coffee, or a cold glass of milk. For brunch, add a leafy green salad or a platter of cut berries; for dessert, nothing beats another platter of summery stone fruits to carry the theme.
Creative Ways to Present
Go all-in with individual mini pies for special occasions, or bake the pie in a rectangular tart pan for an elegant twist. Slice and serve on vibrant plates with edible flower petals, or use a patterned pie crimper for a decorative edge that wows guests even before the first cut.
Make Ahead and Storage
Storing Leftovers
Wrap leftover Homemade Cherry Pie Recipe tightly with plastic wrap or aluminum foil and store it in the refrigerator for up to five days. It keeps wonderfully moist, and the flavors deepen overnight—perfect for next-day treats!
Freezing
Baked slices (or even the whole pie) freeze beautifully for up to three months. Wrap well and thaw overnight in the refrigerator for best results. You can also freeze the unbaked filling or pie dough, giving you a head start on future pies.
Reheating
To enjoy pie warm, pop slices into a 300°F oven for 10–15 minutes or microwave gently in short bursts (just until warmed). If reheating a whole pie, tent loosely with foil and warm in a moderate oven to revive the flakiness of the crust.
FAQs
-
Can I make the Homemade Cherry Pie Recipe with frozen cherries?
Absolutely! Just halve or quarter them while still frozen and toss with the other filling ingredients as directed. The bake time may be a little longer, so keep an eye on your pie and make sure the juices are bubbling at the edges before removing from the oven.
-
What’s the secret to a crisp, non-soggy bottom crust?
Two things: reduce any excess cherry juice before assembling and make sure your oven is fully preheated for that first blast of heat. Baking the pie on a preheated baking sheet can also help prevent soggy bottoms!
-
How do I adapt the Homemade Cherry Pie Recipe for sour cherries?
If using sour cherries, simply increase the sugar to 3/4 or even 1 full cup, depending on your sweet tooth. The lemon juice and cornstarch quantities can stay the same, but taste your filling before baking to make sure it’s just right.
-
Can I make and freeze the pie dough ahead of time?
Absolutely! Homemade or all-butter pie dough freezes well for up to three months. Thaw overnight in the fridge before rolling and using in your Homemade Cherry Pie Recipe—it’ll save you lots of time for baking days!
Final Thoughts
Few desserts feel as joyful and timeless as a Homemade Cherry Pie Recipe. Whether it’s your very first from-scratch pie or a longtime family favorite, the aroma, flavor, and memories are impossible to resist. Pour yourself a cup of coffee, share a generous slice, and savor each sweet, berry-bright bite—you absolutely deserve it!
Print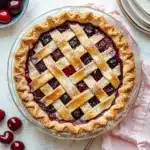
Homemade Cherry Pie Recipe
- Prep Time: 3 hours
- Cook Time: 55 minutes
- Total Time: 7 hours
- Yield: 8-10 servings
- Category: Baking
- Method: Baking
- Cuisine: American
Description
Indulge in the sweet and tangy flavors of this Homemade Cherry Pie. Made with a buttery pie crust and filled with a mix of halved and quartered fresh cherries, this classic dessert is perfect for any occasion.
Ingredients
Pie Crust:
- Homemade Pie Crust or All Butter Pie Crust (both recipes make 2 crusts, 1 for bottom and 1 for top)
Filling:
- 4 and 1/2 cups halved & quartered pitted fresh cherries
- 2/3 cup (135g) granulated sugar
- 1/4 cup (28g) cornstarch
- 1 Tablespoon (15ml) lemon juice
- 1 teaspoon pure vanilla extract
- 1/4 teaspoon almond extract
- 1 Tablespoon (14g) cold unsalted butter, cut into small cubes
- egg wash: 1 large egg beaten with 1 Tablespoon (15ml) milk
- optional: coarse sugar for sprinkling on crust
Instructions
- The crust: Prepare either pie crust recipe through step 5. The pie dough needs to chill in the refrigerator for at least 2 hours before using.
- Make the filling: In a large bowl, stir the cherries, sugar, cornstarch, lemon juice, vanilla, and almond extract together until thoroughly combined.
- Roll out the chilled pie dough: On a floured work surface, roll out one of the discs of chilled dough.
- Pour the leftover juice into a small saucepan. Cook over low heat until juice has slightly reduced and thickened.
- Arrange the lattice: Roll the dough into a circle, cut into strips, and weave into a lattice pattern over the filling.
- Preheat oven to 400°F (204°C). Bake the pie for 20 minutes, then reduce temperature to 375°F (190°C) and bake for an additional 30–40 minutes.
- Remove pie from the oven, place on a cooling rack, and cool for at least 3–4 hours before slicing and serving.
Notes
- Make Ahead / Freezing Instructions: Prepare the pie in full 1 day in advance. The pie crust dough can be stored in the refrigerator for up to 5 days or in the freezer for up to 3 months. Baked pie also freezes well for up to 3 months.
- Special Tools: Cherry Pitter, Glass Mixing Bowl, Rolling Pin, Pie Dish, Pastry Wheel or Pizza Cutter, Pastry Brush, Pie Crust Shield, Cooling Rack
- Cherries: Halve and quarter cherries for best results. Adjust sugar for sour cherries.
Nutrition
- Serving Size: 1 slice
- Calories: Approx. 350
- Sugar: Approx. 25g
- Sodium: Approx. 150mg
- Fat: Approx. 15g
- Saturated Fat: Approx. 8g
- Unsaturated Fat: Approx. 6g
- Trans Fat: 0g
- Carbohydrates: Approx. 50g
- Fiber: Approx. 3g
- Protein: Approx. 4g
- Cholesterol: Approx. 40mg


