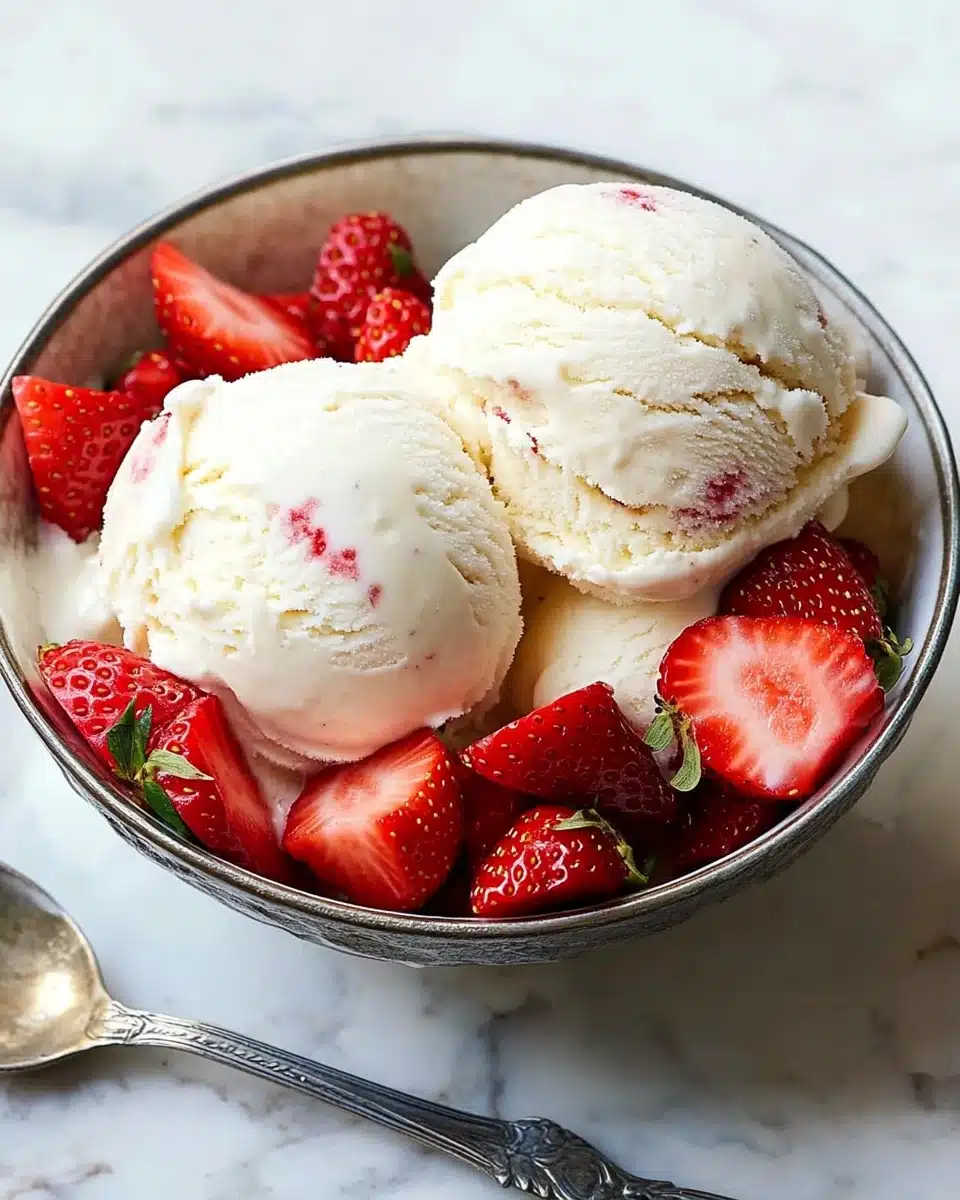
Few desserts capture the bliss of summer—or any season—quite like Homemade Vanilla Ice Cream. Silky, creamy, and brimming with classic vanilla bean flavor, it’s the kind of treat that brings back memories, whether you’re the one making it or just sneaking a spoonful straight from the freezer!
Why You’ll Love This Recipe
- Unbeatable Creaminess: This Homemade Vanilla Ice Cream delivers an ultra-smooth, luscious texture that rivals any scoop shop.
- Pure Vanilla Flavor: Every bite celebrates real vanilla—no artificial shortcuts, just a true, fragrant classic.
- Easy & No-Fuss: The recipe uses simple steps and everyday pantry staples; you don’t need a culinary degree for perfect results.
- Endlessly Customizable: Dress it up with mix-ins, sauces, or enjoy it as-is—the possibilities start with your creativity!

Ingredients You’ll Need
The best Homemade Vanilla Ice Cream is built on just a handful of fresh, quality ingredients. Each one plays a starring role, creating that signature creamy texture and pure, dreamy vanilla flavor that keeps everyone coming back for more.
- Heavy Cream: The foundation of luscious ice cream—heavy cream brings richness and smooth mouthfeel. Opt for full-fat, as it’s worth every silky spoonful!
- Whole Milk: Whole milk balances the richness with a little lightness, so your ice cream is scoopable but never heavy or greasy.
- Cane Sugar: Sugar provides sweetness and keeps the ice cream soft; cane sugar dissolves beautifully for a velvety base.
- Vanilla Extract: This is your flavor star. Use a good-quality, pure vanilla extract for the deepest, most aromatic results.
- Sea Salt: Just a pinch makes all the flavors pop—you won’t taste salt, but the vanilla will taste even more vibrant.
Variations
One of the delights of Homemade Vanilla Ice Cream is how easy it is to adapt—swap an ingredient, stir in your favorites, and you’ve got a whole new treat. Don’t be afraid to get creative and make this recipe your own!
- French Vanilla Ice Cream: Whisk in two egg yolks for an ultra-rich, custard-style base that’s extra creamy.
- Dairy-Free Delight: Use canned coconut milk and your favorite plant milk for a vegan version that’s just as smooth.
- Swirl-In Flavors: Add ribbons of caramel sauce, fudge, or berry compote just before freezing for gorgeous flavor pockets.
- Cookie Crumble: Stir in chopped cookies, brownies, or toffee bits after churning for an indulgent twist.
How to Make Homemade Vanilla Ice Cream
Step 1: Create the Ice Cream Base
Start by gathering a saucepan and combining your heavy cream, whole milk, cane sugar, vanilla extract, and just a pinch of sea salt. Warm the mixture gently over medium-low heat, whisking often to dissolve the sugar—don’t let it boil; you just want everything cozy, combined, and fragrant. In just five minutes, you’ll have a beautifully unified base that already smells like heaven.
Step 2: Chill Thoroughly
Pour the warm ice cream base into a heatproof bowl, cover it up, and send it to the fridge for at least two hours—or even overnight. Chilling is non-negotiable: it allows the flavors to meld and ensures your ice cream churns up creamy, not icy. (Bonus: it’s one less thing to worry about if you prep ahead!)
Step 3: Churn & Freeze
Once your base is fully chilled, give it a quick whisk before adding it to your ice cream maker. Churn according to your machine’s instructions—usually 20 to 30 minutes—until the ice cream is thick, soft, and billowy. For that classic scoop-shop texture, transfer your churned ice cream to an airtight container and freeze for a couple hours until it firms up perfectly.
Step 4: Scoop & Enjoy
The most rewarding part! When you’re ready to serve, let your Homemade Vanilla Ice Cream sit for a few minutes at room temperature so it’s easy to scoop. Then dive in—it’s pure, creamy bliss in every bite.
Pro Tips for Making Homemade Vanilla Ice Cream
- Chill is Key: Make sure your base is fully chilled before churning—this helps prevent icy crystals and gives maximum smoothness.
- Vanilla Matters: Splurge on pure vanilla extract or experiment with real vanilla bean for extraordinary depth and fragrance.
- Prep Your Freezer: Store your container in the freezer while you churn so the soft ice cream doesn’t melt on contact, keeping every scoop perfectly creamy.
- Smooth Scooping: If the ice cream is extra firm, let it soften for just a few minutes (not longer!) at room temperature—this makes for the prettiest, easiest scoops.
How to Serve Homemade Vanilla Ice Cream

Garnishes
The beauty of Homemade Vanilla Ice Cream is its versatility—dress it up with a sprinkle of toasted nuts, a burst of rainbow sprinkles, a drizzle of warm fudge, or even a handful of fresh summer berries. Classic or creative, the right garnish makes each bowl feel special.
Side Dishes
Pairing your ice cream with warm desserts is pure magic—think gooey brownies, apple crisp, fruit pies, or even a chewy chocolate chip cookie. The contrast between warm and cold is absolutely irresistible!
Creative Ways to Present
Try scooping Homemade Vanilla Ice Cream into mason jars with layers of crushed cookies for a picnic, packing it into homemade ice cream sandwiches, or serving small tasting flights topped with different sauces so everyone can sample and savor.
Make Ahead and Storage
Storing Leftovers
Store any leftover ice cream in an airtight, freezer-safe container. Press a layer of parchment directly against the surface before sealing to help prevent freezer burn and maintain the velvety smoothness you love.
Freezing
Homemade Vanilla Ice Cream freezes wonderfully for up to a month. Just make sure the container is tightly sealed, and if possible, keep the ice cream stored in the coldest part of your freezer to avoid icy edges.
Reheating
Good news: ice cream doesn’t need reheating! Instead, if yours is too hard to scoop right away, let the container sit out for a few minutes at room temperature—it’ll soften to perfect scoopability.
FAQs
-
Do I need an ice cream maker to make Homemade Vanilla Ice Cream?
While this recipe is designed for an ice cream maker for the best creamy texture, you can absolutely make it without one! Pour the chilled base into a shallow container, freeze, and stir thoroughly every 30–45 minutes for a few hours until set. The texture will be a bit less airy, but still delicious.
-
Can I use a vanilla bean instead of vanilla extract?
Definitely! Split one vanilla bean lengthwise, scrape out the seeds, and add both seeds and pod to your milk and cream as they warm. Remove the pod before chilling. This step gives your Homemade Vanilla Ice Cream intense, real vanilla flavor and beautiful little specks throughout.
-
How do I prevent my ice cream from becoming icy?
The two keys for ultra-creamy ice cream are a thoroughly chilled base and airtight storage. Don’t rush the chilling step, use the right ratio of cream to milk, and always cover your ice cream to keep out air and moisture.
-
Why is my ice cream too hard to scoop straight from the freezer?
Homemade Vanilla Ice Cream doesn’t contain the softening additives you find in store-bought versions. Simply let your container sit out for a few minutes before scooping, and it will become perfectly creamy and easy to serve.
Final Thoughts
If you’ve never tried Homemade Vanilla Ice Cream before, now is the perfect time—each batch is easy, deeply satisfying, and always a crowd-pleaser. I hope this recipe becomes one of your family’s favorites to make, scoop, and savor all year long. Happy churning!
Print
Creamy Vanilla Ice Cream Recipe
- Prep Time: 30 minutes
- Total Time: 2 hours 30 minutes
- Yield: Serves 4 to 8
- Category: No-Cook
- Method: No-Cook
Description
Learn how to make delicious homemade ice cream with just a few simple ingredients. This creamy treat is perfect for satisfying your sweet cravings on a hot day!
Ingredients
Ice Cream Base:
- 1 1/2 cups heavy cream
- 1 1/2 cups whole milk
- 2/3 cup cane sugar
- 2 teaspoons vanilla extract
- 1/8 teaspoon sea salt
Instructions
- Cooking the Base: In a medium saucepan, combine the cream, milk, sugar, vanilla, and salt. Warm over medium-low heat, whisking often, for 5 minutes, or until the sugar dissolves and the mixture is warmed through.
- Chilling: Pour into a heatproof bowl, cover, and chill for 2 hours or overnight.
- Churning: Remove the chilled ice cream base from the fridge and whisk well. Churn in an ice cream maker according to the manufacturer’s instructions, typically 20 to 30 minutes.
- Freezing: The ice cream will be soft after churning. For firmer ice cream, transfer to an airtight container and freeze for 2 to 4 hours before serving.
- Storage: Store in an airtight container in the freezer for up to a month. If the ice cream is too firm to scoop straight from the freezer, let sit at room temperature for a few minutes to soften.
Notes
- Makes 1 quart


