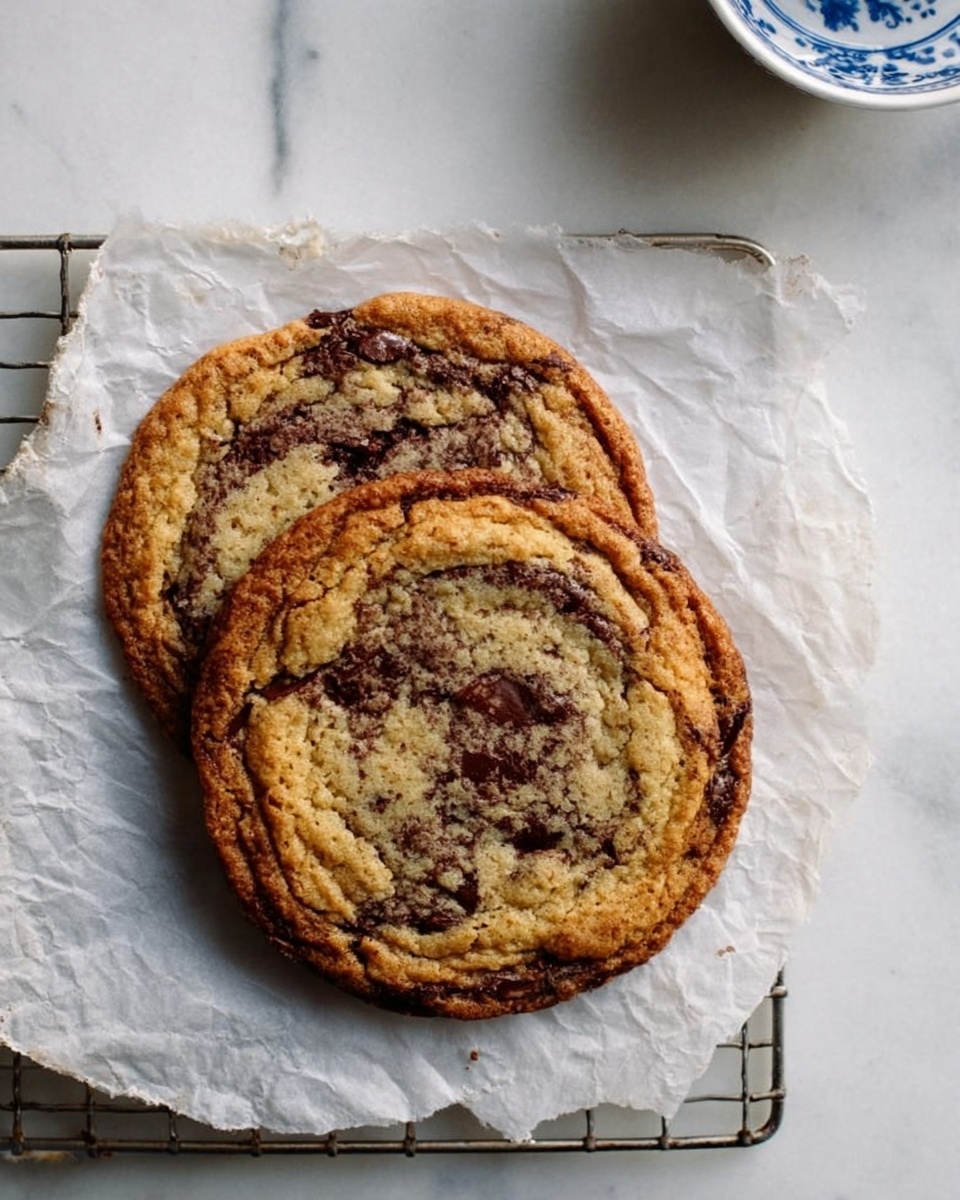
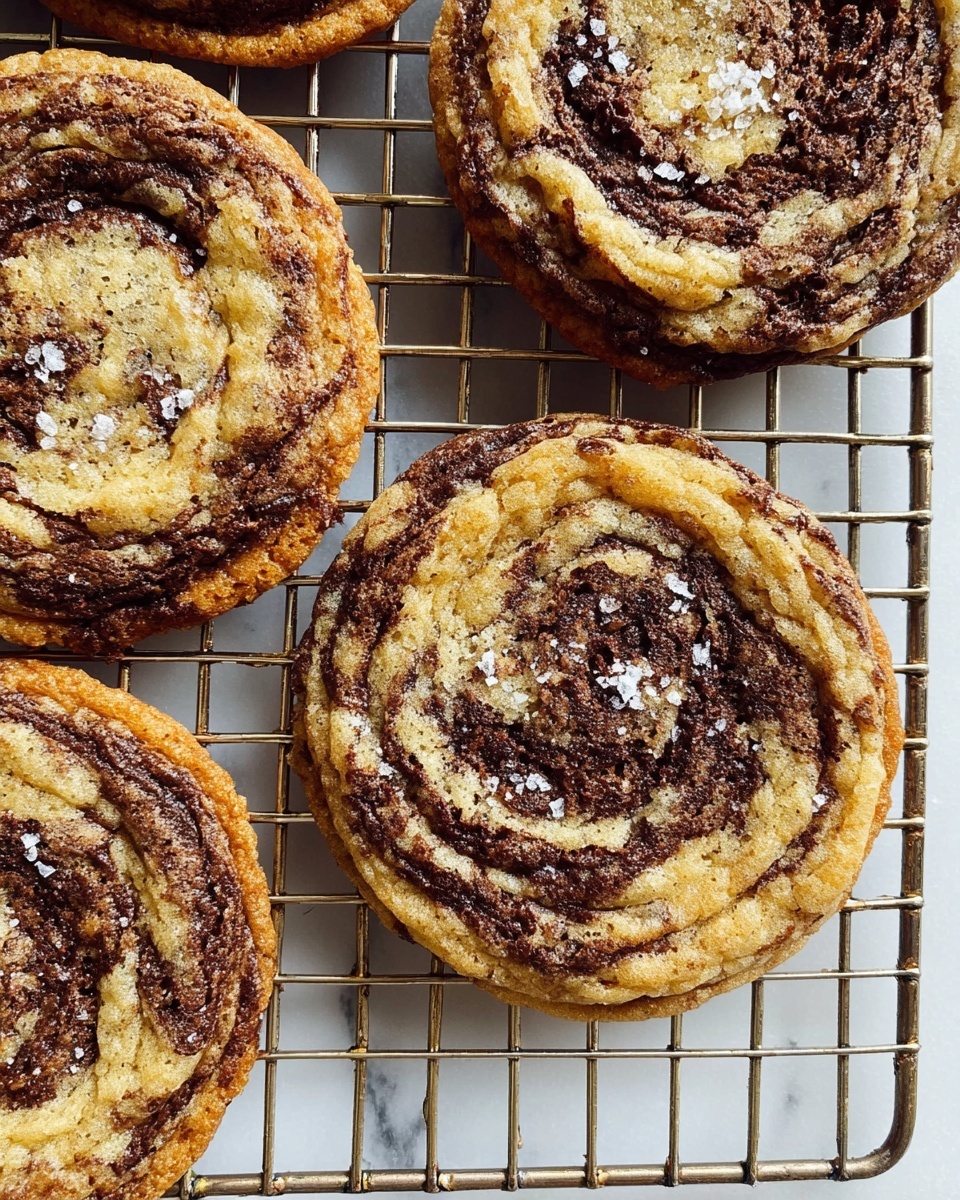
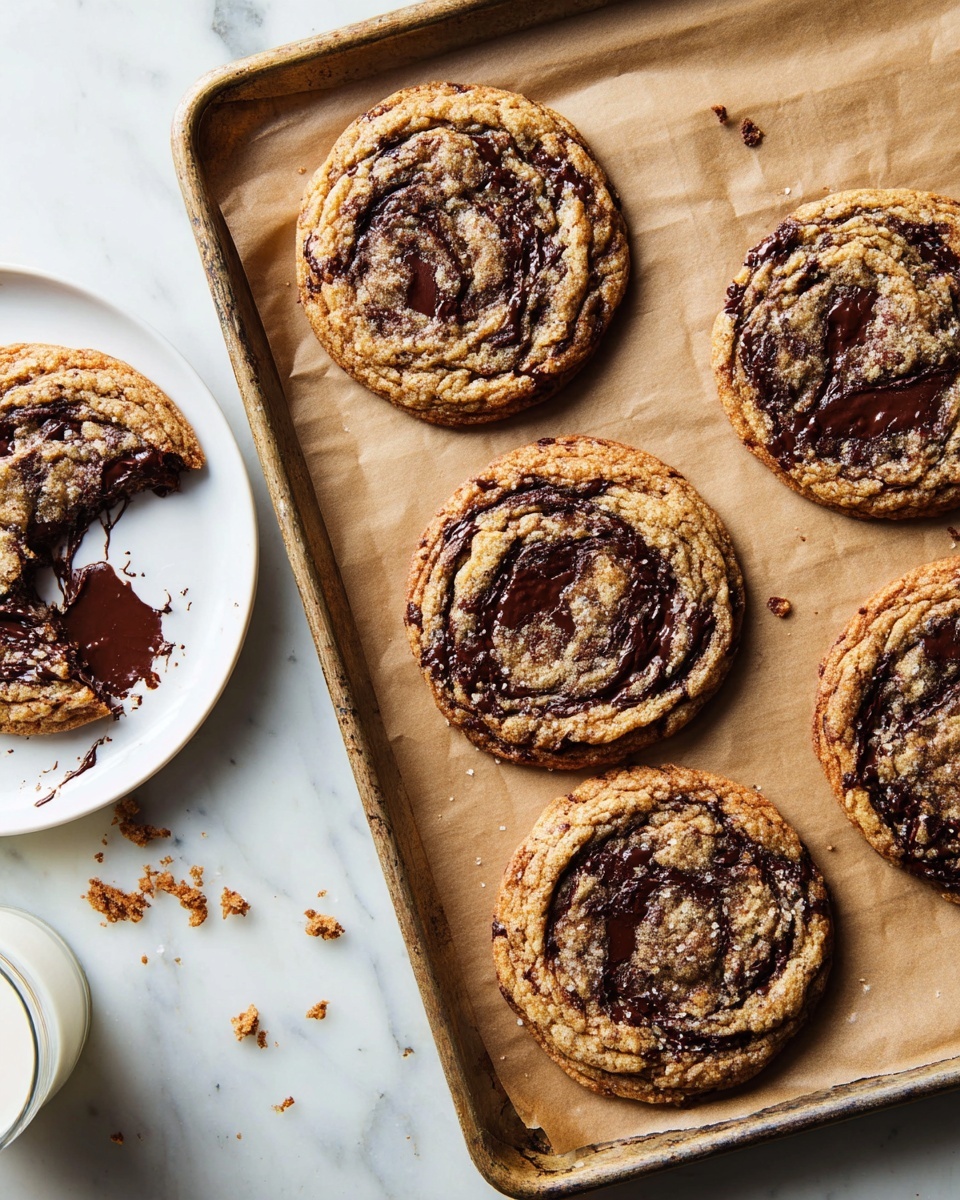
Oh, you’re in for a treat with this Wrinkly Chocolate Chip Cookies Recipe! I absolutely love how these cookies come out with delicate, crinkly tops and wonderfully gooey centers — it’s the kind of texture combo that keeps me sneaking one more cookie way past bedtime. Whenever I’m in the mood for something classic but with a little extra something, this recipe hits the spot perfectly.
What makes this Wrinkly Chocolate Chip Cookies Recipe so special is the playful “banging” step during baking, which forms those signature wrinkles that give these cookies their irresistible character. Whether you’re baking for a cozy afternoon coffee break or baking up a batch to impress your friends, you’ll find that these cookies are a crowd-pleaser with a texture and flavor that’s a little different from your usual chocolate chip cookie.
Why You’ll Love This Recipe
- Unique Wrinkly Texture: The pan-banging method creates those charming wrinkles that make these cookies stand out.
- Perfect Balance: Gooey centers with crisp edges – just what you want in an indulgent cookie.
- Versatile for Any Occasion: Great for gift-giving, parties, or simply satisfying your sweet tooth at home.
- Simple Ingredients: No fancy pantry items needed, just good quality basics and chocolate.
Ingredients You’ll Need
Each ingredient in this Wrinkly Chocolate Chip Cookies Recipe plays a crucial role, from butter’s creamy base to the bittersweet chocolate chunks that melt in your mouth. I always recommend using good-quality chocolate, as it truly elevates the whole experience.
- Unsalted butter: Make sure it’s soft but not melted for the best creaminess when beating.
- Granulated sugar: Adds sweetness and helps with the cookie’s texture.
- Light or dark brown sugar: Gives moisture and depth of flavor, plus those chewy edges.
- Kosher salt: Balances sweetness perfectly and enhances chocolate flavor.
- Large egg: Adds structure and richness; make sure it’s at room temperature.
- Water: A little moisture helps bind ingredients and affects cookie texture.
- Pure vanilla extract: A must-have for that warm, classic aroma.
- Baking soda: Helps the cookies rise and spread just right.
- All-purpose flour: The foundation for these cookies; spoon-and-level for accuracy.
- Bittersweet chocolate: I love to chop a mix of chunks and shards for varied melting pockets.
- Flaky salt (optional): Sprinkled on top just before baking, it adds a delightful salty crunch that contrasts the sweetness.
Variations
I’m all about making this Wrinkly Chocolate Chip Cookies Recipe your own. Feel free to mix in your favorite nuts or swap the bittersweet chocolate for milk chocolate if you prefer a sweeter bite. The cookies are pretty forgiving, so it’s fun playing around!
- Nutty Twist: Adding chopped toasted pecans or walnuts brings a lovely crunch that my family can’t get enough of.
- Dairy-Free Version: Swap butter for a vegan margarine or coconut oil and use dairy-free chocolate chips — I’ve tested this with great results.
- Spiced Up: Sprinkle in a pinch of cinnamon or cardamom for an unexpected warmth.
- Chunky Mix: Mix in some dried cherries or toffee bits along with chocolate for an extra layer of yum.
How to Make Wrinkly Chocolate Chip Cookies Recipe
Step 1: Prep Your Pan and Oven
First things first, adjust your oven rack to the middle position to ensure even baking. Line two sheet pans with your choice of aluminum foil (foil’s dull side up), parchment paper, or silicone mats. This will make cleanup a breeze and keep the bottoms of your cookies soft yet perfectly baked.
Step 2: Cream Butter and Sugars
Using a stand mixer fitted with the paddle attachment, beat the room-temperature butter on medium speed until it’s creamy and smooth — usually about a minute or two. Scrape down the sides so everything mixes evenly. Add the granulated sugar, brown sugar, and kosher salt, then beat on medium until the mixture becomes light and fluffy, which takes about 2–3 minutes. This step is key for that melt-in-your-mouth texture you’ll love.
Step 3: Add Wet Ingredients and Dry Mix-Ins
Mix in the egg, vanilla extract, and water on low speed until just combined. Toss in the baking soda, then add the flour and mix gently until the dough just comes together — be careful not to overmix or you’ll get tough cookies! Lastly, fold in the bittersweet chocolate chunks and shards. At this point, you can let the dough chill in the fridge for a few hours or overnight; chilling helps deepen the flavors and firm up the dough for easier scooping.
Step 4: Scoop, Salt, and Freeze the Dough
Preheat your oven to 350°F. Using a scale, scoop out dough balls weighing about 100 grams each — this is roughly a heaping 1/3 cup. Sprinkle the tops with flaky salt if you’re using it; this little finishing touch creates an extraordinary flavor contrast. Place the dough balls on a plate and freeze for 15 minutes. Freezing firms them up and means they’ll hold their shape better during baking.
Step 5: Bake and Create Those Signature Wrinkles
Place four dough balls evenly spaced on a lined sheet pan and pop them in the oven. Bake for 10 minutes until the cookies are slightly puffed in the center. Then comes the quirky part — carefully lift the sheet pan and drop it down onto the oven rack. This “pan-banging” deflates the centers and helps form those wrinkly tops we’re after! If the centers don’t deflate the first time, don’t worry — just give the pan a couple more good drops every few minutes. The cookies bake around 16 to 18 minutes total, until the edges turn golden brown and the centers remain gooey inside.
Step 6: Cool and Enjoy
Once out of the oven, let the cookies cool on the pan for about 10 minutes before transferring them to a wire rack to cool completely. This resting time helps them set perfectly without losing that tender core. Repeat the process with the remaining dough — you’ll have a beautiful batch of wrinkly delights in no time!
Pro Tips for Making Wrinkly Chocolate Chip Cookies Recipe
- Room Temperature Butter is Key: Make sure your butter is soft but not melting to get a fluffy dough that creaming well.
- Don’t Skip the Pan Drops: That banging technique might feel funny, but it’s essential for the signature wrinkly appearance.
- Chill Dough for Better Scooping: Freezing dough balls before baking keeps them from spreading too much for perfect thickness.
- Watch Your Bake Time: Pull the cookies when edges are golden but centers still look soft for gooey perfection.
How to Serve Wrinkly Chocolate Chip Cookies Recipe
Garnishes
I love sprinkling a little flaky sea salt on top of the cookies right before baking — it adds that perfect salty crunch that pairs beautifully with rich chocolate. Sometimes, I dust a touch of powdered sugar on serving, especially if I’m presenting them at a party for a pretty wintery look.
Side Dishes
These cookies pair wonderfully with a cold glass of milk or a robust cup of coffee. For a grown-up twist, serve them alongside a rich hot chocolate or even a bold espresso — it really elevates the whole dessert experience!
Creative Ways to Present
When serving these cookies at gatherings, I like to stack them on a rustic wooden board with a jar of milk and some colorful straws for a fun, approachable display. Wrapping small stacks tied with twine also makes cute edible gifts that feel thoughtful and homemade.
Make Ahead and Storage
Storing Leftovers
If you have leftovers, keep them in an airtight container at room temperature for up to 4 days. Adding a slice of bread into the container helps keep the cookies soft and chewy — it’s a neat little trick I discovered almost by accident.
Freezing
I freeze extra dough balls so I always have cookie dough ready for a quick bake. Just freeze them on a tray first, then transfer to a freezer bag. You can also freeze baked cookies wrapped tightly; they thaw quickly and taste nearly fresh.
Reheating
To reheat cookies, I pop them in a 300°F oven for about 5 minutes — it revives the gooey center and crisps the edges without drying them out. A quick zap in the microwave for 15 seconds works too if you’re in a hurry.
FAQs
-
Why do my Wrinkly Chocolate Chip Cookies not get wrinkly?
The key to the wrinkly texture is the pan-banging step during baking, which deflates the centers multiple times as they bake. Make sure to follow this step carefully and don’t be shy about the drops — the more the cookies puff up and are knocked down, the better the wrinkles form!
-
Can I use chocolate chips instead of chopped chocolate?
You can, but I recommend chopping good-quality bittersweet chocolate for varied textures and melty pockets. Chocolate chips often contain stabilizers that prevent fully melting, changing how the cookies bake and taste.
-
Is it necessary to freeze the dough before baking?
Freezing the dough balls helps them hold shape during baking and contributes to that perfect chewy texture. If you skip this step, your cookies may spread too thin and lose that characteristic thickness.
-
How do I make these cookies vegan or dairy-free?
Swap the butter for a plant-based substitute like vegan margarine or coconut oil, and use dairy-free chocolate chips. You can replace the egg with flaxseed egg or applesauce, but it might slightly change the texture.
Final Thoughts
Honestly, this Wrinkly Chocolate Chip Cookies Recipe has become a favorite in my kitchen because it’s the perfect balance of crispy, chewy, and gooey with a charming homemade look thanks to those crinkly tops. Baking these cookies feels like a little happy ritual, especially when I share them with friends and family who can’t stop asking for “just one more.” Seriously, if you want a cookie that looks as wonderful as it tastes, give this recipe a try — I promise you’ll be hooked just like I am!
Print
Wrinkly Chocolate Chip Cookies Recipe
- Prep Time: 40 minutes
- Cook Time: 36 minutes
- Total Time: 1 hour 16 minutes
- Yield: About 10 cookies
- Category: Dessert
- Method: Baking
- Cuisine: American
Description
Wrinkly Chocolate Chip Cookies are a delightful twist on classic chocolate chip cookies, featuring a unique baking technique that creates a beautiful wrinkled texture on the surface with gooey, soft centers. These cookies combine rich bittersweet chocolate chunks with a buttery, sweet dough, sprinkled with optional flaky salt for a perfect balance of flavors. Ideal for cookie lovers seeking a visually striking and irresistibly delicious treat.
Ingredients
Dough Ingredients
- 1/2 pound (2 sticks, 227 grams) unsalted butter, at room temperature
- 1 cup (200 grams) granulated sugar
- 3/4 cup (160 grams) packed light or dark brown sugar
- 3/4 teaspoon kosher salt
- 1 large egg
- 1 tablespoon water
- 1 1/2 teaspoon pure vanilla extract
- 1/2 teaspoon baking soda
- 2 cups (256 grams) all-purpose flour
- 8 ounces (227 grams) bittersweet chocolate, chopped (some chunks, some shards)
For Finishing
- Flaky salt, to sprinkle on top (optional)
Instructions
- Prepare Baking Sheets: Adjust an oven rack to the middle position. Line 2 sheet pans with aluminum foil (dull side facing up), parchment paper, or silicone baking mats for easy cleanup and to prevent sticking.
- Make the Dough: In a stand mixer bowl fitted with the paddle attachment, beat the room temperature butter on medium speed until creamy, about 1-2 minutes. Scrape down the sides as needed. Add granulated sugar, brown sugar, and kosher salt, then beat on medium speed until the mixture is light and fluffy, approximately 2 to 3 minutes. Add the egg, vanilla extract, and water, and mix on low speed to combine thoroughly. Mix in baking soda briefly, then add the flour and mix until just combined. Fold in chopped bittersweet chocolate chunks and shards. The dough can be refrigerated for several hours or overnight at this point to enhance flavors and texture.
- Preheat and Shape Cookies: Preheat the oven to 350°F (175°C). Using a scoop or spoon, portion out the dough into 100-gram balls (approximately a heaping 1/3 cup each). Sprinkle flaky salt atop each dough ball if desired, then place the dough balls on a plate and freeze them for 15 minutes to firm up before baking.
- Bake and Create Wrinkles: Place 4 cookie dough balls spaced evenly on one prepared sheet pan. Bake for 10 minutes until cookies puff slightly in the center. Carefully lift the sheet pan and drop it down against the oven rack firmly to set edges and deflate centers – this technique creates the iconic wrinkled surface. If needed, repeat the dropping 1 to 2 more times as cookies puff again, totaling 16 to 18 minutes of baking. Cookies should be spread out with golden brown edges and gooey centers.
- Cool and Serve: Allow the cookies to cool on the baking sheet for about 10 minutes to set before transferring to a wire rack to cool completely. Repeat the baking process with remaining dough balls. Serve once cooled or slightly warm for gooey texture enjoyment.
Notes
- Refrigerating the dough overnight intensifies flavor and improves texture but is optional.
- Scooping 100-gram dough balls ensures uniform cookie size and even baking.
- The pan-banging step is essential to achieve the characteristic wrinkly look; do not skip it.
- Use bittersweet chocolate for balanced sweetness; alternatively, semi-sweet chocolate chips can be used.
- Flaky salt sprinkled on top enhances flavor by adding a slight crunch and contrast to sweetness.
Nutrition
- Serving Size: 1 cookie (approximate)
- Calories: 320 kcal
- Sugar: 25 g
- Sodium: 150 mg
- Fat: 18 g
- Saturated Fat: 11 g
- Unsaturated Fat: 6 g
- Trans Fat: 0.5 g
- Carbohydrates: 37 g
- Fiber: 3 g
- Protein: 4 g
- Cholesterol: 40 mg

