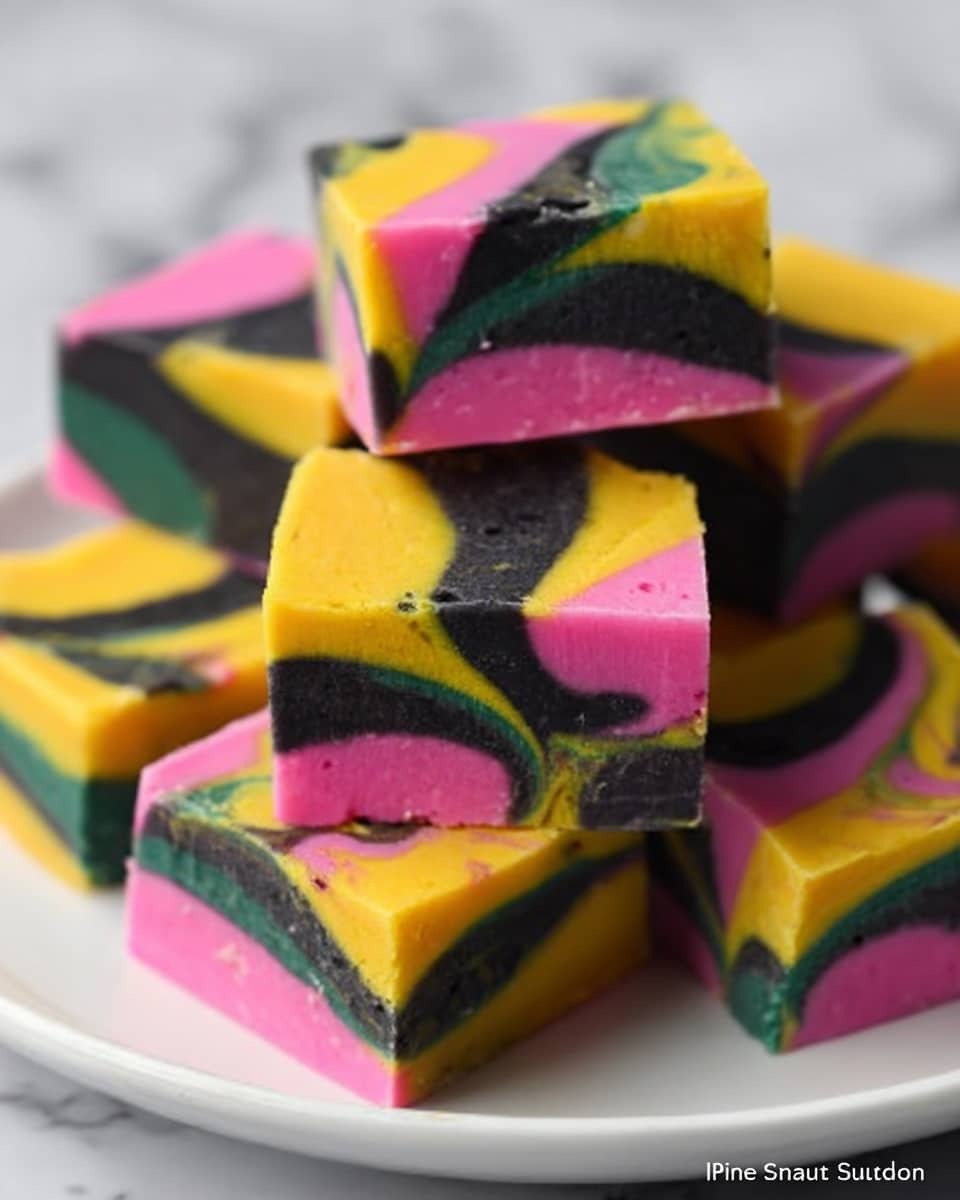
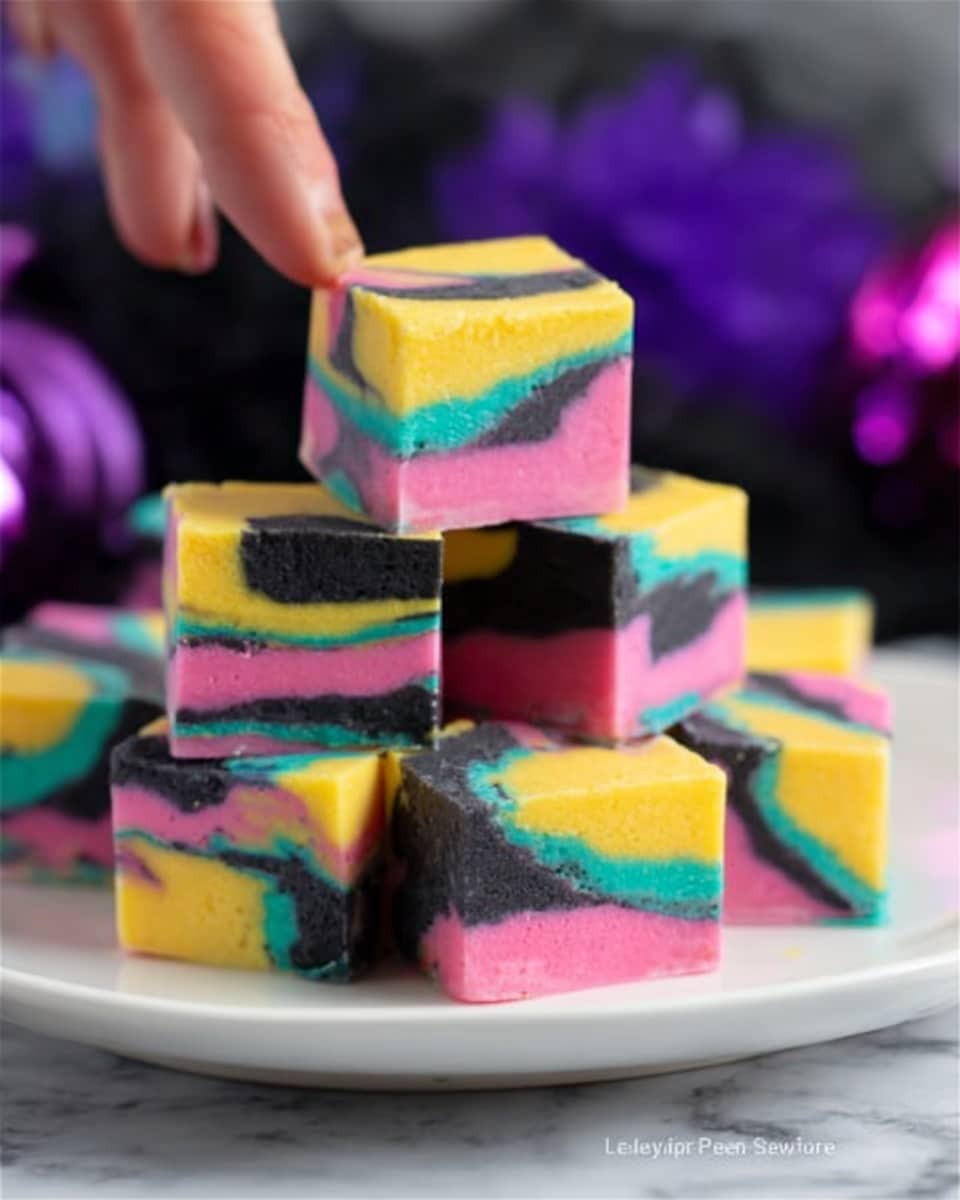
If you’re a fan of all things spooky and sweet, this Nightmare Before Christmas Fudge Recipe will absolutely steal your heart (and your taste buds). It’s that perfect mix of creamy, minty, and colorful fudge that brings Jack Skellington’s quirky world right to your kitchen. I first made this for a Halloween party and honestly, my family went crazy for it! Stick around—I’ll share all my tips to make sure your fudge comes out silky smooth and ready to wow your guests.
Why You’ll Love This Recipe
- Simple Ingredients: You only need 6 pantry staples to create this magical fudge that’s creamy and full of flavor.
- Easy to Customize: With vibrant gel colors and peppermint twist, you can play with shades and flavors to fit your mood or party theme.
- Perfect for Gift-Giving: Its eye-catching swirls and melt-in-your-mouth texture make it a crowd-pleaser for holidays and celebrations.
- Foolproof Technique: I’ll walk you through every step so you avoid common fudge mistakes and nail that perfect silky finish.
Ingredients You’ll Need
The beauty of this Nightmare Before Christmas Fudge Recipe is how well the ingredients come together to create a rich, creamy, and festive treat. Picking good-quality white chocolate really makes a difference here, and fresh peppermint extract adds that refreshing kick everyone loves.
- White chocolate chips: Go for premium brand chips or finely chopped white chocolate bars to ensure smooth melting and no graininess.
- Sweetened condensed milk: This is your fudge’s base, lending creaminess and sweetness—don’t substitute with evaporated milk!
- Marshmallow Fluff: Adds an extra layer of silky texture and subtle sweetness that really sets this fudge apart.
- Unsalted butter: Use fresh butter for richness without extra salt, balancing the sweetness perfectly.
- Vanilla bean paste or extract: I prefer the paste for those tiny vanilla specks, but extract works wonderfully, too.
- Peppermint extract: This gives the fudge that distinctive, refreshing mint bite reminiscent of holiday treats.
- Gel food coloring (black, pink, yellow, teal): Using gel colors helps maintain fudge consistency while creating vibrant swirls for the iconic look.
Variations
I love tweaking this recipe depending on the season or who I’m sharing it with—you should feel free to put your own spin on it! Whether you want it dairy-free, more festive, or with extra texture, these ideas can help.
- Chocolate Peppermint Swirl: I once added a layer of dark chocolate fudge underneath before swirling in the colored white chocolate—it gave a perfect contrast and richer flavor.
- Dairy-Free Version: Substitute coconut condensed milk and dairy-free white chocolate chips for a vegan-friendly treat that’s just as creamy.
- Nutty Delight: Mix in crushed candy canes or chopped pistachios for a crunchy surprise—I usually sprinkle some on top before refrigerating.
- Fruit Flair: Adding a hint of raspberry extract instead of peppermint changes things up beautifully if you want something less traditional.
How to Make Nightmare Before Christmas Fudge Recipe
Step 1: Prep Your Pan Like a Pro
Start by lining your 8”x8” pan with two pieces of parchment paper arranged in a plus sign formation, each piece overlapping the pan edges by about 2 inches. I’ve found that securing the overhang with binder clips keeps it tidy and easy to lift the fudge out once set. This little step saves you from greasing the pan and makes clean-up a breeze!
Step 2: Melt White Chocolate and Condensed Milk Gently
In a medium pot over low heat, combine your white chocolate chips and sweetened condensed milk. Stir occasionally to prevent scorching—trust me, low and slow is key here. It takes about 5 minutes for everything to melt smoothly into a luscious, creamy base. If the heat’s too high, your white chocolate may seize or become grainy, so patience is your friend.
Step 3: Incorporate Fluff, Butter, and Extracts
Once the chocolate mixture is silky, stir in the Marshmallow Fluff, butter, vanilla bean paste, and peppermint extract. Keep the heat low and stir until everything’s heated through and well combined—usually about one minute. This step adds that extra creaminess and the festive peppermint flavor I love so much.
Step 4: Divide and Color Your Fudge
Divide the fudge into four separate bowls—about a cup in each. Add about 4 drops of black gel food coloring to one bowl for that rich, dark shade, then 2 drops of pink, yellow, and teal gel colors to the other bowls (one color per bowl). Stir quickly to reach your desired color intensity; fudge sets fast, so moving swiftly helps prevent clumps or streaks.
Step 5: Create the Magical Swirls
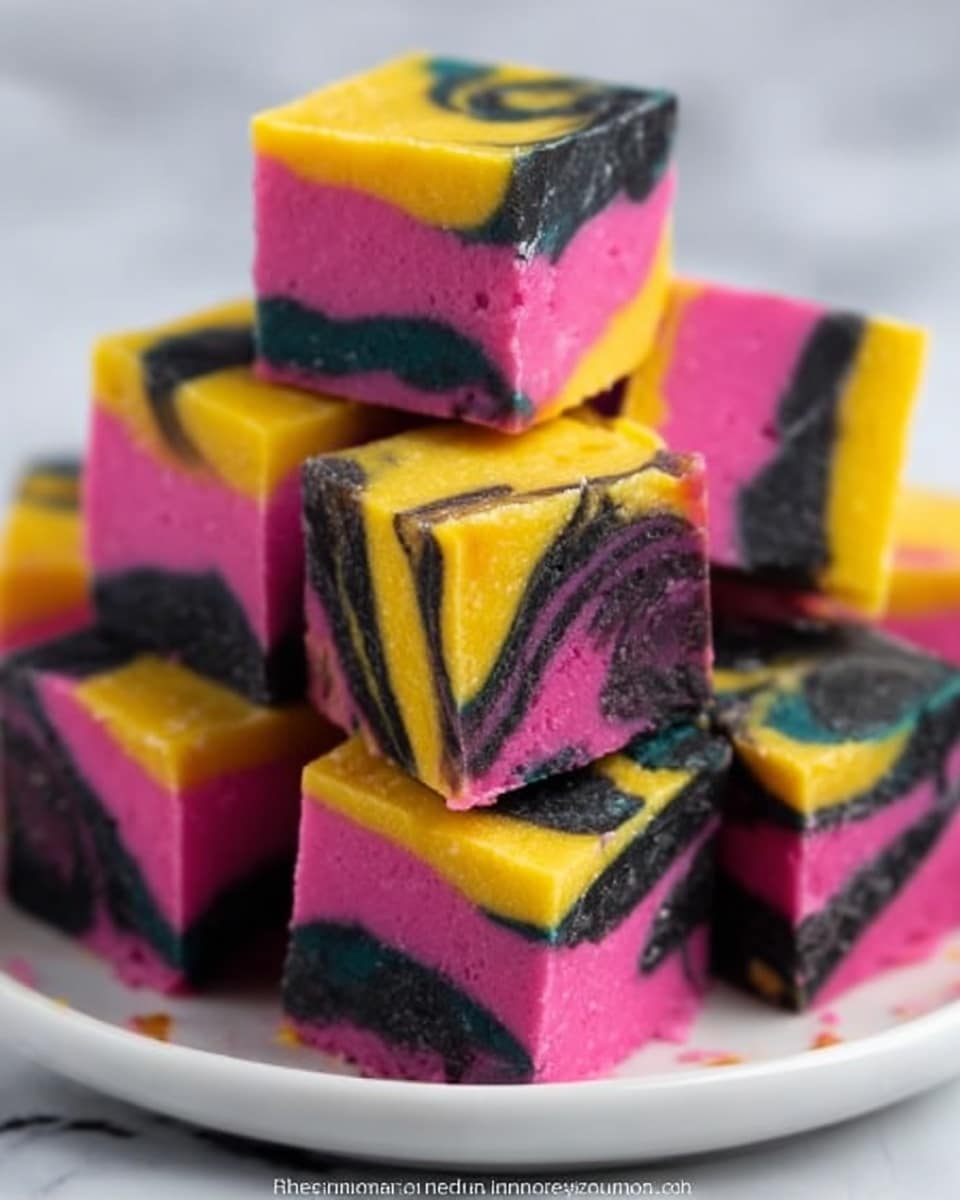
Drop spoonfuls of each colored fudge randomly into your prepared pan. Don’t worry about being neat—I actually love the imperfect, whimsical look this creates! Grab a toothpick or a paring knife and swirl the colors together gently to form those fun, spooky patterns inspired by Sally Skellington’s dress. Once swirled, pop the pan into the fridge to set for at least 2 hours, or overnight if you have the patience.
Step 6: Cut and Serve
Using the parchment overhang, carefully lift the fudge slab from the pan and place it on a cutting board. Cut into squares—bite-sized pieces work best for sharing. This fudge holds its shape beautifully but stays wonderfully soft and creamy. Get ready for compliments!
Pro Tips for Making Nightmare Before Christmas Fudge Recipe
- Low and Slow Melting: Using very low heat while melting ensures your white chocolate stays smooth instead of grainy—a game-changer I discovered after some rocky first attempts.
- Quick Coloring: Add gel colors drop by drop and stir quickly. The fudge can start to set fast, so working efficiently prevents clumpy or uneven color swirls.
- Securing Your Parchment: Binder clips holding the parchment overhang in place keep your fudge form perfect and make lifting the whole block from the pan super easy.
- Avoid Over-Mixing Swirls: Swirl gently with a toothpick instead of stirring; it keeps the colors distinct and visually appealing, making the fudge look professionally done.
How to Serve Nightmare Before Christmas Fudge Recipe
Garnishes
For garnishes, I love sprinkling crushed peppermint candies or edible glitter on top—adds a festive sparkle and a little crunch. If you want to get really fun, tiny candy eyes or Halloween-themed sprinkles fit the theme perfectly, making the fudge pop at any party.
Side Dishes
This fudge pairs beautifully with a hot cup of spiced tea or peppermint coffee. If you’re serving a dessert spread, add some gingerbread cookies or dark chocolate bark alongside for complementary flavors that balance out the sweet, creamy fudge.
Creative Ways to Present
For Halloween or Christmas parties, I like to cut the fudge into small squares and arrange them on a black platter with spiderweb doilies underneath. You can also package individual pieces in clear cellophane bags tied with themed ribbons for delightful party favors or gifts.
Make Ahead and Storage
Storing Leftovers
I store leftover fudge in an airtight container in the fridge, layering parchment paper between to keep pieces from sticking. It stays fresh and creamy for up to a week, though honestly, it rarely lasts that long in my house!
Freezing
If I freeze the fudge, I wrap individual pieces tightly in plastic wrap and place them in a freezer-safe bag. When thawed in the fridge overnight, the fudge keeps its creamy texture surprisingly well, perfect for making ahead of big events.
Reheating
I usually just bring frozen or refrigerated fudge to room temperature before serving—no reheating needed! If you like it a bit softer, a quick 5–10 second zap in the microwave does the trick without melting it completely.
FAQs
-
Can I use white chocolate bars instead of chips for the Nightmare Before Christmas Fudge Recipe?
Absolutely! Just chop the white chocolate bars into small, even pieces to help them melt smoothly and evenly. Sometimes bars give a richer flavor and less stabilizers compared to chips.
-
Why is my fudge grainy instead of smooth?
Grainy fudge often happens if the heat is too high when melting or if the chocolate is overheated. Using low heat and stirring gently helps keep the texture silky. Also, make sure your ingredients are fresh and avoid over-stirring once it starts to set.
-
Can I omit peppermint extract or use a different flavor?
Yes! Peppermint extract gives the classic holiday vibe, but you can skip it or substitute with vanilla, almond, or even a light citrus extract for a different twist.
-
How do I prevent the colors from mixing too much when swirling?
Work quickly and use gentle swirling motions with a toothpick or knife. If the fudge cools too much before swirling, it’ll be harder to blend colors smoothly, so time is of the essence!
-
How long does the fudge keep?
Stored in an airtight container in the fridge, it stays delicious for up to one week. You can extend that by freezing for up to 3 months, just remember to thaw slowly in the fridge for best texture.
Final Thoughts
This Nightmare Before Christmas Fudge Recipe has become a personal favorite because it’s just the right mix of fun, flavor, and nostalgia. Whether you’re treating yourself, prepping for a spooky party, or gifting it to a friend, it’s guaranteed to delight. I hope you enjoy making—and eating—this fudge as much as I do. Go ahead, grab your mixing bowl, and turn your kitchen into a workshop straight out of Halloween Town!
Print
Nightmare Before Christmas Fudge Recipe
- Prep Time: 15 minutes
- Cook Time: 6 minutes
- Total Time: 2 hours 21 minutes
- Yield: 36 servings
- Category: Dessert
- Method: Stovetop
- Cuisine: American
- Diet: Vegetarian
Description
This Nightmare Before Christmas Fudge is a festive, colorful treat inspired by the movie’s iconic characters. Made with creamy white chocolate, sweetened condensed milk, and marshmallow fluff, it’s infused with peppermint extract for a hint of refreshing flavor. The fudge is divided and tinted with vibrant black, pink, yellow, and teal colors, then swirled together for a spooky and fun appearance. Perfect for Halloween parties or holiday celebrations, this rich and creamy fudge sets in the fridge and is easy to slice into bite-sized squares.
Ingredients
Main Ingredients
- 3 1/2 cups white chocolate chips
- 1 (14-ounce) can sweetened condensed milk
- 3 tablespoons Marshmallow Fluff
- 2 tablespoons unsalted butter
- 1/4 teaspoon vanilla bean paste or vanilla extract
- 1/2 teaspoon peppermint extract
Food Coloring
- Black gel food coloring
- Pink gel food coloring
- Yellow gel food coloring
- Teal gel food coloring
Instructions
- Prepare Pan: Line an 8-inch by 8-inch square baking pan with two pieces of parchment paper, each piece extending about 2 inches longer than the pan on all sides. Arrange the parchment papers in a plus sign shape so the fudge can be easily lifted out once set. Optionally, secure the parchment overhang with binder clips for stability.
- Melt White Chocolate Mixture: In a medium saucepan over low heat, combine the white chocolate chips and sweetened condensed milk. Stir occasionally until the mixture is fully melted, smooth, and combined, approximately 5 minutes.
- Add Fluff and Flavorings: Stir in the marshmallow fluff, unsalted butter, vanilla bean paste (or extract), and peppermint extract. Continue cooking and stirring for about 1 minute until everything is heated through and well incorporated.
- Divide and Color Fudge: Pour the fudge mixture evenly into four medium-sized bowls (about 1 cup per bowl). Add approximately 4 drops of black gel food coloring to one bowl. Into the other three bowls, add about 2 drops each of pink, yellow, and teal gel food coloring respectively. Mix each bowl thoroughly, adding more drops if needed until the desired color intensity is reached. Work quickly to prevent the fudge from setting.
- Swirl Colors in Pan: Spoon dollops of each colored fudge randomly into the prepared pan. Use a toothpick or paring knife to swirl the different colors together, creating a marbled, intertwined pattern reminiscent of Nightmare Before Christmas themes.
- Set Fudge: Place the pan in the refrigerator and chill for at least 2 hours or up to overnight until the fudge is fully set and firm to the touch.
- Cut and Serve: Lift the fudge out of the pan using the parchment paper overhang and transfer it to a cutting board. Cut into approximately 36 small squares. Serve and enjoy your colorful, festive fudge!
Notes
- This fudge recipe uses just 6 main ingredients plus food coloring, making it simple yet impressive.
- Use binder clips on the parchment edges to make lifting the fudge out easier.
- Work quickly when adding food coloring to prevent the fudge from setting prematurely.
- For an extra peppermint kick, you can adjust peppermint extract to taste, but be cautious as it’s quite potent.
- Store fudge covered in the refrigerator for up to a week.
- Perfect for Halloween parties and holiday celebrations, the colorful swirls resemble Sally Skellington’s dress.
Nutrition
- Serving Size: 1 piece (approx. 20g)
- Calories: 110
- Sugar: 19g
- Sodium: 30mg
- Fat: 4g
- Saturated Fat: 3g
- Unsaturated Fat: 0.5g
- Trans Fat: 0g
- Carbohydrates: 18g
- Fiber: 0g
- Protein: 1g
- Cholesterol: 7mg

