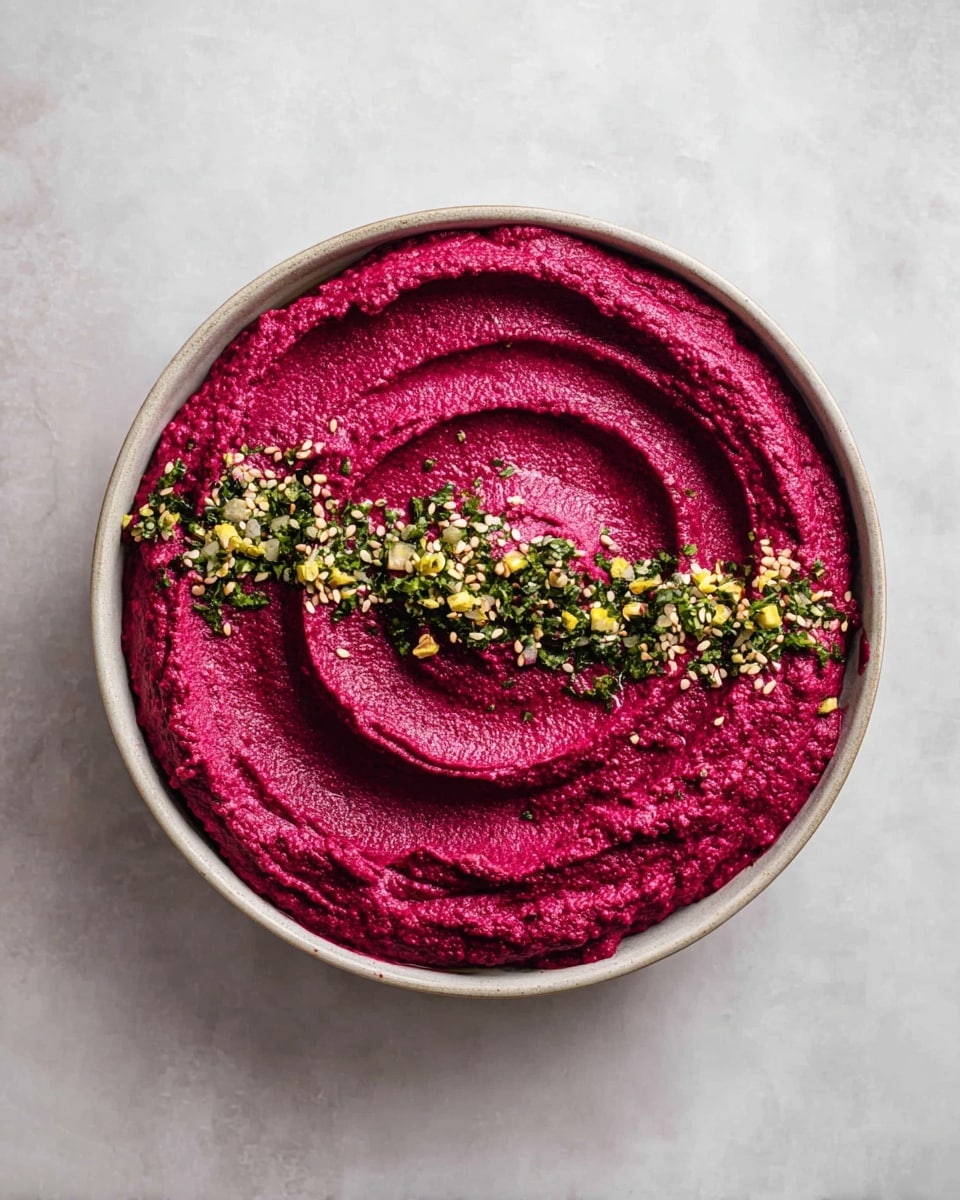
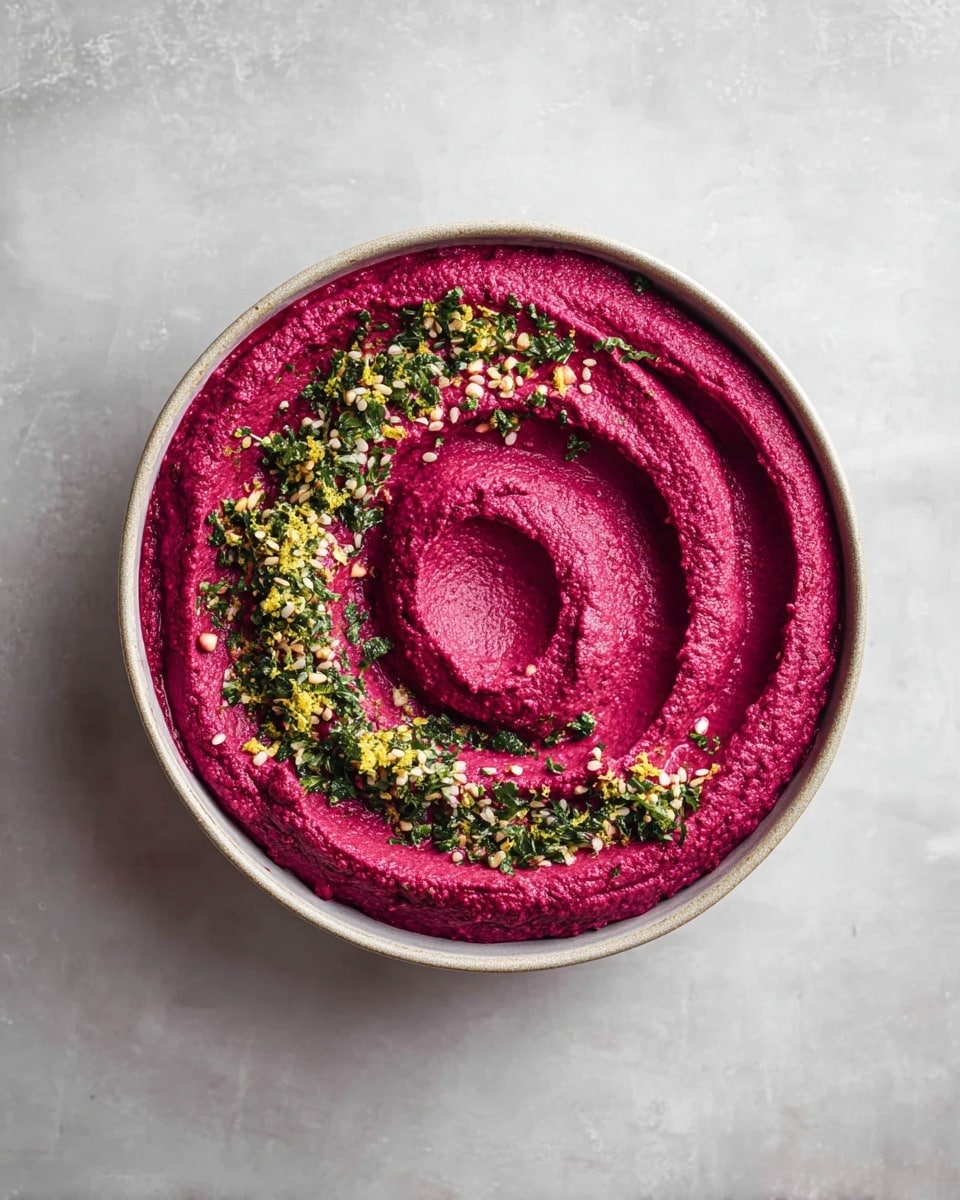
If you’re on the hunt for a vibrant, flavorful twist on classic hummus, you absolutely need to try this Beet Hummus Recipe. I love how it brings a gorgeous pop of color to any snack table, plus it’s packed with earthy sweetness from the beets paired with that signature creamy tahini punch. Whether you’re serving it for a crowd or just craving something fresh and healthy to scoop up with pita or veggies, this recipe is a total winner—and I can’t wait to share all my tips to make sure yours turns out perfect every time.
Why You’ll Love This Recipe
- Stunning Color: The bright pink hue from roasted beets instantly elevates your usual hummus plate.
- Simple Ingredients: You probably already have everything in your pantry, making it super easy to whip up.
- Customizable Flavor: You can easily tweak the lemon, garlic, or cumin levels to suit your taste.
- Healthy & Delicious: It’s a nutritious, satisfying snack or appetizer that’s vegan and gluten-free by nature.

Ingredients You’ll Need
This Beet Hummus Recipe works because the earthy sweetness of roasted beets blends beautifully with the creamy chickpeas and tahini. When shopping, look for firm beets without blemishes and good-quality tahini for the best flavor.
- Roasted beet: Using roasted beets brings out their natural sweetness and soft texture for blending.
- Chickpeas: I prefer canned chickpeas for convenience, but make sure to drain and rinse them well.
- Tahini: A good-quality tahini makes a huge difference—look for smooth and creamy.
- Lemons (zest & juice): Fresh lemons provide bright acidity that balances the sweetness of the beets.
- Garlic: Fresh garlic cloves give that classic hummus kick; chop them finely before blending.
- Olive oil: Adds richness and helps achieve a smooth, creamy texture.
- Cumin: Just a teaspoon adds a warm, earthy undertone—don’t skip it!
- Kosher salt: Essential for seasonings to pop.
- Chopped herbs: Parsley works perfectly to add a fresh contrast on top.
- Toppings (optional): Think za’atar, sliced radishes, pine nuts, lemon zest, bee pollen, or flaky sea salt for that extra wow factor.
Variations
I love that this Beet Hummus Recipe is so flexible—you can adjust it depending on what you have at home or want to highlight. Feel free to play around with spices or toppings to make it your own.
- Extra spice: When I want a little heat, I toss in a pinch of smoked paprika or cayenne—it adds such a nice kick without overpowering the beets.
- Green goddess: Adding a handful of fresh spinach or kale to the food processor makes a “green” beet hummus that’s packed with extra nutrients.
- Nutty twist: Swap olive oil for toasted walnut or almond oil for a rich, nutty flavor that’s surprisingly delicious.
- Garlic-free: If you’re making this for someone sensitive to garlic, you can use roasted garlic or simply leave it out—the lemon and cumin still pack plenty of punch.
How to Make Beet Hummus Recipe
Step 1: Prep Your Beets
The first step is roasting your beet if you haven’t already. I like to wrap the beet in foil and roast it at 400°F for about 40-50 minutes until it’s fork-tender. You’ll know it’s done when the beet gives easily under a knife. Once cooled, peel the skin off—it should slip right off with your fingers or a paper towel. Chop into chunks to make blending easier. This little bit of effort results in the sweetest, richest flavor you’ll absolutely notice in the final hummus.
Step 2: Blend Ingredients
Drop your roasted beet, chickpeas, tahini, lemon juice and zest, garlic, cumin, and salt into the bowl of your food processor. Start blending, then slowly drizzle in the olive oil while the motor runs. You want to keep going until the mixture is silky smooth. Use a spatula occasionally to scrape down the sides—this keeps everything evenly mixed. If it’s too thick, I sometimes add a bit of water or extra olive oil to loosen it up. Taste and tweak the lemon, garlic, cumin, or salt to your liking—I’m a fan of bright, tangy hummus with a garlicky punch!
Step 3: Serve with Flair
Transfer the beet hummus to a pretty bowl and get creative with toppings. I love a sprinkle of chopped parsley, za’atar spice, and a drizzle of olive oil. Sometimes I scatter pine nuts or thin radish slices on top for crunch. For parties, I’ve even swirled in a bit of tahini or added big flakes of sea salt for that gourmet touch. Presentation can really up the wow factor when guests come over, but this hummus is delicious plain too.
Pro Tips for Making Beet Hummus Recipe
- Roasting Beets Perfectly: Wrap them tightly in foil to keep moisture in, which makes peeling easier and keeps beets tender inside.
- Adjust Lemon Gradually: Start with less lemon juice and add more after blending so it doesn’t overpower the beets.
- Smooth Texture Secret: Drizzle olive oil slowly while blending to get that luscious, creamy consistency.
- Avoid Overloading the Processor: Don’t cram too many ingredients at once; blend in stages if needed so the mixture is smooth without overheating your appliance.
How to Serve Beet Hummus Recipe
Garnishes
I’m a sucker for fresh parsley because it adds a refreshing contrast to the earthy beet flavor. Za’atar is another favorite—it brings a subtle tang and herbal depth. If you want crunch, pine nuts or thinly sliced radishes add great texture. And always a drizzle of high-quality olive oil on top—it’s like the cherry on this pink hummus sundae!
Side Dishes
This beet hummus pairs wonderfully with warm pita bread, crunchy cucumber slices, or raw carrots. When I planned small gatherings, I also paired it with roasted veggies and grilled meats for a balanced spread. It’s fantastic as part of a mezze platter alongside olives, feta, and stuffed grape leaves.
Creative Ways to Present
For special occasions, I’ve served this hummus in a shallow white bowl with a swirl of tahini and a sprinkle of edible flowers on top—it’s such a showstopper. Another time, I spread it in a thick layer on a wooden board and arranged colorful veggies and crackers all around, turning it into an inviting, colorful appetizer centerpiece. This recipe really lends itself to creative plating!
Make Ahead and Storage
Storing Leftovers
Leftover beet hummus keeps beautifully in an airtight container in the fridge for up to 4-5 days. I always give it a good stir before serving because the oils and flavors can settle. It’s perfect prepared a day ahead—the flavors deepen and meld together nicely.
Freezing
While I don’t freeze hummus regularly, I’ve frozen beet hummus a couple of times with decent results. Just pack it in a freezer-safe container and thaw overnight in the fridge before serving. The texture might be slightly different upon thawing, so give it a good stir and maybe a splash of olive oil or lemon juice to freshen it up.
Reheating
I typically enjoy beet hummus cold or at room temperature, but if you want to warm it slightly, just let it sit out for 30 minutes before serving or briefly microwave in short bursts stirred in between to avoid overheating. It’s best not to heat it too much as it might alter the flavor and texture.
FAQs
-
Can I use raw beets instead of roasted in this Beet Hummus Recipe?
Raw beets are quite firm and earthy, so I don’t recommend using them without roasting. Roasting softens the beets, brings out their natural sweetness, and makes the hummus smoother and more flavorful. If you’re short on time, you can microwave or steam beets, but roasting is the best method.
-
Can I make this Beet Hummus Recipe nut-free and allergy-friendly?
Yes! Since this recipe only contains tahini (made from sesame seeds) and chickpeas as the “nutty” ingredients, it’s naturally nut-free. However, if you or your guests are allergic to sesame, you can try substituting tahini with sunflower seed butter or omit it and add extra olive oil for creaminess.
-
How long does beet hummus last in the fridge?
It generally stays fresh for about 4-5 days in the refrigerator when stored in an airtight container. Always check for any off smells or mold before consuming leftovers.
-
What can I use beet hummus for besides a dip?
Beet hummus is super versatile! Use it as a spread on sandwiches or wraps, a vibrant sauce drizzled over roasted veggies or grilled meats, or even dolloped on salads for extra flavor and color.
-
Can I prepare beet hummus ahead of time?
Absolutely! In fact, it’s often better after a few hours or overnight as the flavors have time to meld beautifully. Just keep it covered in the fridge and bring it to room temperature before serving for best results.
Final Thoughts
This Beet Hummus Recipe has become one of my go-to snacks—it’s colorful, flavorful, and endlessly versatile. Every time I make it, friends and family rave about how pretty and tasty it is, and I love that it’s a healthy alternative that doesn’t sacrifice any indulgence. If you’ve never tried beet hummus before, this is the perfect recipe to start with—it’s foolproof, satisfying, and will add some fun to your everyday dips. Trust me, once you make it, you’ll keep coming back for more!
Print
Beet Hummus Recipe
- Prep Time: 15 min
- Cook Time: 15 min
- Total Time: 30 min
- Yield: 8 servings
- Category: Dip
- Method: Blending
- Cuisine: Middle Eastern
- Diet: Vegetarian
Description
This vibrant Beet Hummus combines the earthy sweetness of roasted beets with creamy chickpeas and tahini, brightened by fresh lemon juice and garlic. Blended to smooth perfection and topped with fresh herbs and optional garnishes, it makes a strikingly colorful and flavorful dip perfect for snacks, appetizers, or party platters.
Ingredients
Main Ingredients
- 1 roasted beet, peeled and chopped
- 1 can (15 oz) chickpeas, drained
- 2/3 cup tahini
- 2-3 lemons, zest and juice (about 1/3 cup lemon juice)
- 2 cloves garlic, chopped
- 1/3 cup olive oil
- 1 teaspoon cumin (or more to taste)
- 1 teaspoon kosher salt
- 1 handful chopped herbs (such as parsley)
Toppings (optional)
- Chopped parsley
- Za’atar
- Thinly sliced radishes
- Pine nuts
- Lemon zest
- Gomasio
- Bee pollen
- Big salt flakes
- Olive oil
- Other desired garnishes
Instructions
- Prepare Ingredients: Begin by roasting the beet until tender, then peel and chop it into smaller pieces suitable for blending.
- Combine in Food Processor: Place the roasted beet, drained chickpeas, tahini, lemon juice and zest, chopped garlic, cumin, and kosher salt into the bowl of a food processor.
- Blend While Drizzling Olive Oil: Turn on the food processor and slowly drizzle in the olive oil as it runs, blending the mixture until it reaches a smooth and creamy consistency.
- Taste and Adjust Seasoning: Sample the hummus and adjust the flavors by adding more olive oil, lemon juice, garlic, cumin, or salt according to your preference. The recipe favors a garlicky and lemony profile.
- Serve and Garnish: Transfer the beet hummus to a serving bowl, then sprinkle with chopped parsley, za’atar, lemon zest, pine nuts, salt flakes, or any other desired toppings. Optionally, drizzle additional olive oil for a beautiful presentation and enhanced flavor.
Notes
- This beet hummus has a striking pink color and a slightly sweet, earthy flavor from the roasted beets.
- The recipe is quick and easy, mainly relying on blending ingredients in a food processor without additional cooking.
- You can customize the seasoning and toppings to suit your taste or presentation style.
- Swirling olive oil on top adds both visual appeal and richness.
- It pairs excellently with pita bread, vegetable sticks, or as a spread on sandwiches.
Nutrition
- Serving Size: 1/8 of recipe (about 1/4 cup)
- Calories: 140 kcal
- Sugar: 3 g
- Sodium: 210 mg
- Fat: 9 g
- Saturated Fat: 1.3 g
- Unsaturated Fat: 7 g
- Trans Fat: 0 g
- Carbohydrates: 14 g
- Fiber: 4 g
- Protein: 5 g
- Cholesterol: 0 mg


