
If you’re looking for a vibrant, flavorful twist on classic comfort food, you’re going to love this Green Chutney Chicken Enchiladas Recipe. It’s a fun fusion dish that brings together the zesty freshness of Indian green chutney with the cozy, satisfying feel of enchiladas. Trust me, once you try this, it’ll become a go-to in your dinner rotation—my family can’t get enough of it!
Why You’ll Love This Recipe
- Unique Flavors: The green chutney adds a fresh, herby punch that revamps traditional enchiladas.
- Easy to Make: With simple ingredients and straightforward steps, it’s perfect for weeknight dinners.
- Family Favorite: Everyone I’ve served it to asks for seconds — it’s that good.
- Versatile: You can customize it with your preferred heat level, protein, or add-ins easily.

Ingredients You’ll Need
These ingredients come together beautifully to balance tang, spice, and creaminess. Grab fresh herbs for the chutney, and if you can find good-quality tortillas, your enchiladas will shine!
- Chicken: I like using shredded cooked chicken for convenient layering and a juicy filling.
- Green Chutney: Fresh coriander and mint blended with lime and green chili create the heart of this dish—homemade is best but store-bought can work in a pinch.
- Cheese: A blend of mozzarella and cheddar melts perfectly and adds that gooey, dreamy texture.
- Tortillas: Flour tortillas hold everything nicely without getting soggy.
- Onions and Spices: Lightly sautéed to bring out sweetness and add warmth with cumin and garlic.
- Sour Cream or Yogurt: Optional but adds a lovely cooling touch when served.
Variations
One of the things I adore about this Green Chutney Chicken Enchiladas Recipe is how adaptable it is! You can play around with different proteins or add some veggies to suit your family’s tastes or what you have on hand.
- Vegetarian Version: Swap the chicken for roasted veggies like bell peppers, zucchini, and mushrooms — this still hits that flavor jackpot.
- Spice Level: If you like it hotter, add extra green chilies to your chutney or sprinkle some hot sauce on top before serving.
- Cheese Choices: Try pepper jack for a spicy kick or use paneer for an Indian twist.
- Gluten-Free: Use corn tortillas to keep it GF-friendly without compromising flavor.
How to Make Green Chutney Chicken Enchiladas Recipe
Step 1: Make the Green Chutney
Start by blending fresh cilantro, mint leaves, green chilies, garlic, ginger, lemon juice, a pinch of sugar, and salt with a splash of water or yogurt to get a smooth, vibrant chutney. I love making a bit extra because it doubles as an awesome dip or spread later on.
Step 2: Prepare the Chicken Filling
Use shredded cooked chicken — either leftover rotisserie or quickly poached. Toss it with a few spoonfuls of the green chutney and sautéed onions with cumin and garlic for that warm base flavor. This helps the chutney soak into the chicken nicely, making every bite flavorful.
Step 3: Assemble Your Enchiladas
Lay a tortilla flat, spoon a generous amount of the chicken filling down the center, sprinkle with cheese, then roll it up tightly. Arrange rolled enchiladas snugly in a baking dish seam-side down—this prevents them from unrolling while baking.
Step 4: Top and Bake
Spread a thin layer of green chutney on top of the enchiladas and cover them with more cheese — this creates that amazing bubbly, golden finish. Bake in a preheated oven at 375°F (190°C) for about 20 minutes until the cheese is melted and the edges are slightly crisp.
Pro Tips for Making Green Chutney Chicken Enchiladas Recipe
- Make Chutney Ahead: I often make the green chutney a day in advance—it actually tastes even better once the flavors deepen overnight.
- Shred Chicken While Warm: This helps the chicken soak up more chutney and spices, making it juicier and more flavorful.
- Cheese Distribution: Sprinkle cheese not just inside but also on top for that perfect stringy, melty finish everyone loves.
- Prevent Soggy Tortillas: Don’t overfill your enchiladas and bake immediately after assembling so they stay intact and hold their shape.
How to Serve Green Chutney Chicken Enchiladas Recipe
Garnishes
I love topping these enchiladas with a dollop of cooling yogurt or sour cream, some extra fresh cilantro, and a squeeze of lime. It brightens every bite and cuts through the richness beautifully. Thinly sliced red onions or chopped green chilies also bring a nice crunch and a pop of color.
Side Dishes
To round out the meal, I usually serve a simple cucumber and tomato salad tossed with chaat masala or a crisp green salad with lemon vinaigrette. Roasted potatoes or Mexican street corn also pair wonderfully if you want a hearty spread.
Creative Ways to Present
For dinner parties, I’ve rolled smaller-sized enchiladas and arranged them on a platter with assorted chutneys and dips on the side—makes for a festive, interactive meal. You could also serve them in individual ramekins for a cute personal touch!
Make Ahead and Storage
Storing Leftovers
I always pop leftover enchiladas into an airtight container and store in the fridge for up to 3 days. This recipe reheats beautifully without drying out—just cover loosely with foil to keep moisture in.
Freezing
Freezing works great! After assembling (but before baking), freeze the enchiladas in a covered dish or wrapped tightly with foil and plastic wrap. When you want to enjoy, bake them straight from the freezer with a bit more time added. It’s a lifesaver for busy weeknights.
Reheating
I reheat leftover enchiladas in a 350°F oven for around 15 minutes covered with foil, then remove the foil at the end to crisp the cheese back up. Microwaving works in a pinch but you won’t get that nice baked texture.
FAQs
-
Can I use store-bought green chutney for this recipe?
Absolutely! While homemade green chutney has the freshest flavor, good quality store-bought chutney works well and saves time—just taste and adjust seasoning if needed.
-
What type of chicken is best for these enchiladas?
Shredded, cooked chicken works best—leftover roast chicken, poached breasts, or even rotisserie chicken are all great options and make prep speedy.
-
Can I make this recipe vegan?
Definitely! Use sautéed veggies or spiced tofu as the filling and swap cheese for vegan varieties or nutritional yeast for cheesy flavor.
-
How spicy is this dish?
It’s moderately spicy thanks to the green chilies in the chutney, but you can easily adjust heat by reducing chilies or adding more. The cooling yogurt also balances the spice perfectly.
Final Thoughts
Honestly, this Green Chutney Chicken Enchiladas Recipe has quickly become one of my absolute favorite fusion dishes to make. It’s fresh, flavorful, and family-friendly—all the things I look for in a weeknight meal. I hope you try it soon and love it as much as we do; it’s definitely the kind of recipe you’ll want to make again and again!
Print
Green Chutney Chicken Enchiladas Recipe
- Prep Time: 15 minutes
- Cook Time: 40 minutes
- Total Time: 55 minutes
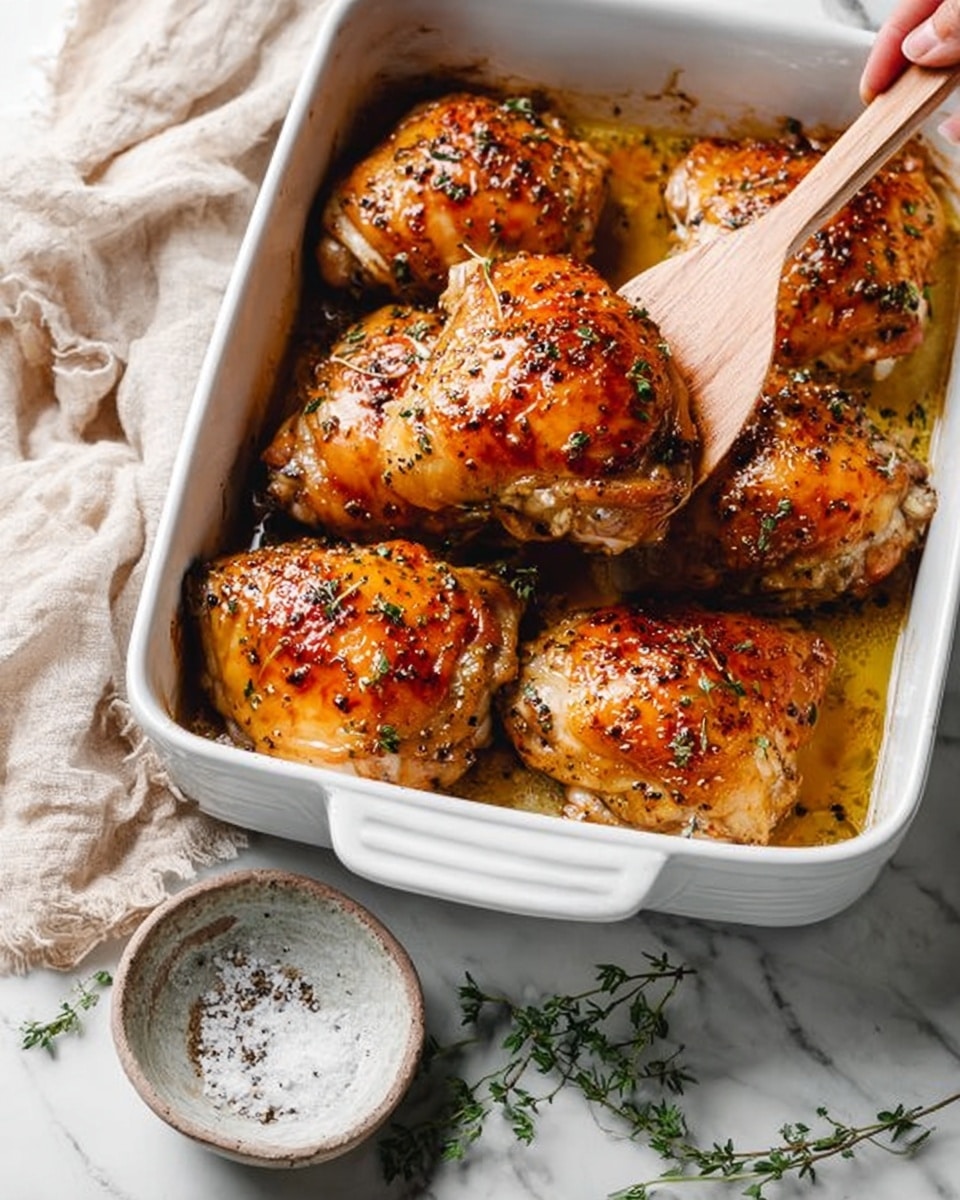
- Yield: 8 servings (8 chicken thighs)
- Category: Main Course
- Method: Baking
- Cuisine: American
Description
Deliciously tender and juicy baked honey mustard chicken thighs coated in a flavorful mixture of honey, Dijon mustard, garlic, and fresh herbs, perfect for an easy and comforting weeknight dinner.
Ingredients
Chicken
- 8 bone-in chicken thighs
Honey Mustard Sauce
- ¼ cup honey
- ¼ cup Dijon mustard
- 2 garlic cloves, minced
- 1 tablespoon extra-virgin olive oil
- 1 ½ teaspoons finely chopped fresh rosemary
- 1 ½ teaspoons finely chopped fresh thyme
- ½ teaspoon kosher salt
- ¼ teaspoon freshly ground black pepper
Instructions
- Preheat Oven: Preheat the oven to 350°F (177°C). Place the chicken in a baking dish and pat dry with a paper towel to remove excess moisture for better browning.
- Prepare Sauce: In a small bowl, stir together honey, Dijon mustard, minced garlic, extra-virgin olive oil, chopped rosemary, chopped thyme, kosher salt, and freshly ground black pepper until well combined.
- Coat Chicken: Brush or spoon the honey mustard mixture liberally over the top of each chicken thigh, ensuring a thorough coating for maximum flavor.
- Bake Chicken: Place the baking dish in the oven and bake the chicken for 40 to 45 minutes, or until fully cooked and the internal temperature reaches 175°F (80°C).
- Crisp Skin: In the last 2 to 3 minutes of cooking, turn on the oven broiler to crisp up the skin, watching closely to avoid burning.
Notes
- These baked honey mustard chicken thighs make a quick and flavorful meal perfect for busy weeknights.
- Using bone-in chicken thighs keeps the meat juicy and tender during baking.
- Broiling at the end adds a delicious crispy finish to the skin.
- Fresh herbs like rosemary and thyme enhance the flavor but can be adjusted based on your preference.
Nutrition
- Serving Size: 1 chicken thigh
- Calories: 371 kcal
- Sugar: 9 g
- Sodium: 343 mg
- Fat: 26 g
- Saturated Fat: 7 g
- Unsaturated Fat: 16 g
- Trans Fat: 0.1 g
- Carbohydrates: 10 g
- Fiber: 0.4 g
- Protein: 24 g
- Cholesterol: 142 mg


