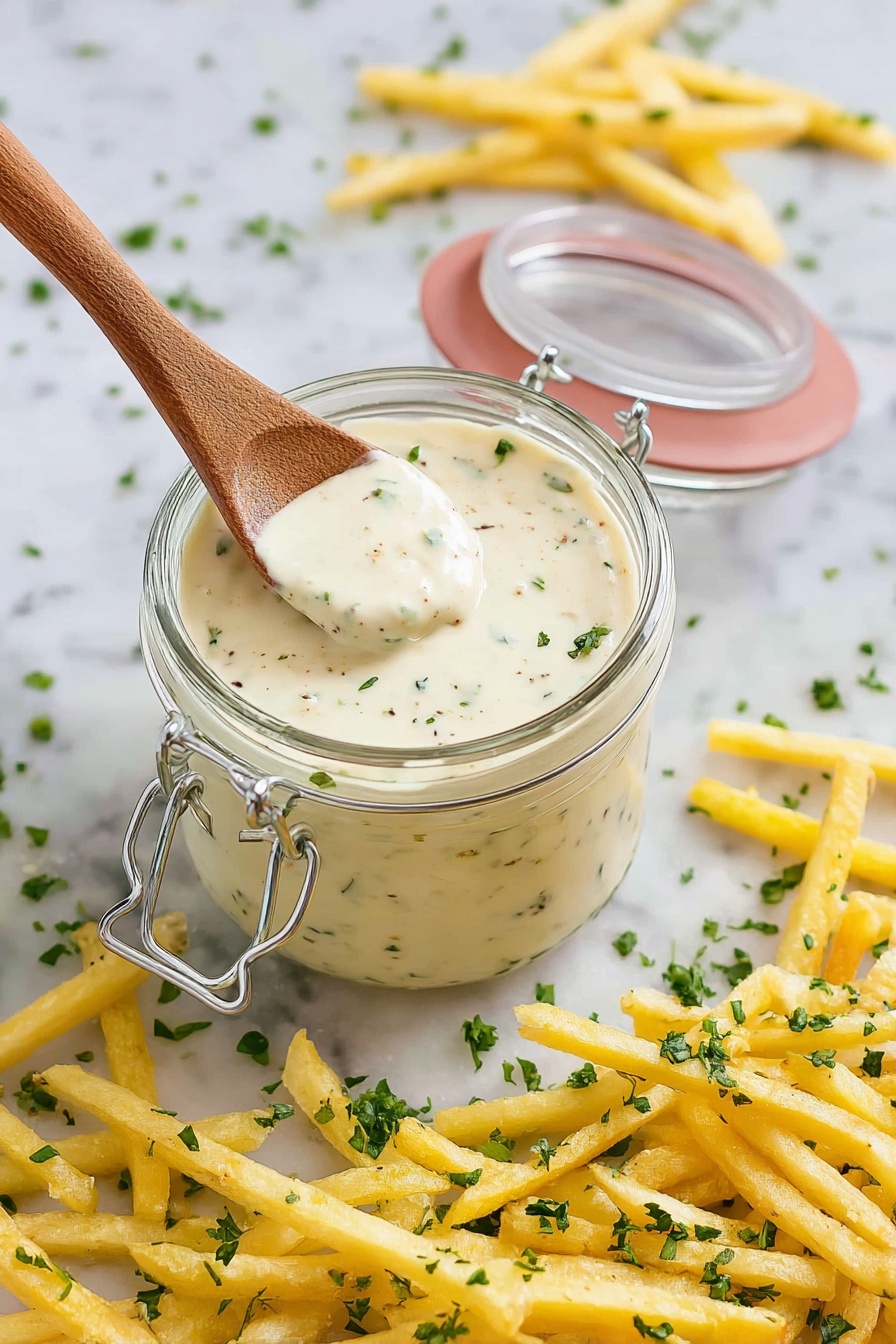
If you’re anything like me, you know there’s nothing quite like a homemade sauce that takes your meals from good to unforgettable. That’s exactly why I’m excited to share this Roasted Garlic Aioli Recipe with you — it’s creamy, full of that mellow roasted garlic punch, and so incredibly versatile. Whether you’re dipping, spreading, or dolloping, this aioli will become your new go-to. Stick around, I’ll walk you through all the little tricks that make this recipe fan-freaking-tastic.
Why You’ll Love This Recipe
- Deep, Rich Flavor: Roasting the garlic softens its sharpness and adds a sweet, caramelized depth you won’t find anywhere else.
- Super Simple Ingredients: You only need a handful of everyday pantry staples to whip this up—no crazy gadgets needed.
- Versatility Reloaded: Use it as a dip, spread, or salad dressing—the possibilities are endless.
- Make-Ahead Friendly: It mellows and improves overnight, so it’s perfect for prepping ahead of any meal or party.

Ingredients You’ll Need
This recipe pairs simple ingredients that play well together—roasted garlic’s sweetness balances the tang of lemon and the creaminess of mayo beautifully. I always recommend using fresh garlic and good-quality mayonnaise to get that incredible aioli you deserve.
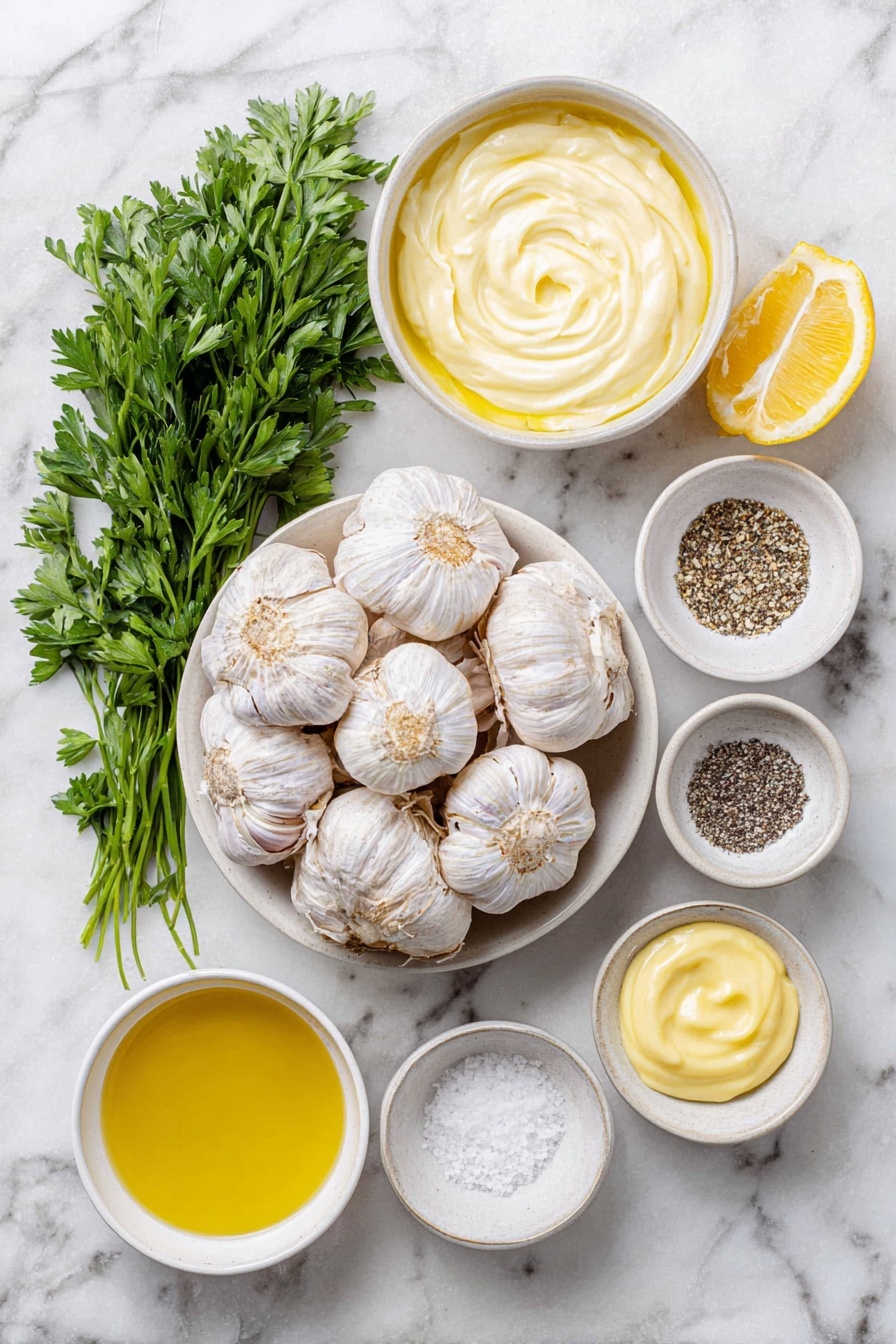
- Garlic head: Look for firm bulbs with tight skins to ensure freshness and great roasting results.
- Olive oil: Use extra virgin if you like a more pronounced fruity flavor, but any good quality olive oil works.
- Mayonnaise: I prefer full-fat mayo for creaminess; homemade or store-bought both work perfectly here.
- Lemon juice: Freshly squeezed is a game changer—bottled just can’t compare.
- Dijon mustard: Adds a subtle tang and helps bind the aioli for that lovely smooth texture.
- Salt and pepper: Essential for seasoning and bringing everything together.
- Parsley or chives (garnish): Fresh herbs add color and a bright herbal note that livens up the bowl.
Variations
I love how flexible this Roasted Garlic Aioli Recipe is! Over time I’ve played around with it and discovered that adding a few twists can really customize it for whatever mood or meal you have in mind.
- Spicy Kick: I sometimes toss in a pinch of cayenne or smoked paprika when I want a little heat or smoky undertone—it transforms the aioli completely.
- Herbaceous Boost: Fresh basil or tarragon make great alternatives if you want a different herbal flair rather than parsley or chives.
- Lighter Version: I’ve substituted half the mayo with Greek yogurt to cut some fat while keeping it creamy—perfect for a health-conscious twist.
- Sweet Hint: Adding a teaspoon of honey balances the acidity and smooths out stronger garlic notes, especially if you’re sharing with kiddos.
How to Make Roasted Garlic Aioli Recipe
Step 1: Roast Your Garlic to Golden Perfection
This is the heart of the recipe. First, preheat your oven to 400°F (200°C). Then, peel away the loose outer layers of the garlic bulb but leave the cloves intact inside. Slice off the top to expose those beautiful cloves, drizzle with olive oil, and wrap tightly in foil. Pop it in the oven for about 30 to 40 minutes. You’ll know it’s ready when the cloves are soft, golden, and smell heavenly. Patience here is key—roasting brings out that mellow sweetness that makes this aioli stand out.
Step 2: Mash and Mix Like a Pro
When your garlic is cool enough to handle, squeeze those softened cloves right out of their skins into a bowl. I mash mine with a fork until silky smooth—that extra effort really helps the aioli come together luxuriously. Then, mix in mayonnaise, freshly squeezed lemon juice, and Dijon mustard. Give it a good stir until everything’s harmonized. Season with salt and pepper, taste, and adjust as needed. It’s that easy, but oh so rewarding.
Step 3: Chill and Serve
Pop your aioli in the fridge for at least 30 minutes. This little waiting period lets all the flavors marry and deepen. It also thickens it up a bit. Trust me, it’s worth the wait. Once chilled, it’s ready to elevate everything from roasted veggies to sandwiches and grilled seafood.
Pro Tips for Making Roasted Garlic Aioli Recipe
- Wrap Tight: Make sure to seal the foil around the garlic bulb completely to trap steam for even roasting—this keeps those cloves moist and tender.
- Smooth It Out: If you want an ultra-smooth texture, blend the aioli ingredients in a food processor instead of mashing by hand.
- Adjust Consistency: If your aioli feels too thick after chilling, a teaspoon or two of water or extra lemon juice will loosen it just right.
- Use Extra Roasted Garlic: Roast a second bulb or save extra cloves for an easy spread on bread—the flavor is addictive!
How to Serve Roasted Garlic Aioli Recipe
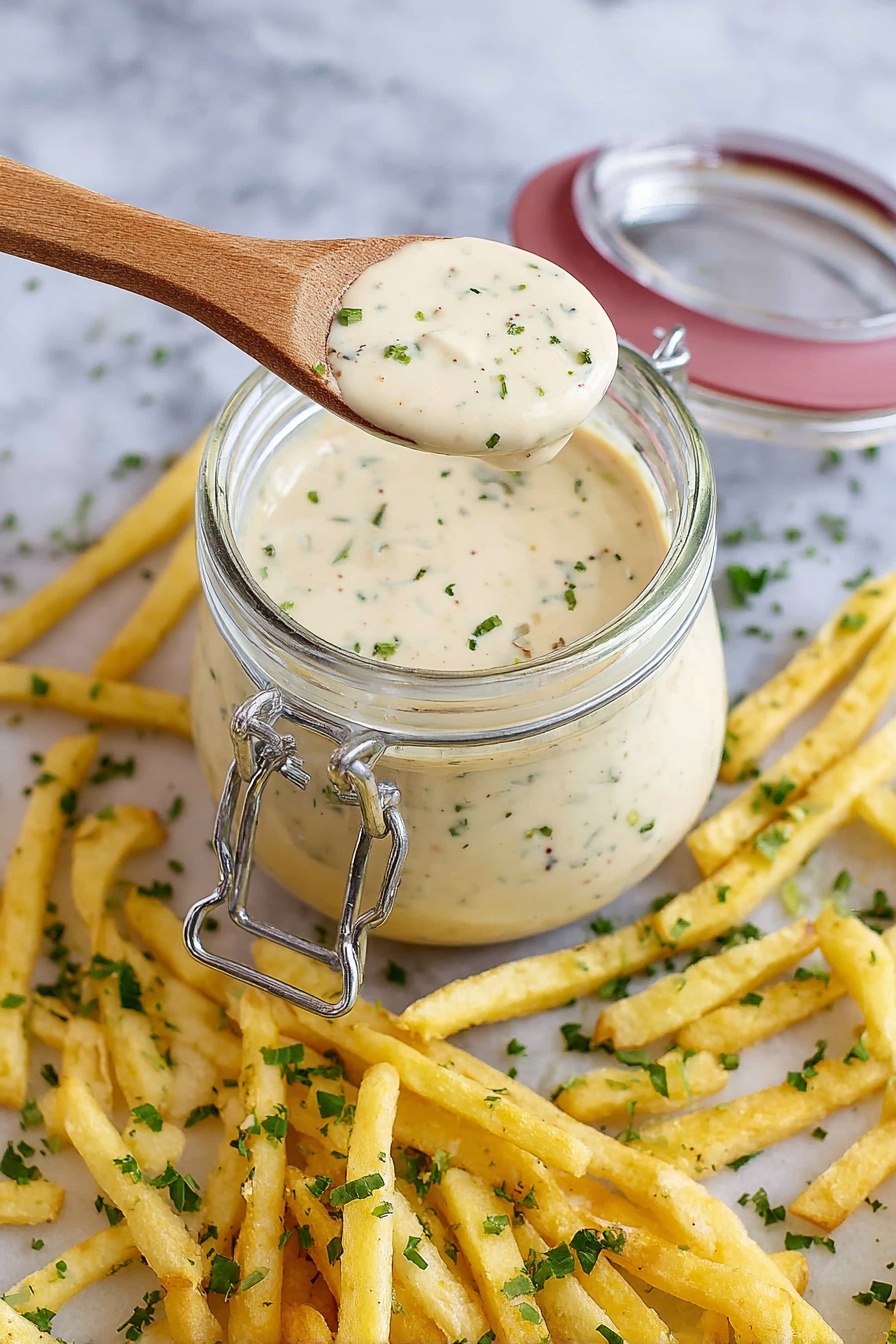
Garnishes
I usually sprinkle freshly chopped parsley or chives right on top before serving. It not only adds a pop of color but brings a fresh herbal note that contrasts beautifully with the roasted garlic’s richness. Sometimes, I toss in a little lemon zest if I’m feeling fancy—totally optional but lovely.
Side Dishes
This aioli is a dream partner for crispy roasted potatoes, fresh vegetable crudités, grilled chicken, or even as a dip alongside crispy shrimp. I also love it brushed on crusty bread as an alternative to butter—it’s pure magic.
Creative Ways to Present
For dinner parties, I like to serve the aioli in small ramekins surrounded by colorful roasted veggies and artisan breads for dipping. It doubles as both a centerpiece and crowd-pleaser. Another favorite is swirling it into mashed potatoes or drizzling over grilled steaks for an unexpected burst of flavor.
Make Ahead and Storage
Storing Leftovers
I’ve kept leftover roasted garlic aioli in an airtight container in the fridge for up to 5 days, and it stays creamy and delicious. Just give it a good stir before each use. Be sure to keep it chilled to preserve that vibrant flavor and freshness.
Freezing
Honestly, I’ve found freezing this aioli isn’t ideal because the texture can change and separate a bit upon thawing. If you must freeze, do so in small portions and whisk well after thawing, but fresh is always best here.
Reheating
Since it’s a cold sauce, reheating isn’t necessary or recommended. If your aioli gets too thick after refrigeration, just stir in a bit of warm water or lemon juice to bring it back to creamy perfection.
FAQs
-
Can I use roasted garlic powder instead of fresh roasted garlic?
While roasted garlic powder can add flavor, it won’t provide that creamy, luscious texture fresh roasted garlic does in this aioli. For the best results, roasting fresh garlic is the way to go.
-
Is this aioli gluten-free and paleo-friendly?
This Roasted Garlic Aioli Recipe is naturally gluten-free. However, traditional mayonnaise might not be paleo approved unless you use a paleo-friendly mayo alternative. Check labels to be sure.
-
How long can I store the roasted garlic aioli?
You can keep it refrigerated in an airtight container for up to 5 days. Always give it a good stir before using it again.
-
Can I make this aioli without mayonnaise?
Yes! You can swap mayo for Greek yogurt or use an egg-free alternative if you prefer, though it might slightly change the texture and tang.
-
What are the best uses for roasted garlic aioli?
It’s fantastic as a dip for fries or veggies, a spread on sandwiches and burgers, or even dolloped onto grilled seafood or roasted meats. Its creamy texture and roasted garlic flavor elevate almost any dish!
Final Thoughts
I absolutely love how this Roasted Garlic Aioli Recipe turns out every single time—it’s like a comforting hug for your taste buds. When I first tried making it, I was surprised by how few ingredients and how little time it really takes to create something so complex and flavorful. Honestly, once you get the hang of roasting garlic perfectly, this sauce is endlessly adaptable and always welcomed at my table. I highly recommend you give it a shot—it’s one of those magic little kitchen tricks that impresses everyone effortlessly.
Print
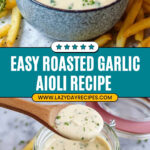
Roasted Garlic Aioli Recipe
- Prep Time: 5 minutes
- Cook Time: 40 minutes
- Total Time: 45 minutes
- Yield: 8 servings
- Category: Condiment
- Method: Baking
- Cuisine: French
Description
This Roasted Garlic Aioli is a creamy, flavorful condiment made by roasting garlic to bring out its natural sweetness and blending it with mayonnaise, lemon juice, and Dijon mustard. Perfect as a dip, spread, or sauce, this aioli adds a gourmet touch to sandwiches, vegetables, and grilled meats.
Ingredients
Garlic Roasting
- 1 head garlic
- 1 tablespoon olive oil
Aioli Base
- ½ cup mayonnaise
- 1 tablespoon lemon juice
- ½ teaspoon Dijon mustard
- Salt and pepper, to taste
Garnish
- Parsley or chives, chopped (for garnish)
Instructions
- Preheat Oven: Preheat your oven to 400°F (200°C) to prepare for roasting the garlic.
- Prepare Garlic: Peel away the outer layers of the garlic bulb, leaving the cloves intact. Slice off the top of the bulb with a sharp knife to expose the cloves. Place the bulb on aluminum foil, drizzle the cloves with olive oil, and wrap tightly in foil.
- Roast Garlic: Place the wrapped garlic bulb in the preheated oven and roast for 30-40 minutes until the cloves are soft and golden brown.
- Cool and Mash Garlic: Remove garlic from the oven and let it cool slightly. Squeeze the roasted cloves out of their skins into a small bowl and mash with a fork until smooth and creamy.
- Mix Aioli: In a separate bowl, combine the mashed garlic, mayonnaise, lemon juice, and Dijon mustard. Stir thoroughly to blend all ingredients evenly. Season with salt and pepper to taste, adjusting as needed.
- Garnish: Optionally, stir in or sprinkle chopped parsley or chives for added color and fresh flavor.
- Chill: Transfer the aioli to a serving dish or airtight container. Cover and refrigerate for at least 30 minutes to allow the flavors to meld.
Notes
- Roast extra garlic cloves to use as a spread on bread or for other recipes.
- For a smoother consistency, blend the aioli ingredients in a food processor or blender.
- If the aioli is too thick, thin it with a small amount of water or additional lemon juice.
- Keep in mind the aioli will thicken after chilling, so adjust consistency accordingly before refrigerating.
- Customize your aioli by adding flavors like smoked paprika or a bit of honey for a unique twist.
Nutrition
- Serving Size: 2 tablespoons
- Calories: 110
- Sugar: 0.5g
- Sodium: 150mg
- Fat: 11g
- Saturated Fat: 1.5g
- Unsaturated Fat: 8g
- Trans Fat: 0g
- Carbohydrates: 1g
- Fiber: 0.3g
- Protein: 0.4g
- Cholesterol: 10mg