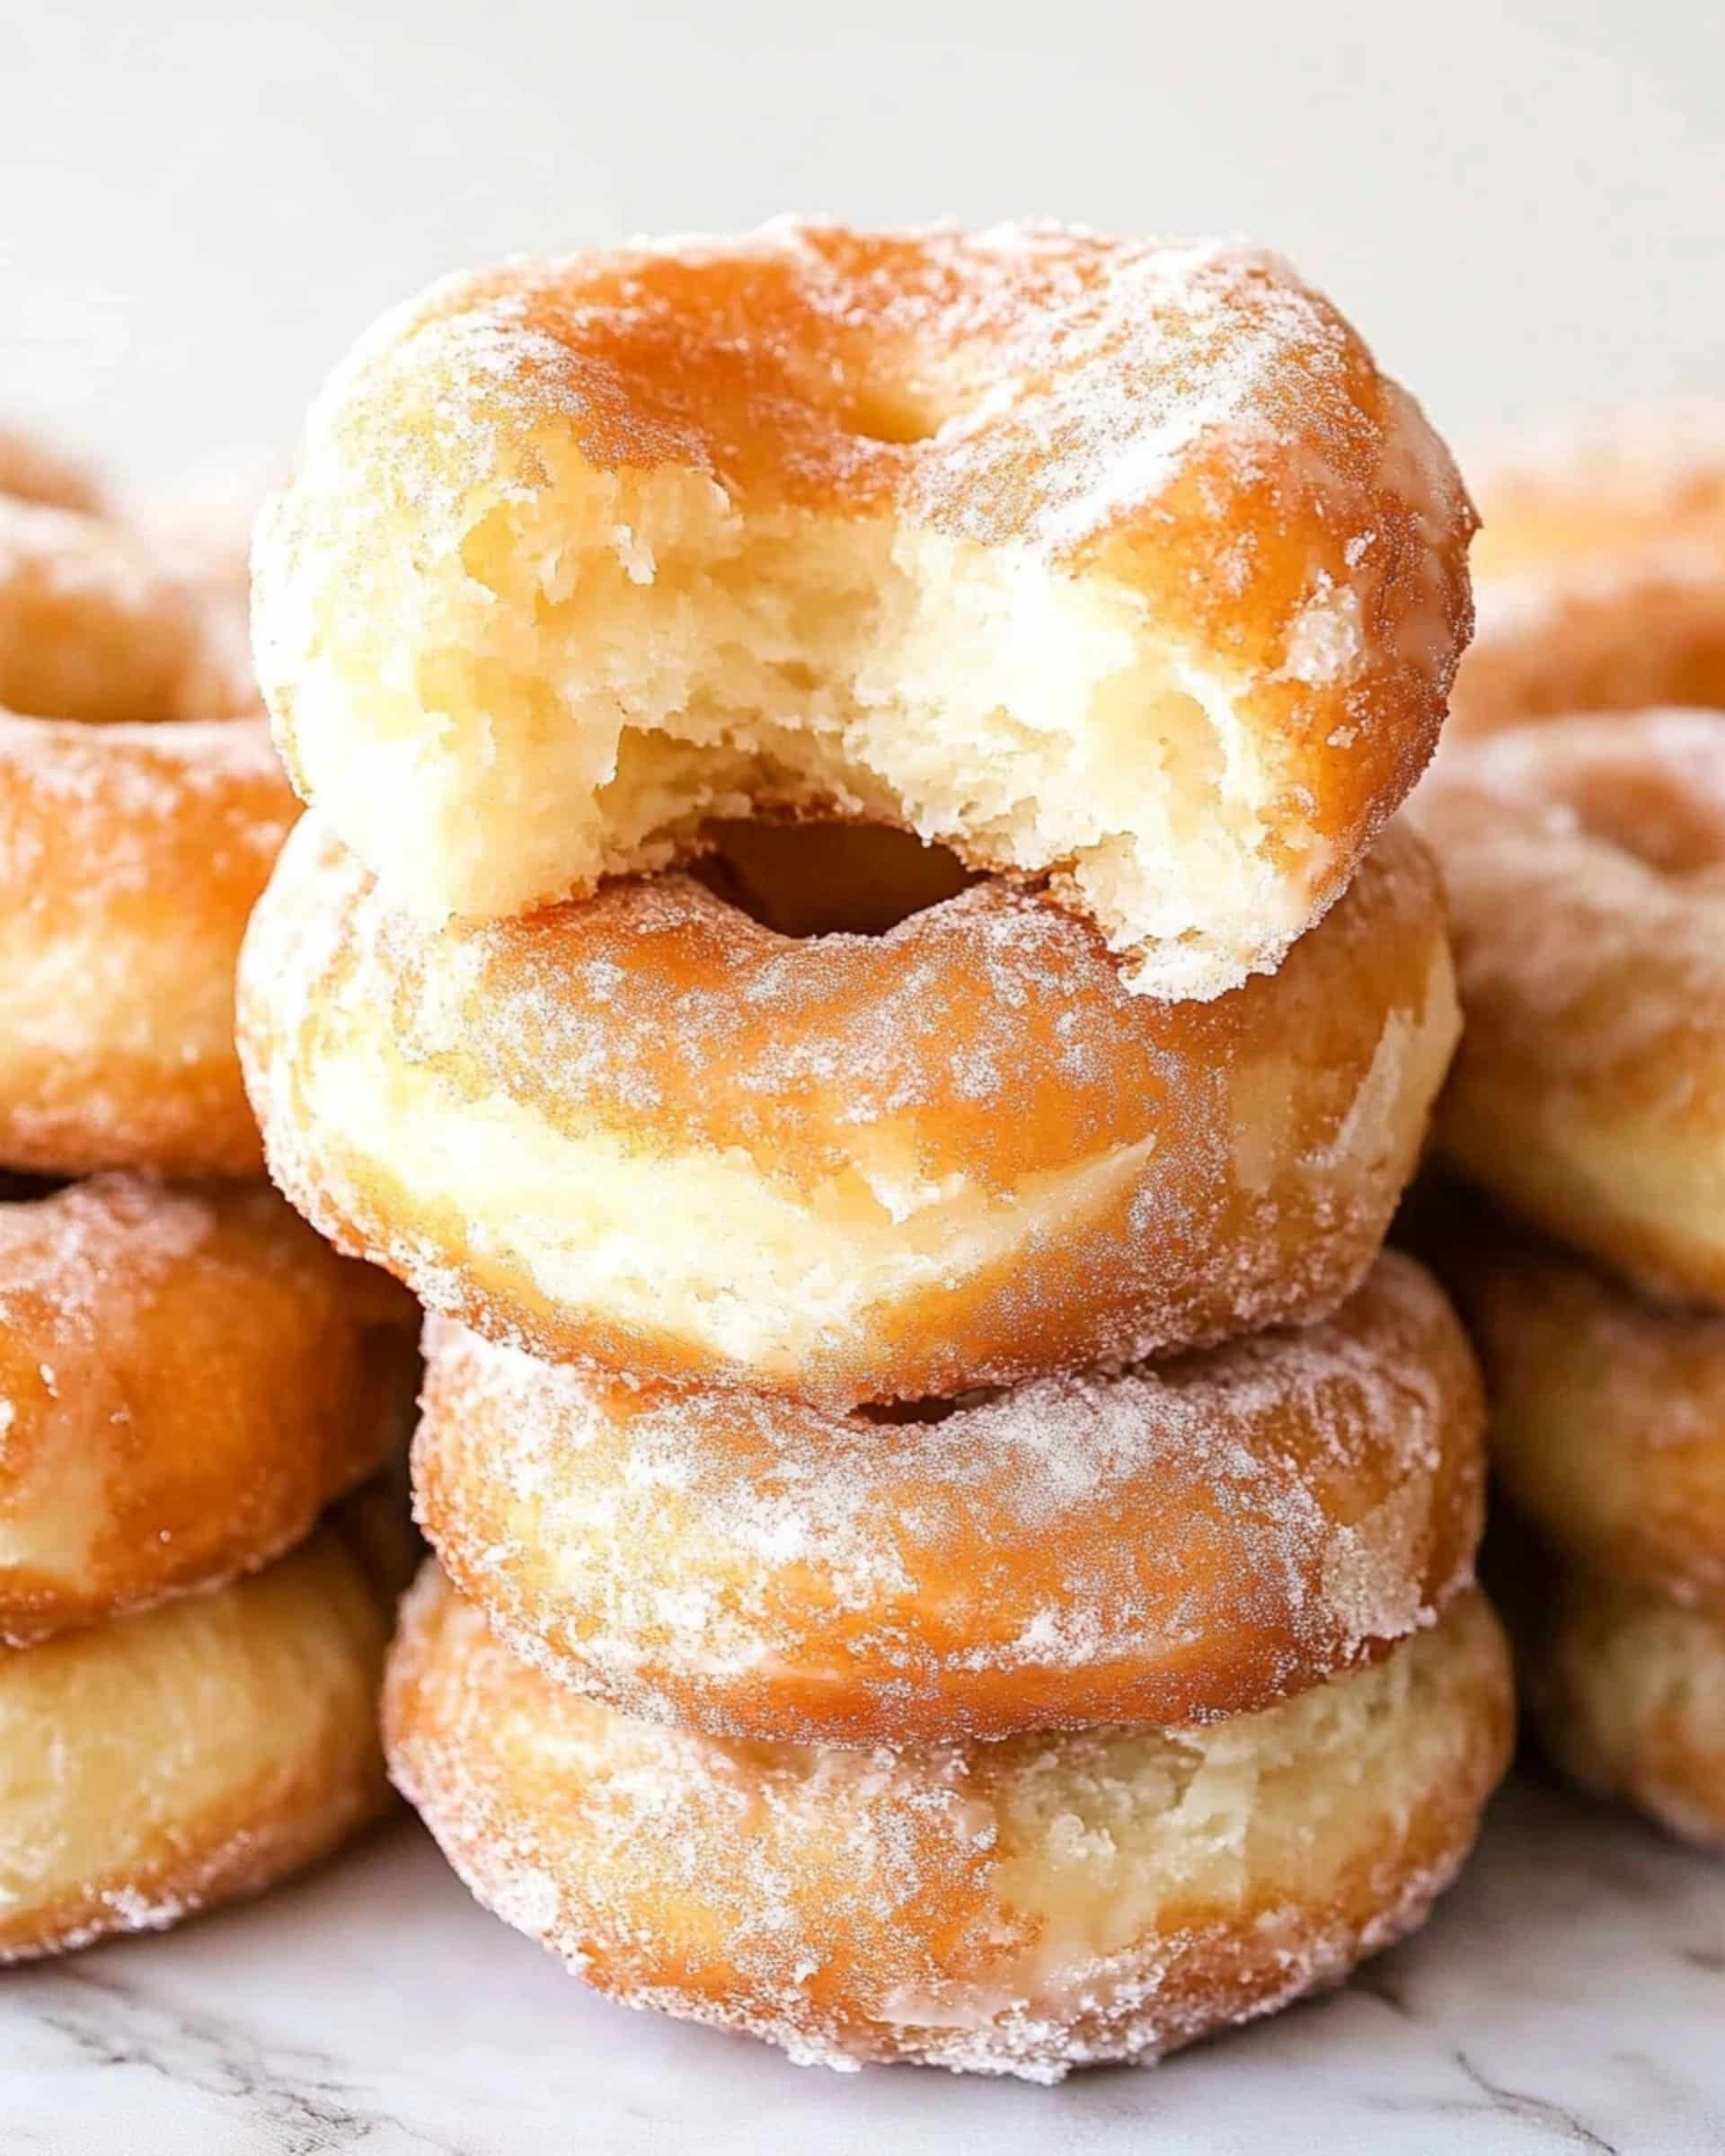
This incredibly fluffy Sourdough Discard Donuts recipe transforms your leftover starter into pillowy, golden-brown treats with a perfect hint of sweetness. The slight tanginess from the sourdough discard adds a delightful complexity that makes these donuts absolutely irresistible. Best of all, while they do need some rising time, the actual hands-on work is minimal, making them a rewarding weekend project that yields professional bakery results right in your kitchen!
Why You’ll Love This Recipe
- Perfect Use for Discard: Finally, a delicious purpose for that sourdough discard you’ve been collecting! These donuts give your starter new life in the most delicious way possible.
- Incredibly Tender Texture: The combination of sourdough discard and the proper rising time creates donuts with an unbelievably soft, pillowy interior that commercial donuts simply can’t match.
- Make-Ahead Friendly: The dough can rest in the refrigerator overnight, meaning you can prep everything the evening before and enjoy fresh, warm donuts for breakfast.
- Customizable: While the simple glaze is perfect as-is, you can easily adapt these donuts with different toppings, fillings, or flavor variations to suit your taste.

Ingredients You’ll Need
- Whole Milk: Provides richness and helps activate the yeast. Its fat content contributes to the tender texture of the donuts.
- Granulated Sugar: Feeds the yeast and adds sweetness to balance the slight tang from the sourdough discard.
- Active Dry Yeast: Works alongside your sourdough discard to create perfectly risen donuts with an airy texture.
- Sourdough Discard: The star ingredient that adds complex flavor and helps create that perfect donut texture. Use unfed starter straight from the refrigerator.
- Butter: Adds richness and flavor. Make sure it’s very soft or melted and cooled to incorporate properly.
- Eggs: Provide structure, richness, and help bind the ingredients together.
- Nutmeg: A classic donut spice that adds warmth and depth of flavor without overwhelming.
- All-Purpose Flour: Forms the structure of your donuts. Be careful not to add too much, as slightly sticky dough creates a more tender final product.
- Vegetable or Canola Oil: For frying. These neutral oils have high smoke points perfect for achieving that golden-brown exterior.
- Powdered Sugar: The base for the simple glaze that gives these donuts their classic sweet finish.
Note: You’ll find the complete list of ingredients, along with their exact measurements, in the printable recipe card at the bottom of this post.
Variations
Want to put your own spin on these sourdough donuts? Here are some delicious ways to customize:
Flavored Glazes
Transform the basic glaze by adding vanilla extract, maple syrup, or a tablespoon of strong coffee. For chocolate lovers, whisk in 2-3 tablespoons of cocoa powder and a splash more milk.
Toppings Galore
After glazing, quickly sprinkle with colorful sprinkles, toasted coconut flakes, crushed nuts, or crumbled bacon for a sweet-savory twist.
Filled Delights
Skip the center hole and make round donuts that you can fill after frying. Use a piping bag to inject jam, pastry cream, or nutella into the side.
Seasonal Spins
Add cinnamon to the dough in fall, lemon zest in spring, or replace the nutmeg with cardamom for a unique flavor profile.
How to Make Sourdough Discard Donuts
Step 1: Activate the Yeast
In your stand mixer bowl, combine the warm milk (110-120°F) with sugar, then sprinkle yeast over the top. Let it sit for 5-10 minutes until foamy, which confirms your yeast is alive and ready to work.
Step 2: Make the Dough
With the dough hook attached, mix in the sourdough discard, softened butter, eggs, and nutmeg until combined. Gradually add the flour one cup at a time on low speed until fully incorporated. Continue mixing on medium speed for 4-5 minutes until the dough pulls away from the sides but still remains slightly sticky.
Step 3: First Rise
Transfer the dough to a greased bowl, cover with plastic wrap, and refrigerate for at least 1 hour or overnight. This cold fermentation develops flavor while making the dough easier to handle.
Step 4: Shape the Donuts
Once the dough has doubled and is cold, divide it in half. Roll each half to ½-inch thickness on a lightly floured surface. Cut into donut shapes using a 3-inch round cutter and a smaller one for centers. Place on parchment-lined baking sheets, leaving space between each for rising.
Step 5: Second Rise
Cover the donuts with greased plastic wrap and let rise in a warm spot for about 1 hour until they’re noticeably puffy. They’re ready when a gentle finger press leaves a small dent that slowly springs back.
Step 6: Fry to Golden Perfection
Heat oil in a Dutch oven or heavy-bottomed pot to 375°F. Carefully lower 1-2 donuts at a time into the hot oil, frying for 1-2 minutes per side until golden brown. Remove to paper towels to drain excess oil.
Step 7: Glaze
Whisk together powdered sugar, milk, and a pinch of salt until smooth. Dip each warm donut into the glaze, coating both sides, then place on a cooling rack to set.
Pro Tips for Making the Recipe
- Watch Your Temperature: Keep your milk between 110-120°F—too hot will kill the yeast, too cool won’t activate it properly.
- Sticky Is Good: Resist adding too much flour. A slightly sticky dough creates tender donuts, while overly firm dough makes tough ones.
- Cold Dough Is Easier: The refrigeration step isn’t just for flavor—cold dough is much easier to handle, cut, and transfer.
- Oil Temperature Matters: Maintain a steady 375°F oil temperature. Too hot burns the outside before the inside cooks; too cool makes greasy donuts.
- Small Batches: Fry only 1-2 donuts at a time to maintain oil temperature and give each donut room to float freely.
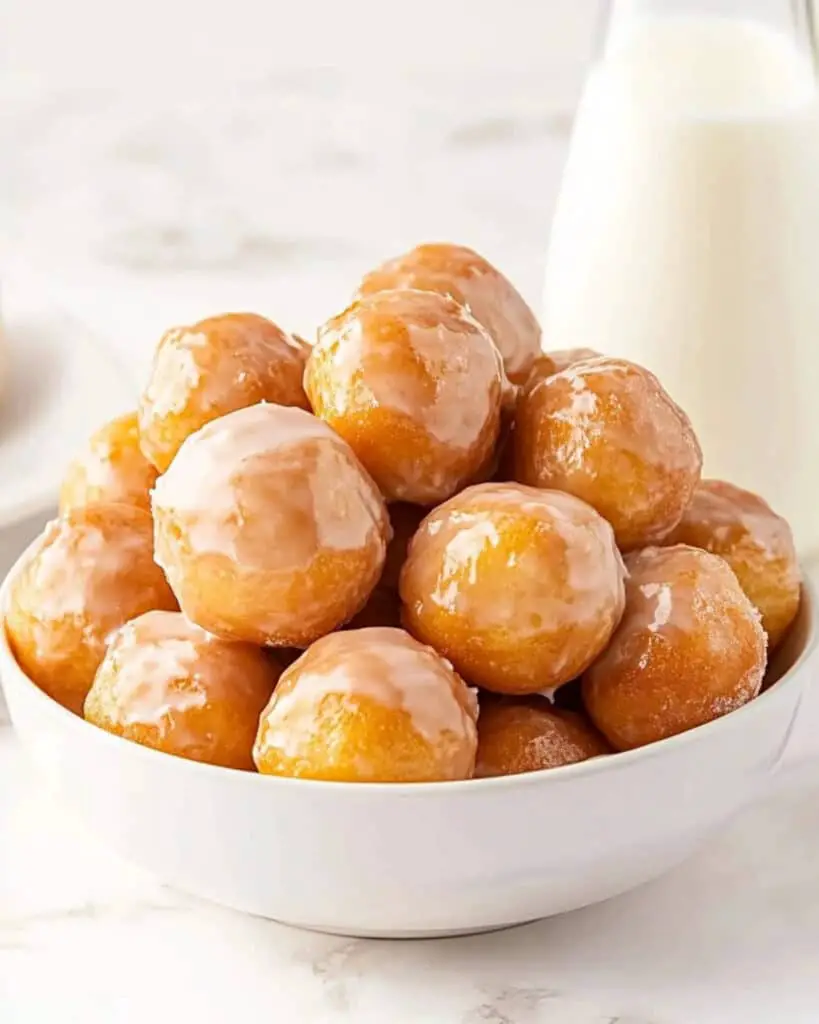
- Test Donut First: Always fry a donut hole first to check oil temperature and cooking time before committing to a full batch.
How to Serve
These sourdough donuts shine in their simplicity but can be paired with various accompaniments for a truly special treat:
Perfect Pairings:
Serve alongside a strong cup of coffee, hot chocolate, or cold milk to balance the sweetness. For brunch, include fresh fruit to create a more balanced offering.
Serving Temperature:
These donuts are at their absolute peak when enjoyed slightly warm, when the exterior is still crisp and the interior is at its softest. They’re still delicious at room temperature, but warming for 10 seconds in the microwave can revive day-old donuts.
Presentation:
For a charming presentation, stack donuts on a cake stand or arrange on a serving platter with the donut holes scattered around. A light dusting of powdered sugar just before serving adds an extra special touch.
Make Ahead and Storage
Storing Leftovers
Store completely cooled donuts in an airtight container at room temperature for 1-2 days. The texture is best the day they’re made, as they’ll gradually become more bread-like over time.
Freezing
You can freeze unglazed donuts for up to 2 months. Wrap each donut individually in plastic wrap, then place in a freezer bag. Thaw at room temperature, then warm in a 350°F oven for 5 minutes before glazing.
Make-Ahead Options
The dough can be refrigerated overnight after the first rise, which actually improves flavor development. You can also cut the donuts and keep them refrigerated for several hours before the second rise—just bring to room temperature before allowing them to complete their final rise.
FAQs
-
Can I use active sourdough starter instead of discard?
While discard is perfect for this recipe, you can use active starter too. The flavor may be slightly more pronounced, and the dough might rise a bit faster, so keep an eye on it during proofing times.
-
Can I bake these donuts instead of frying them?
Yes, though the texture will be different. Place shaped donuts on a parchment-lined baking sheet and bake at 350°F for 15-18 minutes until golden. They’ll be more bread-like than traditional donuts but still delicious, especially brushed with melted butter when hot from the oven.
-
Why did my donuts deflate when I transferred them to the oil?
This usually happens when donuts are over-proofed or handled too roughly. Try reducing the second rise time slightly or being more gentle when transferring. Using a slotted spoon or spider tool can help maintain their shape.
-
Can I make this recipe without a stand mixer?
Absolutely! Mix ingredients with a wooden spoon until combined, then turn onto a floured surface and knead by hand for 8-10 minutes until smooth and elastic. The dough will be slightly sticky, so use a bench scraper to help manage it.
Final Thoughts
These Sourdough Discard Donuts are truly a game-changer for home bakers. They transform what might otherwise be waste into something extraordinarily delicious, with a complexity of flavor you simply can’t get from ordinary donuts. Yes, they take some time with the rising periods, but most of that is hands-off—and that first bite of warm, freshly glazed donut makes every minute worth it. Don’t be intimidated by the frying process; take it slow, and you’ll be rewarded with bakery-quality treats that will have everyone asking for your secret. Give this recipe a try the next time you’re feeding your sourdough starter—your taste buds (and anyone lucky enough to share) will thank you!
Print
Sourdough Discard Donuts Recipe
- Prep Time: 45 minutes
- Cook Time: 30 minutes
- Total Time: 4 hours 15 minutes
- Yield: 18 donuts
- Category: Desserts
- Method: Frying
- Cuisine: American
- Diet: Vegetarian
Description
Sourdough Discard Donuts are soft, fluffy, and deliciously golden with a sweet and glossy glaze. Perfectly crispy on the outside and tender on the inside, they’re a great way to use up sourdough discard and satisfy your donut cravings. Whether served fresh for breakfast or as a delightful treat, they are bound to impress.
Ingredients
- 1 cup whole milk, warmed between 110°F and 120°F
- 1/3 cup granulated sugar
- 2 1/4 teaspoons active dry yeast
- 1/2 cup heaping sourdough discard (about 6 oz.)
- 8 tablespoons salted butter, very soft or melted and cooled
- 2 large eggs, room temperature
- 1/2 teaspoon ground nutmeg
- 3 3/4 cups all-purpose flour, plus more for dusting
- Vegetable or canola oil for greasing and frying
- 3 cups powdered sugar
- 1/2 cup whole milk
- Pinch of salt
Instructions
- Activate the Yeast
In the bowl of a standing mixer fitted with a dough hook, mix the warmed milk and granulated sugar. Ensure the milk is warm but not hot. Sprinkle the yeast over the milk mixture and allow it to sit for 5-10 minutes until it becomes frothy, signaling the yeast is active. - Prepare the Dough
Add the sourdough discard, softened or cooled melted butter, eggs, and nutmeg. Mix until well combined. Gradually add the flour, one cup at a time, keeping the mixer on low speed. Once incorporated, increase to medium speed and knead the dough for 4-5 minutes until a loose ball forms and separates cleanly from the sides of the bowl. - First Rise
Transfer the dough ball to a greased bowl, cover with plastic wrap, and refrigerate for at least 1 hour or overnight to allow it to double in size. - Shape the Donuts
Once the dough has risen, divide it in half. On a lightly floured surface, roll each portion to ½-inch thickness. Use a 3-inch donut cutter or two round cutters to cut out the donuts and holes. Place them on a parchment-lined baking sheet, leaving space between each donut. - Second Rise
Cover the donuts lightly with greased plastic wrap and allow them to rise in a warm place for about 1 hour. The donuts should double in size or appear noticeably puffy, with a gentle touch leaving a slight dent. - Prepare for Frying
Heat about 4 inches of shortening or vegetable oil in a heavy-bottomed saucepan or Dutch oven to 375°F. Use a food thermometer to maintain this temperature. - Fry the Donuts
Fry 1-2 donuts at a time for 1-2 minutes on each side, ensuring a golden brown color. Use a slotted spoon to transfer fried donuts to a paper towel-lined sheet pan to drain excess oil. - Prepare the Glaze
Whisk powdered sugar, milk, and a pinch of salt together in a bowl until smooth and glossy. - Glaze the Donuts
Dip each donut into the glaze, coating both sides. Place the glazed donuts on a cooling rack to set and dry.
Notes
- Milk Temperature: Ensure the milk is between 110°F and 120°F to avoid killing the yeast.
- Butter: If using melted butter, cool it first to prevent overheating the yeast. Alternatively, use very soft butter to blend easily.
- Sticky Dough: Slightly sticky dough yields lighter donuts compared to drier dough.
- Transferring Donuts: Use parchment paper to help move donuts into the oil—place the parchment and donut over the oil and carefully peel back the paper.
- Overnight Proofing: Refrigerating the dough overnight enhances the flavor and provides more flexibility in preparation.
Nutrition
- Serving Size: 1 donut
- Calories: 270
- Sugar: 20g
- Sodium: 150mg
- Fat: 12g
- Saturated Fat: 6g
- Unsaturated Fat: 4g
- Trans Fat: 0g
- Carbohydrates: 36g
- Fiber: 1g
- Protein: 4g
- Cholesterol: 45mg


