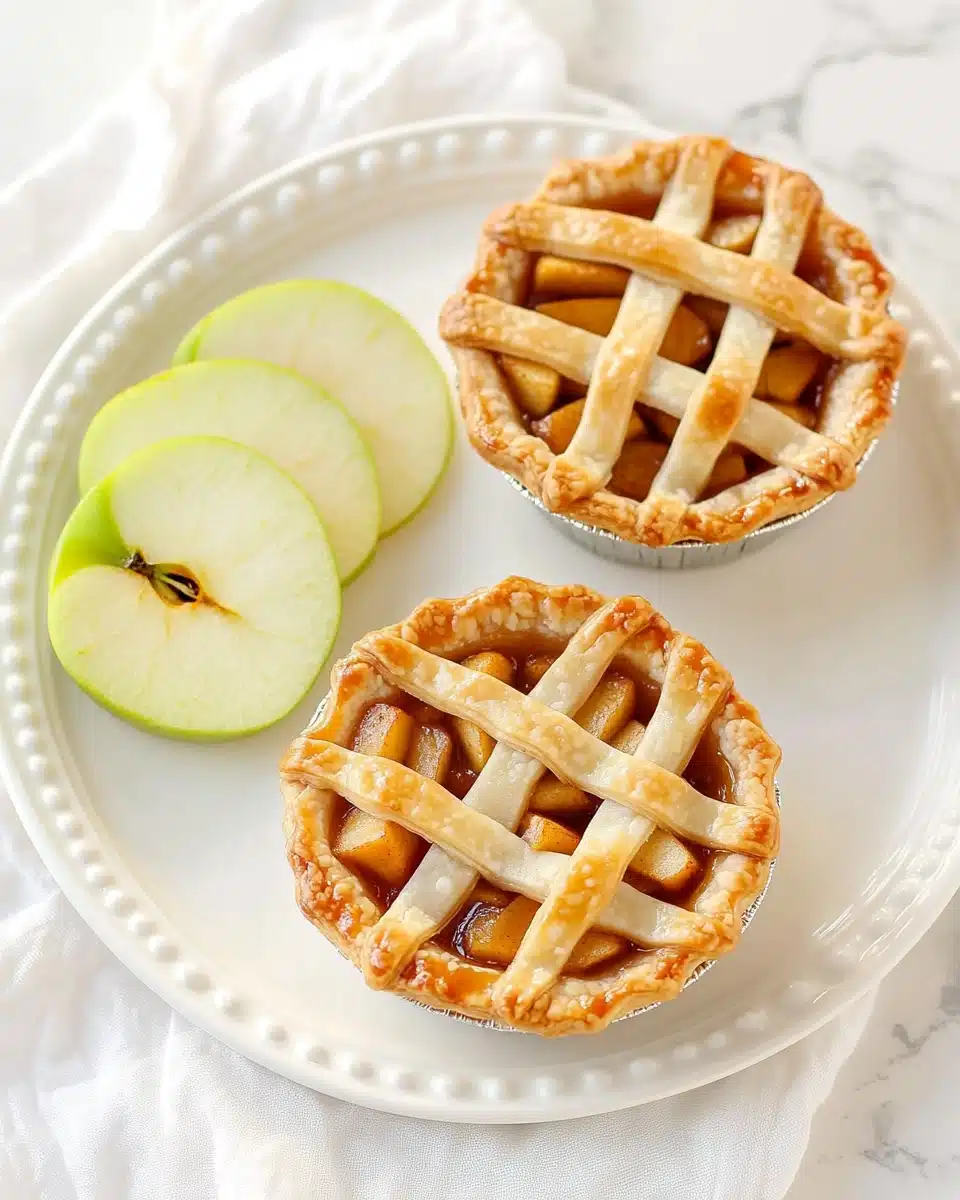
Apple Harvest Mini Pies are everything we adore about homemade apple pie—just cuter, more portable, and absolutely irresistible for snacking, sharing, and showing off. Packed with juicy autumn apples and wrapped in tender, golden pie crusts, these mini treats capture all the coziness of fall in the palm of your hand. Whether you’re craving a sweet bite with coffee or planning a festive dessert platter, these tiny pies offer big flavors with just the right touch of nostalgia.
Why You’ll Love This Recipe
- Perfectly Portable: These Apple Harvest Mini Pies are the ultimate handheld dessert, ideal for parties, lunchboxes, or picnics in the crisp autumn air.
- Classic Fall Flavor in Every Bite: With luscious apples, warm cinnamon, and tender pie crust, each mini pie bursts with comforting seasonal goodness.
- Fun for All Ages: Kids love to help assemble and decorate these adorable mini pies—making family baking time especially memorable.
- No Slicing Required: Every guest gets their own pie, so serving is effortless and mess-free.

Ingredients You’ll Need
I promise, this ingredient list is delightfully short but thoughtfully chosen. Every component plays a vital role in giving Apple Harvest Mini Pies their flaky texture, juicy filling, and signature warmth—plus, most of these are pantry staples you probably already have!
- Pie Crusts (2, homemade or store-bought): The cornerstone of these minis—choose homemade for a more rustic feel, or your favorite premade crust for convenience.
- Chopped Apples (2 ½ cups): Crisp, fresh apples—think Granny Smith for tang or Honeycrisp for sweetness—bring the juiciness and structure.
- Granulated Sugar (¼ cup): Adds just the right amount of sweetness to balance out the apples’ natural tartness.
- All-Purpose Flour (2 tablespoons): Thickens the filling so it’s lush and never runny or watery.
- Ground Cinnamon (1 teaspoon): Warm spice makes these pies instantly evoke memories of cozy autumn days.
- Pure Vanilla Extract (1 teaspoon): Lends beautiful aroma and enhances all the other flavors.
- Ground Nutmeg (⅛ teaspoon): A small but mighty addition for a subtle, nutty warmth.
- Unsalted Butter (1 tablespoon, optional): Adds richness and helps the filling bubble beautifully—it’s optional, but I highly recommend it.
Variations
The magic of Apple Harvest Mini Pies is in how easy they are to customize. Whether you want to tweak flavors, sneak in another fruit, or adjust for dietary needs, these little pies are happily adaptable!
- Salted Caramel Apple: Add a drizzle of caramel sauce over the apples before topping with the crust for sweet, gooey decadence.
- Spiced Pear & Apple: Substitute half of the apples with ripe pears and a pinch more nutmeg for a juicy twist.
- Gluten-Free Mini Pies: Use a gluten-free pie crust and a tablespoon of cornstarch in place of flour to satisfy gluten-free friends and family.
- Maple Walnut Crunch: Sprinkle chopped walnuts and a splash of maple syrup into the filling for a nutty, autumnal flair.
How to Make Apple Harvest Mini Pies
Step 1: Prep the Oven and Pie Crusts
Start by preheating your oven to 425°F (220°C)—that’s the golden temperature for perfectly crisp mini pies. Roll out your pie crusts on a lightly floured surface to about 1/8-inch thick, then use a 3.5-inch cookie cutter (or even an inverted glass) to cut 12 circles. Gently nestle each round into the wells of a standard muffin pan, pressing the dough up the sides to shape your mini shells. Chill the pan in the refrigerator while you move on to the filling—cold dough equals flakier results!
Step 2: Make the Apple Filling
In a large mixing bowl, toss the chopped apples with sugar, flour, cinnamon, vanilla extract, and nutmeg. Be sure every piece is evenly coated—this ensures each mini pie is bursting with juicy, cinnamon-kissed fruit (and not a dry bite in sight!).
Step 3: Fill and Top the Mini Pies
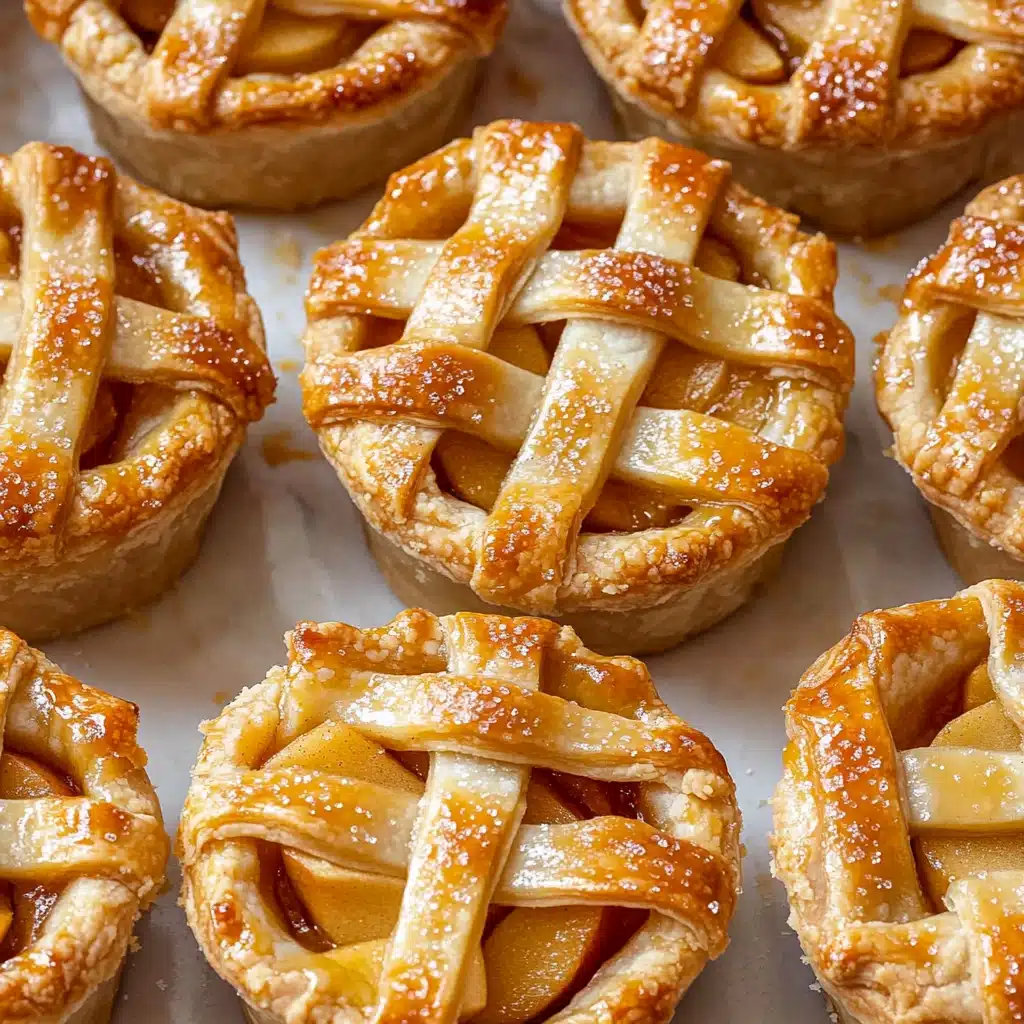
Retrieve your muffin pan from the fridge and evenly spoon about 3 tablespoons of the apple mixture into each crust-lined cup. Dot each pie with a little piece of butter if you’d like—it gives the filling a luxurious, caramelized finish. Roll out the extra crust, cut your favorite shapes or lattice strips for the tops, and place them over the pies. Feel free to get creative here (think leaves, stars, or classic lattice)!
Step 4: Bake, Cool, and Enjoy!
Bake the Apple Harvest Mini Pies for 18 to 23 minutes, until the crusts are lightly golden and the apple filling is bubbling. Let them cool in the pan for 10–15 minutes before carefully lifting them out to a wire rack. They’ll finish cooling there—though it’s totally fair game to taste one while still a little warm!
Pro Tips for Making Apple Harvest Mini Pies
- Choose the Right Apples: For the best texture, use a mix of tart and sweet apples—think Granny Smith and Honeycrisp—to create layers of flavor and help prevent sogginess.
- Chill Your Dough: Keep your pie dough (and even your muffin pan) cold at every step for the flakiest, most tender mini crusts possible.
- Don’t Overfill: Three tablespoons of filling per pie is just right; it keeps the pies tidy and ensures even cooking without messy overflows.
- Creative Pie Tops: Use small cookie cutters to make festive shapes or simple strips for a lattice—these little details earn major “oohs” from guests!
How to Serve Apple Harvest Mini Pies
Garnishes
Dress up your Apple Harvest Mini Pies with a sprinkle of powdered sugar, a drizzle of warm caramel, or a generous dollop of freshly whipped cream on top. A small scoop of vanilla ice cream alongside each warm pie is never a bad idea—trust me, the contrast between cool and warm makes for an unforgettable bite!
Side Dishes
Serve these mini pies as the star of a fall dessert board with cinnamon pecans, soft cheeses, or spiced nuts. If you’re serving them after a meal, they’re lovely with hot cider, coffee, or even a glass of chilled sparkling apple wine for grown-up gatherings.
Creative Ways to Present
For parties, arrange the Apple Harvest Mini Pies on a rustic wooden board, each topped with a fun pastry cutout (like leaves or acorns). Wrap them in parchment and tie with twine for picnic favors, or stack them in a pretty box for the sweetest edible gift at any family gathering.
Make Ahead and Storage
Storing Leftovers
If you find yourself with leftover Apple Harvest Mini Pies (lucky you!), simply cover and store them in the refrigerator for up to 5 days. The flavors continue to meld, and the crust remains tender for a truly satisfying next-day treat.
Freezing
You can freeze fully baked mini pies for up to 2 months. Once cooled, wrap each pie in plastic and place in a zip-top freezer bag. Thaw at room temperature or gently warm in the oven for that fresh-baked taste anytime you please.
Reheating
To reheat, pop the mini pies in a 300°F (150°C) oven for about 10 minutes, or until warmed through. For a speedy fix, the microwave works too—just heat in 10-second bursts and enjoy as soon as they’re warm and fragrant.
FAQs
-
Can I use store-bought pie crust for Apple Harvest Mini Pies?
Absolutely! Store-bought crust is a fabulous time-saver and works beautifully in this recipe. If you’re feeling extra cozy and have the time, making your own crust adds a homemade touch—but there’s no wrong choice here.
-
What types of apples are best for mini apple pies?
Firm, tart apples like Granny Smith hold their shape well and balance the sweetness, while Honeycrisp or Fuji add juiciness and a hint of floral sweetness. Mixing a few varieties gives your Apple Harvest Mini Pies the best texture and flavor.
-
How can I prevent the crusts from getting soggy?
Chilling the dough before baking and measuring your filling (about 3 tablespoons per pie) helps keep the crust crisp. Also, be sure to use the flour in the filling to absorb extra juice from the apples—no sogginess in sight!
-
Can I make Apple Harvest Mini Pies ahead of time?
Definitely! Bake the pies a day in advance, let them cool completely, then store covered in the fridge. For that just-baked taste, reheat briefly in the oven before serving, and garnish as desired.
Final Thoughts
If you’ve been searching for a delightful, crowd-pleasing treat that captures the essence of autumn, Apple Harvest Mini Pies are the answer. They’re as fun to make as they are to eat—and perfect for sharing with friends and family. Give them a try, and watch these golden, bite-sized beauties disappear in no time!
Print
Apple Pie Delights Recipe
- Prep Time: 30 mins
- Cook Time: 25 mins
- Total Time: 55 mins
- Yield: 12 mini pies
- Category: Dessert
- Method: Baking
- Cuisine: American
- Diet: Vegetarian
Description
Delicious mini apple pies that are perfect for individual servings and make a great dessert for any occasion. These pies are filled with a sweet and spiced apple filling and wrapped in a flaky crust.
Ingredients
Pie Crusts:
- 2 pie crusts, homemade or store-bought
Apple Filling:
- 2 1/2 cups chopped apples (315 grams)
- 1/4 cup granulated sugar (50 grams)
- 2 tablespoons all-purpose flour, measured correctly (15 grams)
- 1 teaspoon ground cinnamon
- 1 teaspoon pure vanilla extract
- 1/8 teaspoon ground nutmeg
- 1 tablespoon unsalted butter, optional (15 grams)
Instructions
- Preheat the oven: Preheat the oven to 425°F (220°C).
- Prepare the crust: Roll out the pie crusts and cut out circles to fit a muffin pan.
- Fill the crust: Fill each crust with apple filling and top with butter.
- Bake: Bake for 18 to 23 minutes until golden brown.
- Cool and serve: Let the mini pies cool before serving.
Notes
- Store any leftover mini apple pies in the refrigerator for up to 5 days.
- Reheat in the microwave before serving.
Nutrition
- Serving Size: 1 mini pie
- Calories: 180
- Sugar: 10g
- Sodium: 100mg
- Fat: 8g
- Saturated Fat: 3g
- Unsaturated Fat: 4g
- Trans Fat: 0g
- Carbohydrates: 25g
- Fiber: 2g
- Protein: 2g
- Cholesterol: 8mg


