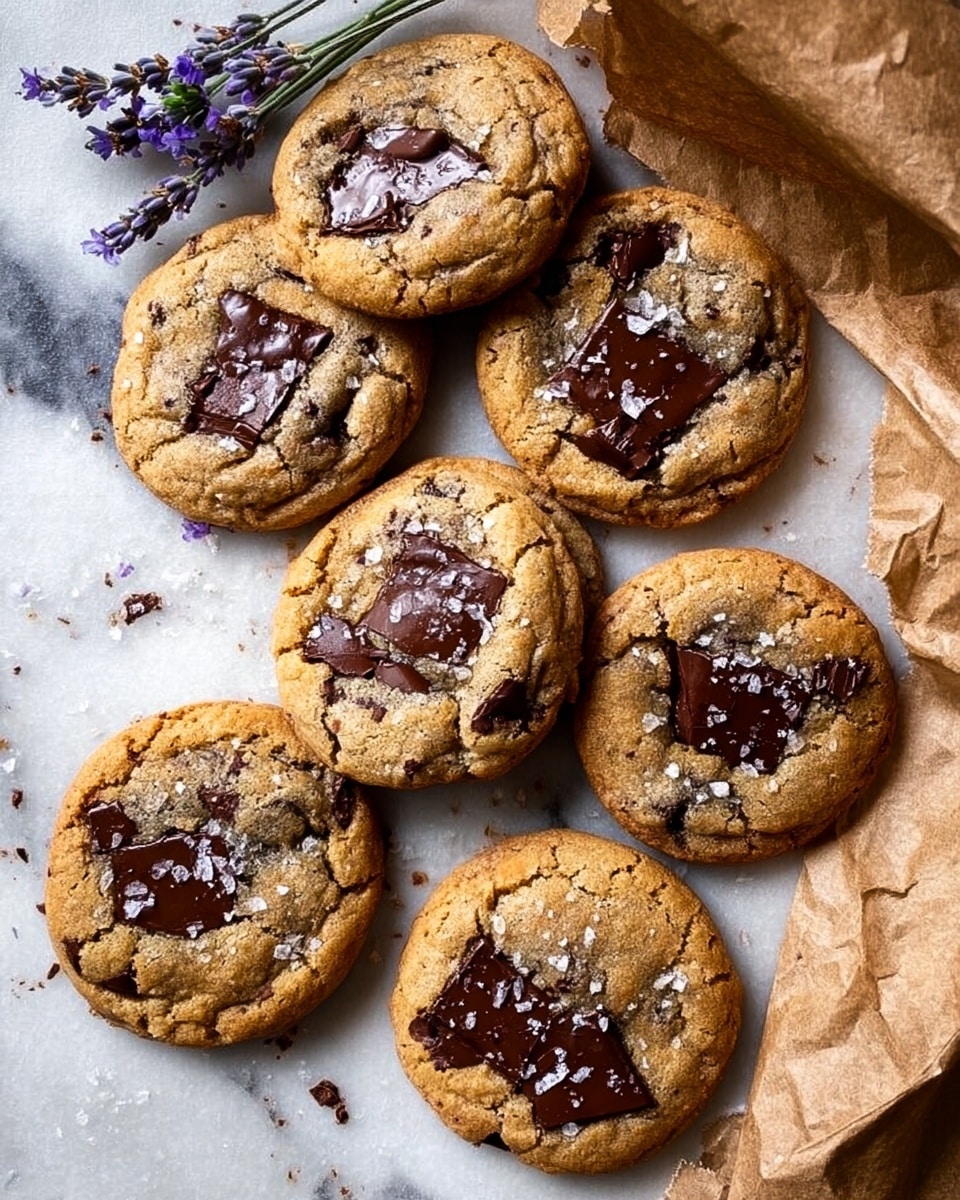
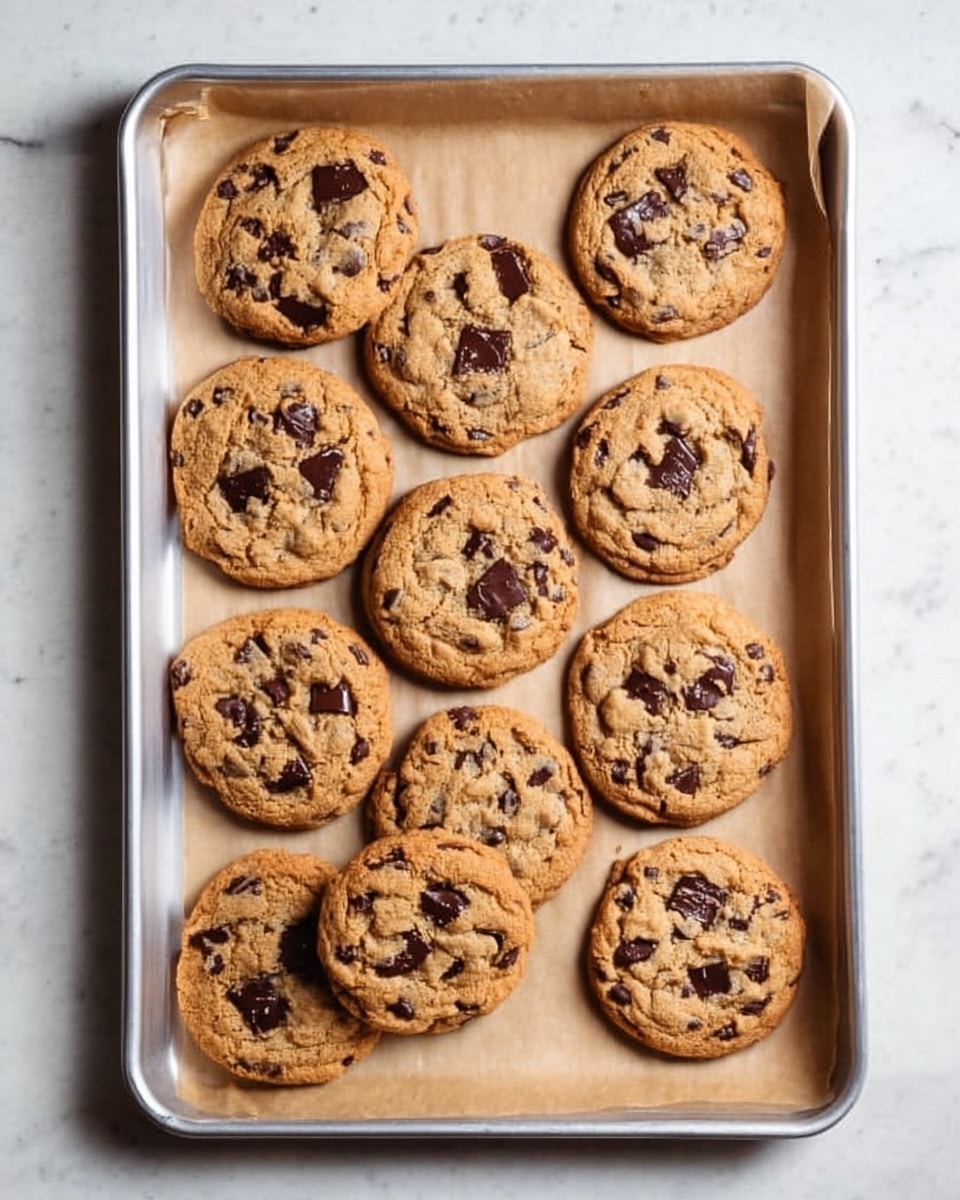
Oh, let me tell you why this Brown Butter Chocolate Chip Cookies Recipe has become a staple in my kitchen! There’s something incredibly magical about the depth of flavor brown butter brings to these cookies—it’s nutty, rich, and just slightly caramelized, making every bite feel indulgent without being overly sweet. You’ll find these cookies perfect for cozy evenings, sharing with friends, or just treating yourself when you want something truly special.
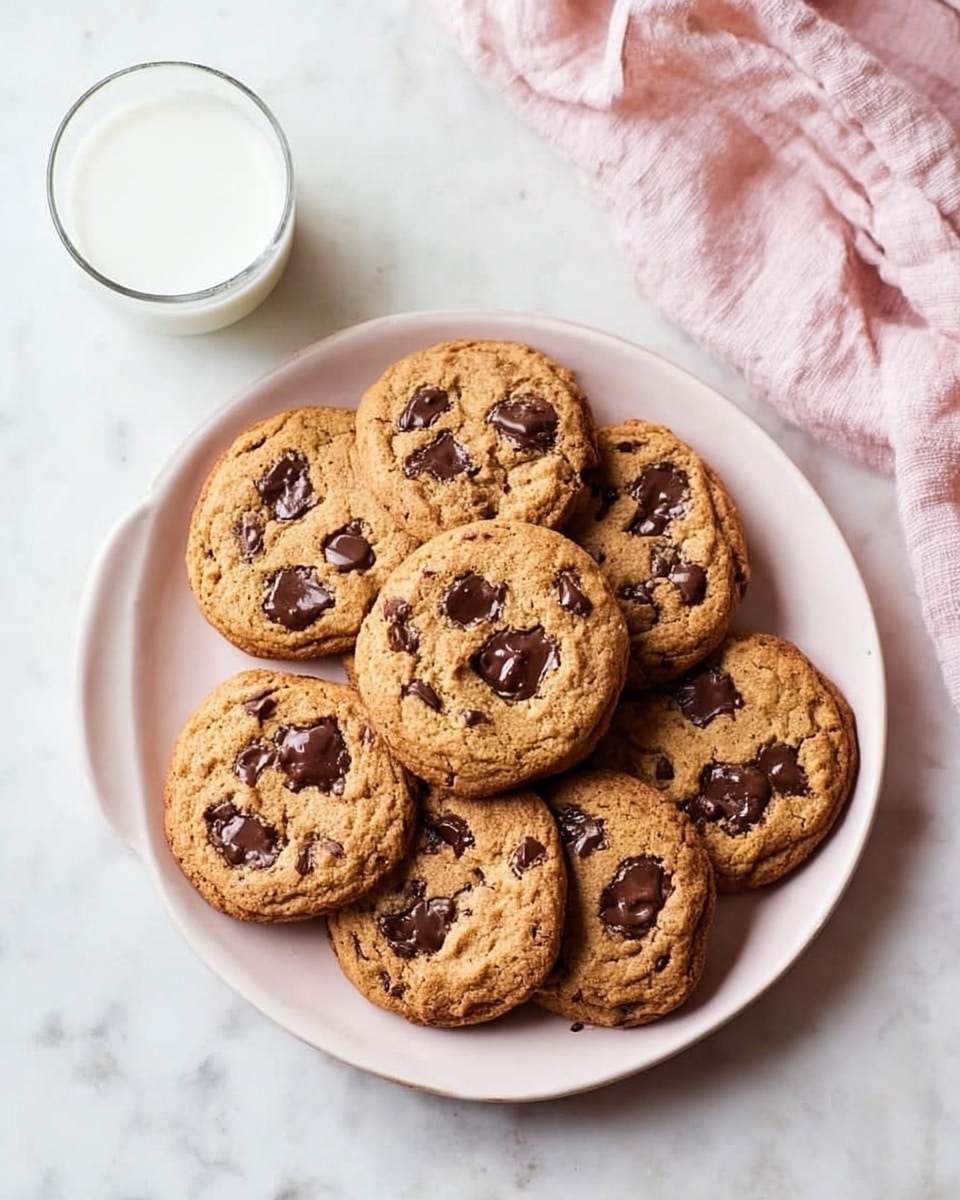
When I first tried this Brown Butter Chocolate Chip Cookies Recipe, I was hooked instantly. It’s not just about the flavor though—the texture hits all the right notes too, with crispy edges and soft, gooey centers that hold onto chunky chocolate bits just right. I promise, once you try making these, you’ll keep coming back because they’re that comforting and reliable.
Why You’ll Love This Recipe
- Deep, Irresistible Flavor: Brown butter adds a nutty, caramel-like richness you won’t get from just regular melted butter.
- Perfect Texture Every Time: Crispy edges with tender, melty centers—exactly what chocolate chip cookies should be.
- Made for Chocolate Lovers: This recipe uses both bittersweet chunks and semi-sweet chips for dynamic chocolate bliss in every bite.
- Simple Yet Special: It’s easy to make, but your family and guests will swear it’s from a gourmet bakery.
Ingredients You’ll Need
These ingredients come together in harmony to create the ultimate Brown Butter Chocolate Chip Cookies Recipe. From the all-purpose flour doing its part for structure, to brown butter and sugars delivering rich flavor—you’ll love how straightforward these pantry staples turn into something extraordinary.
- All-purpose flour: I highly recommend weighing your flour for cookie success; too much flour can make them dry or too thick.
- Baking soda: Helps the cookies rise and develop that perfect texture.
- Kosher salt: Balances sweetness and enhances the butter’s nuttiness.
- Unsalted butter: We brown this right from the fridge, so don’t soften beforehand—getting just the right browning is key.
- Water: Added to brown butter to help cool it down and keep the texture just right.
- Brown sugar: Adds moisture and caramel flavor—don’t skip it!
- White sugar: Gives necessary sweetness and helps with crisp edges.
- Eggs and egg yolk: Eggs provide moisture and structure; the extra yolk gels the dough for chewiness.
- Vanilla extract or vanilla paste: Elevates all the sweet flavors.
- Bittersweet chocolate: Chopped from a bar to get those melty pockets of deep chocolate goodness.
- Semi-sweet chocolate chips: Offers little bursts of sweet chocolate in every bite.
- Walnuts (optional): Adds a lovely crunch and earthiness, though they’re totally optional.
Variations
I love playing around with this Brown Butter Chocolate Chip Cookies Recipe to suit different moods or occasions, and I encourage you to do the same! It’s super flexible—don’t be afraid to swap out nuts or add some fun mix-ins.
- Nut-Free Version: Simply omit the walnuts if you want allergy-friendly cookies; they’re still deliciously rich and chocolate-packed.
- Adding Cinnamon or Espresso: I’ve added a pinch of cinnamon or a teaspoon of instant espresso powder for a lovely twist that complements the brown butter beautifully.
- Using Different Chocolates: Try white chocolate or milk chocolate chips for a sweeter profile—my family sometimes requests this for special treat days.
- Chewy or Crisp: If you want chewier cookies, chill the dough longer or add a bit more egg yolk; for crisper ones, flatten dough balls before baking.
How to Make Brown Butter Chocolate Chip Cookies Recipe
Step 1: Brown the butter to develop that delicious nutty flavor
This is the star of the show! Melt your cold, unsalted butter over medium-low heat in a saucepan. Don’t walk away because it foams and bubbles pretty fast. Stir frequently with a heatproof whisk or spatula—first it will foam, then the milk solids start to brown, shifting from pale yellow to a rich golden brown. Keep an eagle eye on it because it can go from perfect to burnt in seconds. When you see it’s a deep golden brown with toasty aroma, immediately pull it off the heat and stir a few more times. Then pour it into a large bowl and whisk in the water. This cools the butter slightly and makes it easier to mix later. Let it sit around 10 minutes to cool enough before adding anything else.
Step 2: Mix sugars, eggs, and vanilla into your brown butter
Once your brown butter has cooled to just warm (not hot, or it’ll melt the chocolate later), whisk in your brown sugar and white sugar until well combined. Next, add the two eggs plus the extra egg yolk, along with vanilla extract or paste. I like to whisk everything until it’s smooth and shiny—this helps with that melt-in-your-mouth texture.
Step 3: Combine your dry ingredients and then fold everything together
In another bowl, mix your flour, baking soda, and salt together, so they’re evenly distributed. Pour the wet brown butter mixture into your dry ingredients and stir until just combined. Don’t overmix here because you want to keep those cookies tender. Last but not least, carefully fold in the chopped bittersweet chocolate, chocolate chips, and walnuts if you’re using them. These chocolate chunks add so much texture and flavor—it’s what makes these cookies stand out.
Step 4: Chill your dough before baking
Here’s a pro tip I learned: chilling the dough in the fridge for about an hour really helps the cookie flavors develop better and stops the cookies from spreading too thin when baked. It’s worth the wait, trust me! I usually cover the bowl with plastic wrap or transfer dough balls onto a tray for chilling.
Step 5: Bake to perfection
Preheat your oven to 350°F. Scoop out 2-ounce balls of dough and gently roll them between your palms. Place them on a parchment-lined baking sheet with about 4 inches between each ball to give them room to spread. Bake for 8 minutes, then (this is a little optional trick I picked up) you can gently reshape or slightly flatten each cookie with the back of a spoon or your fingers—this helps them spread evenly. Rotate the pan for even baking and pop them back in for 3 to 4 more minutes, until edges are golden brown but centers are still soft. Let them cool on the sheet for a few minutes before moving to a wire rack. You’ll be amazed at how perfectly chewy and rich these turn out!
Pro Tips for Making Brown Butter Chocolate Chip Cookies Recipe
- Watch the Butter Carefully: Brown butter changes color quickly—stir every few seconds once it starts foaming to avoid burning.
- Weigh Your Flour: I learned this the hard way—too much flour makes the cookies cakey, not chewy, so use a kitchen scale whenever possible.
- Chill the Dough: Don’t skip this! It improves flavor and controls spread for perfectly shaped cookies.
- Use Good Quality Chocolate: The difference in taste between chocolate bars and cheap chips is huge—go for quality chocolate bars for the best results.
How to Serve Brown Butter Chocolate Chip Cookies Recipe
Garnishes
I often sprinkle just a tiny pinch of flaky sea salt on warm cookies right after baking—it amps up the chocolate flavor and adds a lovely contrast to the sweetness. Another favorite is to serve them with a light dusting of powdered sugar for a festive touch when guests come over.
Side Dishes
These cookies shine best with a cold glass of milk or a hot cup of coffee or tea. On special occasions, I like pairing them with vanilla ice cream to make quick and easy ice cream sandwiches—everyone adores that combo!
Creative Ways to Present
For parties or gifting, I like stacking cookies with parchment paper between each and wrapping them in a rustic ribbon or cello bag with a cute tag. For kids’ birthdays, using colorful sprinkles pressed lightly into the dough balls before baking turns these into little festive treats. Presentation is all about fun and making them irresistible!
Make Ahead and Storage
Storing Leftovers
I store leftover cookies in an airtight container at room temperature to keep them chewy for several days. If they start to firm up, just pop a slice of bread in the container—the cookies soak up moisture and stay softer longer!
Freezing
I usually scoop and freeze dough balls separately on a baking sheet, then transfer to a freezer-safe bag once frozen solid. This way, you can bake fresh cookies straight from the freezer whenever the craving hits—with no extra prep.
Reheating
Leftover cookies reheat beautifully in a warm oven at 300°F for 5 minutes or so. This refreshes their chewy texture and melts the chocolate just a bit again. Be careful not to overheat or they will dry out.
FAQs
-
Can I use salted butter instead of unsalted butter for the Brown Butter Chocolate Chip Cookies Recipe?
You can absolutely use salted butter, but reduce the amount of added kosher salt in the recipe slightly to avoid over-salting. Using unsalted butter gives you full control over the saltiness, but salted butter will still yield delicious cookies.
-
Why do we add water to the brown butter?
The water cools the browned butter quickly and stops the cooking process, preventing it from becoming too dark or burnt. It also makes the mixture easier to incorporate with the sugars and eggs later.
-
Can I skip chilling the dough?
While it’s possible to skip chilling, I don’t recommend it. Chilling strengthens the dough, helps develop flavor, and prevents excessive spreading during baking which can result in thin, crispy cookies instead of tender ones.
-
How do I make my Brown Butter Chocolate Chip Cookies crispier?
To get crispier cookies, you can flatten the dough balls before baking and bake a minute or two longer, watching carefully so they don’t burn. Reducing the brown sugar slightly can also help produce a crisper texture.
-
What’s the best way to store leftover cookies?
Store them in an airtight container at room temperature with a slice of bread included to keep them soft. For longer storage, freeze the baked cookies in a sealed container and thaw them at room temperature before eating.
Final Thoughts
This Brown Butter Chocolate Chip Cookies Recipe truly feels like a little slice of comfort baked into every bite. I love how this recipe combines simplicity with those rich, deep flavors that make people ask for seconds (and thirds!). Give it a go—you’ll enjoy the process and be rewarded with cookies that taste like you spent all day baking, even on your busiest days. Trust me, once you try it, you’ll want to keep this recipe handy forever.
Print
Brown Butter Chocolate Chip Cookies Recipe
- Prep Time: 15 minutes
- Cook Time: 30 minutes
- Total Time: 1 hour 45 minutes
- Yield: 24 cookies (2 dozen)
- Category: Dessert
- Method: Baking
- Cuisine: American
Description
These Brown Butter Chocolate Chip Cookies feature rich, nutty flavors from browned butter, combined with melted and chip chocolate, walnuts, and a perfect balance of sugars, resulting in irresistibly soft and chewy cookies with crisp golden edges. Chilling the dough enhances the flavor and texture, making them a decadent treat perfect for any occasion.
Ingredients
Dry Ingredients
- 3 (360g) cups all-purpose flour
- 1 teaspoon baking soda
- 1 teaspoon kosher salt
Wet Ingredients
- 1 cup unsalted butter (straight from the fridge, to be browned)
- 2 teaspoons water
- 1 1/2 cups brown sugar
- 1/2 cup white sugar
- 2 large whole eggs
- 1 large egg yolk
- 2 teaspoons vanilla extract or vanilla paste
Mix-ins
- 3 ounces bittersweet chocolate, chopped (from a bar)
- 6 ounces semi-sweet chocolate chips
- 1/3 cup finely chopped walnuts
Instructions
- Combine Dry Ingredients: In a large bowl, whisk together the flour, baking soda, and kosher salt until evenly mixed.
- Brown the Butter: Place the cold unsalted butter in a medium saucepan over medium-low heat. Stir continuously with a silicone whisk as it melts and foams. Watch carefully for it to change from pale yellow to light brown, then continue stirring until it reaches a deep golden brown color. Quickly remove from heat and stir a few more times to prevent burning.
- Cool Brown Butter: Immediately pour the browned butter into a large mixing bowl and whisk in 2 teaspoons of water. Let the mixture cool for about 10 minutes. This cooling prevents the chocolate added later from melting prematurely.
- Add Sugars and Eggs: Whisk the brown and white sugars into the browned butter until smooth. Then add the whole eggs, egg yolk, and vanilla extract, whisking again until fully incorporated.
- Combine Wet and Dry: Pour the wet mixture into the bowl of dry ingredients and gently mix until just combined, being careful not to overmix.
- Fold in Chocolate and Walnuts: Fold in the chopped bittersweet chocolate, semi-sweet chocolate chips, and walnuts evenly throughout the dough.
- Chill the Dough: Cover and refrigerate the dough for 1 hour to firm up and develop flavor.
- Preheat Oven and Prepare Baking Sheet: Preheat your oven to 350°F (175°C). Line baking sheets with parchment paper to prevent sticking.
- Shape Cookies: Scoop out 2-ounce portions of dough and roll between your palms into balls. Space them 4 inches apart on the prepared baking sheets to allow room for spreading.
- Bake and Shape: Bake the cookies for 8 minutes, then remove them from the oven and optionally reshape the dough balls with a spatula or spoon for a flatter appearance. Rotate the baking sheet for even baking.
- Finish Baking: Return the cookies to the oven and bake for an additional 3 to 4 minutes, until edges are lightly golden brown but centers are still soft.
- Cool and Serve: Remove from oven and let the cookies cool on the baking sheet for a few minutes before transferring to a wire rack to cool completely.
Notes
- Make Ahead: Dough can be made ahead, portioned into balls, and refrigerated for up to 3 days. Bake directly from the fridge for best results.
- Flour Weight: For consistent texture and avoid domed cookies, weigh your flour precisely as flour quantity affects cookie appearance dramatically.
- Freezing Dough: Cookie dough balls can be frozen for longer storage. Thaw before baking or bake directly from frozen with adjusted baking time.
- Equipment: Recommended tools include an OXO medium cookie scoop, baking sheets lined with parchment paper, a stand mixer or hand mixer, and silicone spatulas for folding.
Nutrition
- Serving Size: 1 cookie
- Calories: 124 kcal
- Sugar: 21 g
- Sodium: 21 mg
- Fat: 7 g
- Saturated Fat: 4 g
- Unsaturated Fat: 3 g
- Trans Fat: 0 g
- Carbohydrates: 18 g
- Fiber: 1 g
- Protein: 2 g
- Cholesterol: 32 mg

