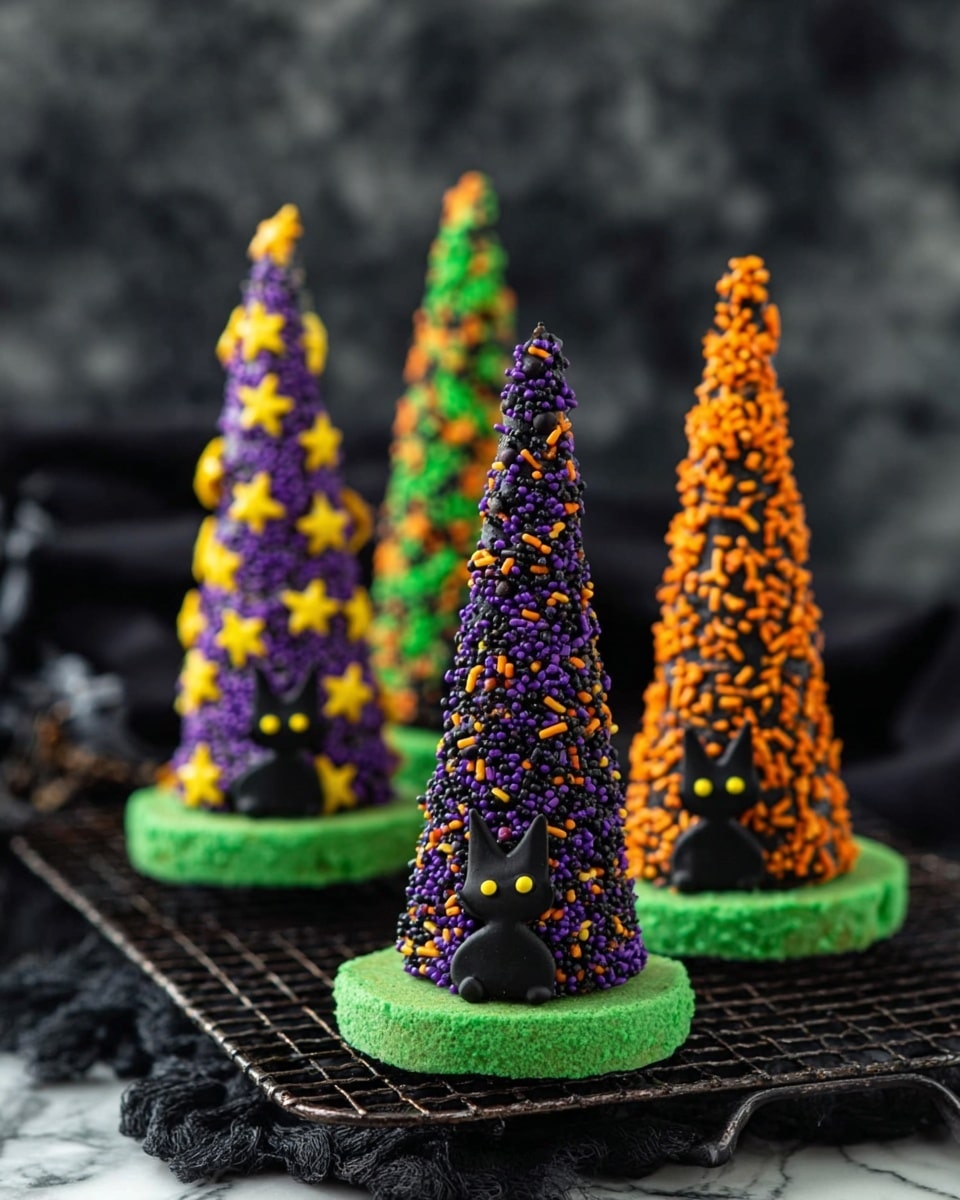
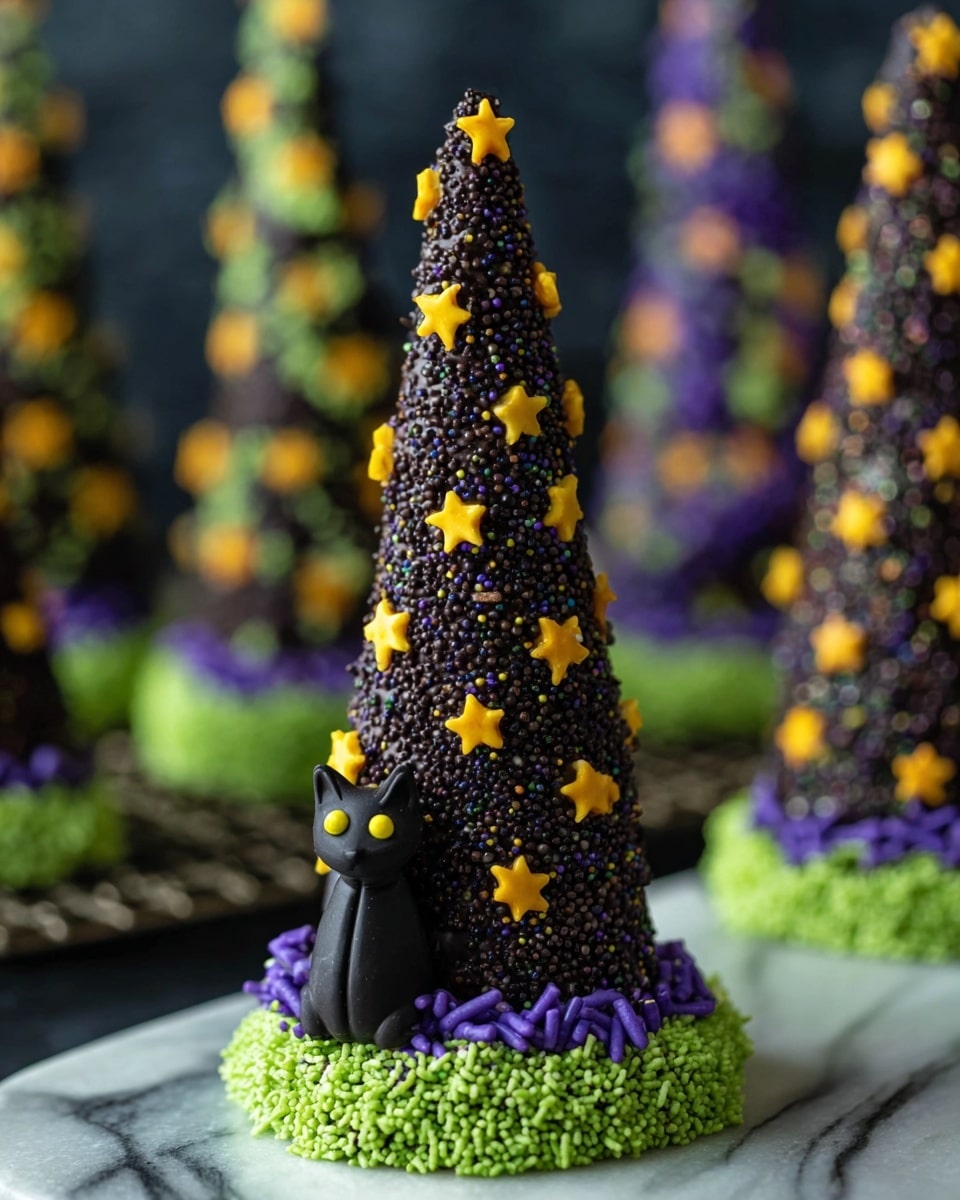
If you’re looking for a fun and festive treat that’s as delightful to make as it is to eat, you’re going to love this Candy-filled Witch Hats Recipe. These charming little hats are perfect for Halloween parties or just a cozy night in with the kids, combining crunchy waffle cones, rich chocolate, and a surprise candy center. Trust me, once you try this recipe, your family will be begging you to make it every year!
Why You’ll Love This Recipe
- Super Easy to Make: You don’t need to be a pro baker to whip these up, and I promise they look impressive every single time.
- Fun Surprise Inside: The candy-filled center adds an exciting twist that’s always a hit with kids and adults alike.
- Customizable Decorations: Whether you want spooky sprinkles or spooky cat decorations, you can let your creativity shine.
- Perfect for Parties: They’re bite-sized, festive, and transport well—ideal for sharing with friends or coworkers.
Ingredients You’ll Need
These ingredients come together to create the perfect balance of crisp, rich, and sweet. Make sure your chocolate melting wafers are good quality so you get that smooth, glossy finish every time.
- Waffle Ice Cream Cones: Look for sturdy cones that won’t crumble when dipped in chocolate.
- Chocolate Melting Wafers: These melt easily and coat the cones beautifully—don’t substitute regular chocolate bars here.
- Chocolate Cookies: Choose round chocolate cookies that fit nicely on top to seal the hats.
- Green Sour Belts: These add a punch of color and a tart contrast—perfect for the witchy look.
- Black Cat Icing Decorations: They add personality and a spooky vibe that really brings this recipe to life.
- Halloween Sprinkles: Use colorful sprinkles that suit your style, from classic orange and black to neon colors.
- Candy: Pick small candies that fit inside the cone without spilling out—M&Ms, mini gummies, or any bite-sized Halloween treats work great.
Variations
I love making these Candy-filled Witch Hats my own by switching up the candies and decorations. It’s a recipe that’s all about playful creativity, so don’t hesitate to experiment!
- Variation: When I first tried swapping green sour belts for orange gummy worms, it gave a whole new fun twist—and my kids loved it!
- Dietary Adjustments: Use dairy-free chocolate wafers to make these hats vegan-friendly without losing any of that chocolaty magic.
- Seasonal Changes: For a non-Halloween twist, try red and green sprinkles and fill with peppermint candies for Christmas.
- Difficulty Levels: If you want an easier version, skip decorating the cones before filling and just focus on the candy surprises.
How to Make Candy-filled Witch Hats Recipe
Step 1: Dip and Decorate the Cones
Start by melting your chocolate wafers according to the package instructions—this usually means heating them gently in short bursts so they don’t burn. I use a spatula to coat each waffle cone with chocolate, smoothing it out and flicking off any excess. This step is where your witch hats really start to take shape! Once coated, add your festive Halloween sprinkles on the outside while the chocolate’s still wet, then set the cones upside down on parchment paper to set. This not only gives a pretty finish but also reinforces the cone’s structure.
Step 2: Add Sour Belt ‘Hat Bands’ and Decorations
After the chocolate has slightly set, spread a little more chocolate along the bottom edge of the cone and carefully wrap your green sour belts around like a hat band. This is where those little black cat icing decorations come in handy—just dab a bit of chocolate on the back and place them on the bands for that extra spooky detail. I discovered this trick because without the ‘glue’ of melted chocolate, the belts wouldn’t stick properly.
Step 3: Fill with Candy and Seal the Hat
Fill each cone with your chosen Halloween candies and sprinkles. I recommend using smaller candy pieces to avoid overflowing and making a mess. Once filled, use a bit of melted chocolate to coat the bottom of the cone and carefully press a chocolate cookie on top. Flip the cone over and let it sit until the chocolate hardens, creating a delicious seal that holds all the goodies inside.
Pro Tips for Making Candy-filled Witch Hats Recipe
- Chocolate Tempering: Warm your chocolate wafers gently and stir often to keep the coating shiny and smooth.
- Use Parchment Paper: Lining your tray with parchment helps the cones set perfectly and keeps cleanup easy.
- Secure Sour Belts Quickly: Apply the melted chocolate right before wrapping the sour belts so it acts like a glue.
- Seal with Care: When sealing with the cookie, gently press—too hard can crack the cookie or spill candy inside.
How to Serve Candy-filled Witch Hats Recipe
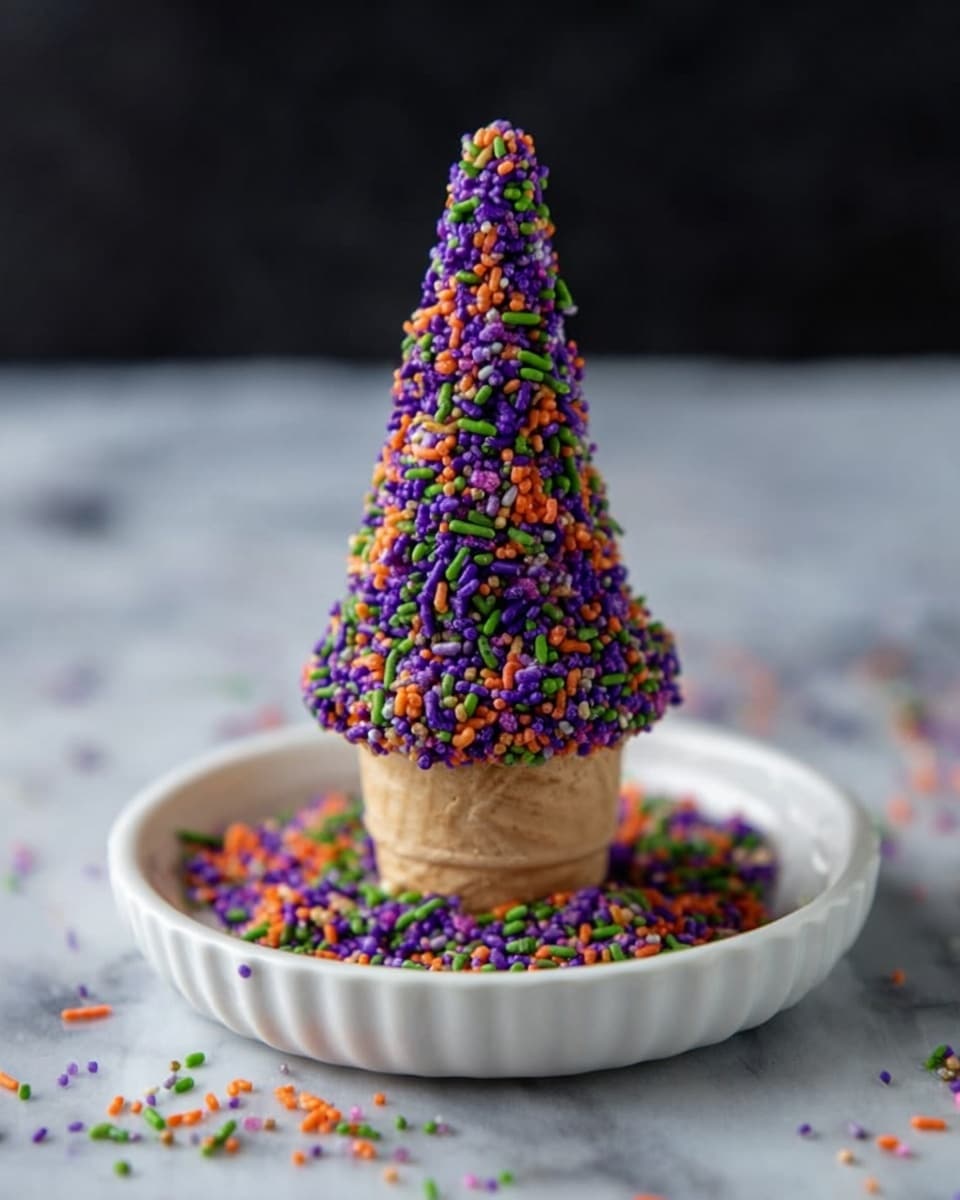
Garnishes
I love adding an extra sprinkle of Halloween themed sugar on top right before serving—it just makes everything pop! Sometimes I dust the finished hats lightly with edible glitter for a magical touch that really wows guests.
Side Dishes
These witch hats are sweet and crunchy bite-sized treats that pair wonderfully with a warm cup of apple cider or hot chocolate. For a party, I like to serve them alongside mini pumpkin muffins or caramel popcorn for an extra festive spread.
Creative Ways to Present
For Halloween parties, I’ve arranged these candy-filled witch hats standing upright in a deep bowl filled with black beans (clean, dry ones!) so the hats stay upright and look like a magical forest of hats. It’s a fun way to display them and makes grabbing one an easy, charming experience for guests.
Make Ahead and Storage
Storing Leftovers
I keep leftover Candy-filled Witch Hats in an airtight container at room temperature, and they usually last for about 3 days. Because of the chocolate coating, they stay crisp and fresh—no soggy cones here!
Freezing
Freezing is a bit tricky with the candy fillings since some candies don’t thaw well, but if you wrap each hat individually in plastic wrap and place them in an airtight container, they can last up to a month. Just thaw them at room temperature before serving to avoid condensation ruining the crunch.
Reheating
Since these are best served at room temperature, there’s no need to reheat. Just unwrap and enjoy! If your chocolate has dulled a bit, a quick blast from a warm oven (about 200°F for a minute or two) can help, but be careful not to melt the candy inside.
FAQs
-
Can I use regular chocolate instead of melting wafers for the Candy-filled Witch Hats Recipe?
While you can try regular chocolate, melting wafers are specially formulated to melt smoothly without seizing or needing tempering, which makes coating the cones much easier and results in a shinier finish. If you use regular chocolate, make sure to temper it properly or add a little vegetable oil to help it melt smoothly.
-
What kind of candies work best inside the witch hats?
Small, bite-sized candies like mini M&Ms, gummy bears, or mini chocolate chips work best to fill the cones without spilling. Avoid sticky or large candies that might make filling or sealing tricky.
-
How long do Candy-filled Witch Hats last?
Stored properly in an airtight container at room temperature, they’re best enjoyed within 3 days. After that, the waffle cones can start to lose their crispness.
-
Can I make these ahead of time for a party?
Absolutely! They hold up well for several days when stored in a cool, dry place. Just make sure to assemble them close enough to your party day so the cones stay fresh and crunchy.
Final Thoughts
I absolutely love how this Candy-filled Witch Hats Recipe combines simplicity with a dash of whimsy. Every year, I find myself pulling out this recipe to bring some magic to Halloween, and it never fails to delight both kids and adults. It’s an easy project that makes you feel like a crafty wizard, and the best part is sharing these sweet surprises with the people you care about. Give it a try—you’ll see why it’s become one of my favorite festive treats to make and share!
Print
Candy-filled Witch Hats Recipe
- Prep Time: 20 minutes
- Cook Time: 15 minutes (including chocolate setting time)
- Total Time: 35 minutes
- Yield: 12 witch hats
- Category: Dessert
- Method: No-Cook
- Cuisine: American
Description
These whimsical Candy-filled Witch Hats are a festive Halloween treat perfect for parties and celebrations. Made with waffle ice cream cones dipped in rich melted chocolate, decorated with sprinkles and green sour belts to resemble witch hats, and filled with an assortment of Halloween candies. Topped with a chocolate cookie base, these hats are as fun to make as they are to eat.
Ingredients
Cones and Coating
- 12 waffle ice cream cones
- 12 oz chocolate melting wafers
Decorations
- Halloween sprinkles
- 12 green sour belts
- 12 black cat icing decorations (optional)
Topping
- 12 chocolate cookies
Filling
- Assorted Halloween candy
Instructions
- Melt the Chocolate: Melt the 12 oz of chocolate melting wafers according to the package directions, ensuring the chocolate is smooth and free of lumps for easy coating.
- Coat the Cones: Using a spatula, cover each waffle ice cream cone entirely with the melted chocolate, smoothing the surface and removing any excess for a neat finish.
- Decorate the Cones: While the chocolate coating is still wet, decorate the cones with Halloween sprinkles. Place the cones upright on a parchment-lined baking sheet to set.
- Attach the Sour Belts: Apply a small amount of melted chocolate to the bottom edge of each cone and secure a green sour belt around it to mimic the hatband. Optionally, add a black cat icing decoration to the front of each cone for extra spookiness.
- Fill the Cones: Once the decorations are set but the chocolate is still slightly tacky, fill each cone carefully with assorted Halloween candies and additional sprinkles for a festive look.
- Seal with a Cookie Base: Cover the bottom opening of the cone with melted chocolate, being careful not to let chocolate drip inside the cone. Immediately press a chocolate cookie onto the chocolate seal to create the base of the witch hat.
- Set and Store: Flip the cones upside down to allow the chocolate bases to solidify completely. Once set, transfer the candy-filled witch hats to an airtight container until ready to serve.
Notes
- These candy-filled witch hats are a fun and surprising Halloween treat, combining the flavors of chocolate, sour belts, cookies, and festive candies.
- Using waffle cones makes for an easy, edible structure that perfectly mimics a witch’s hat shape.
- Ensure the chocolate is fully melted and smooth for easier coating and better adhesion of decorations.
- You can customize the candy fillings according to your preference or dietary restrictions.
- Store in a cool, dry place to prevent melting and keep the cones crisp.
Nutrition
- Serving Size: 1 witch hat
- Calories: 280
- Sugar: 22g
- Sodium: 70mg
- Fat: 14g
- Saturated Fat: 8g
- Unsaturated Fat: 5g
- Trans Fat: 0g
- Carbohydrates: 34g
- Fiber: 2g
- Protein: 3g
- Cholesterol: 5mg

