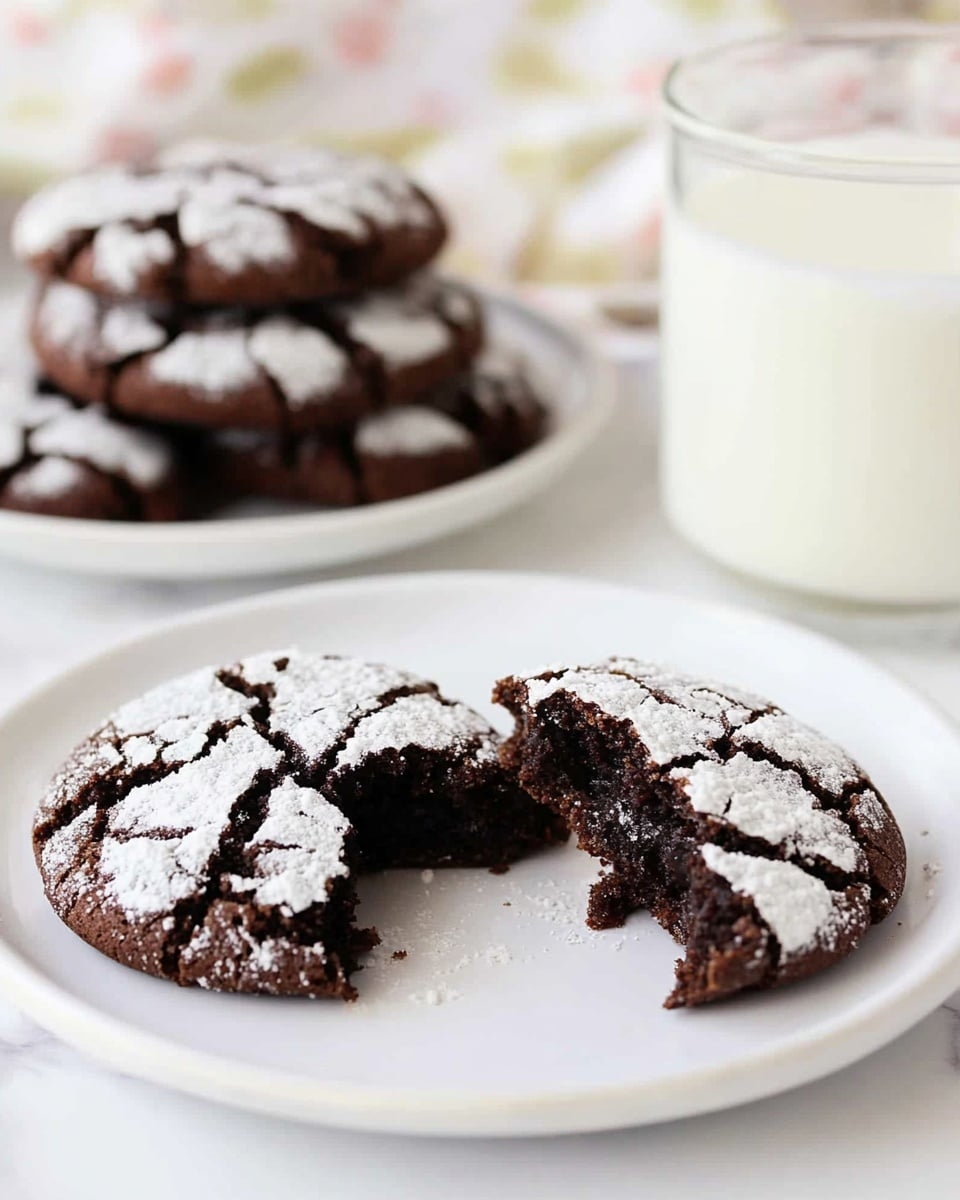
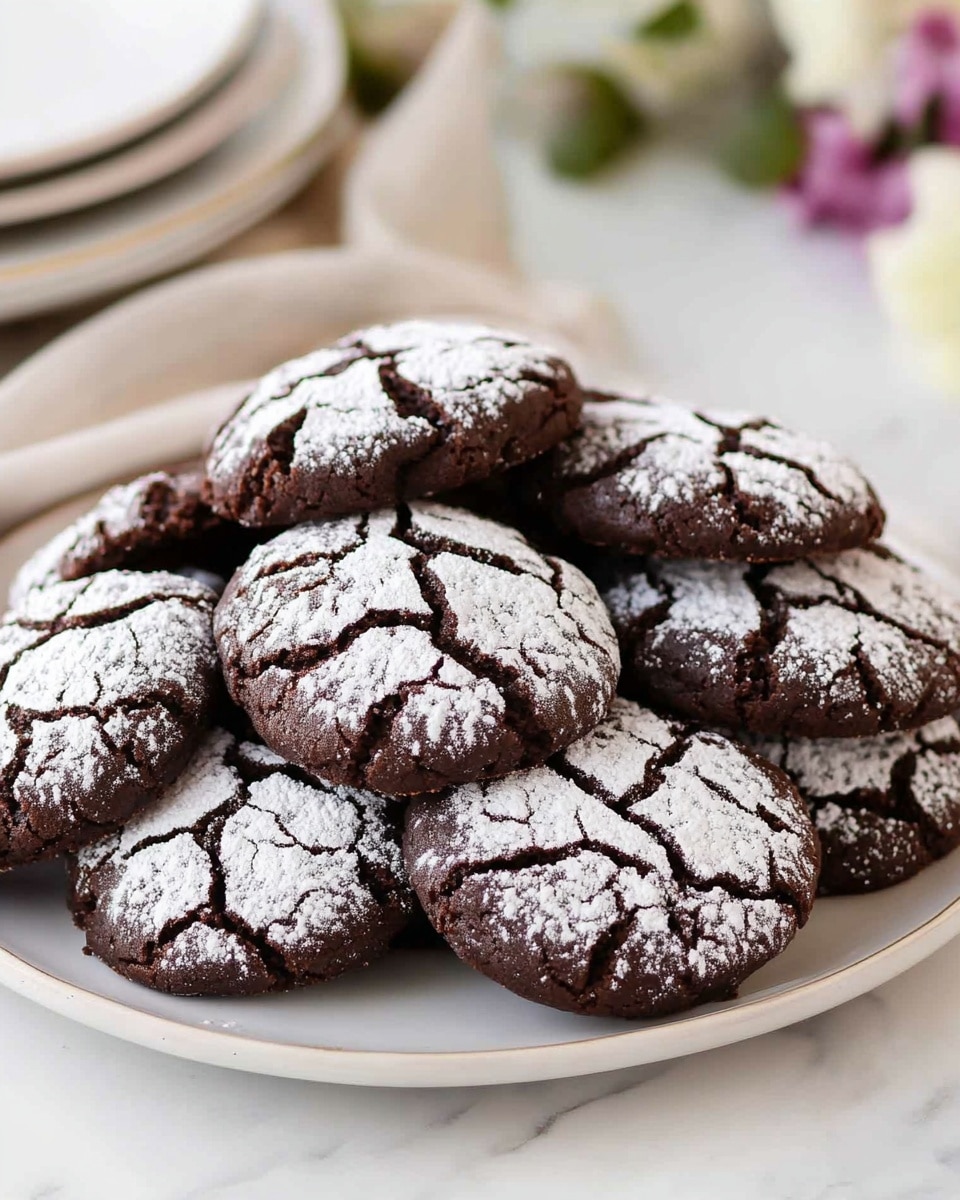
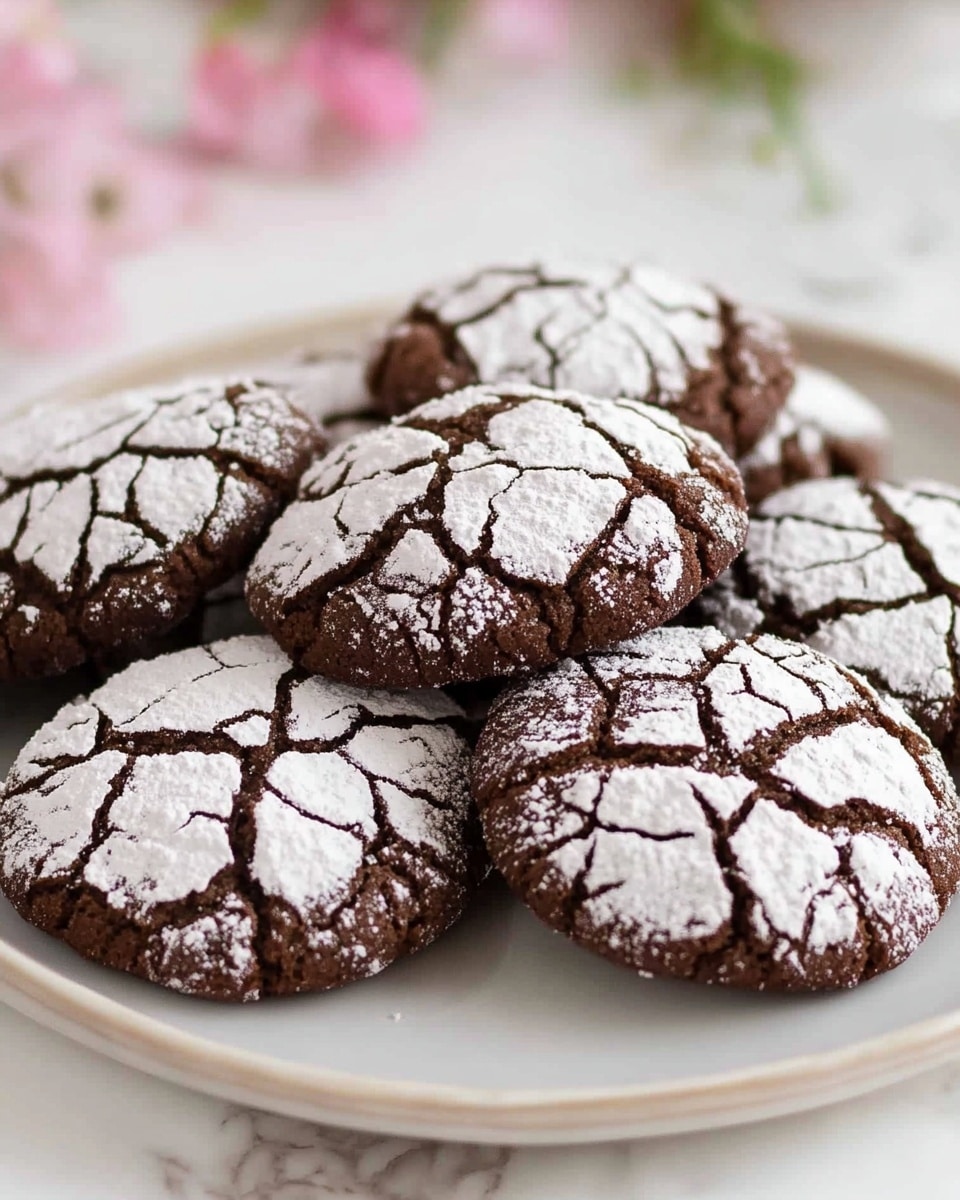
I absolutely love how this Chocolate Crinkle Cookies Recipe turns out every single time — fudgy on the inside with that perfect crackly powdered sugar crust on the outside. When I first tried this recipe, I was amazed at how simple ingredients come together to create something so visually stunning and irresistibly delicious. Whether you’re baking for a holiday party or just craving a cozy treat on a chilly afternoon, these cookies always hit the spot.
You’ll find that this Chocolate Crinkle Cookies Recipe is not only straightforward to follow but also super forgiving, making it ideal if you’re new to baking or just want a dependable favorite. The best part? You can make the dough ahead and stash it in the fridge, which means you can whip up fresh batches anytime the cookie craving hits. I love sharing this recipe with friends because it’s a guaranteed crowd-pleaser — and it often sparks fun conversations over the “secret” to those gorgeous crackled tops.
Why You’ll Love This Recipe
- Simple Ingredients: Made with pantry staples you probably already have, making it easy to bake anytime.
- Perfect Texture: Fudgy centers with crackled, powdered sugar-coated tops that melt in your mouth.
- Make-Ahead Friendly: Dough chills overnight, letting you spread out your baking without stress.
- Versatile Flavors: You can tweak extracts or add espresso for a flavor kick that makes this recipe uniquely yours.
Ingredients You’ll Need
Each ingredient in this Chocolate Crinkle Cookies Recipe plays a key role in creating that classic rich chocolate flavor and the chewy, tender texture you’ll fall in love with. Choosing the right cocoa powder and letting the dough chill properly will make a big difference.
- Unsweetened Cocoa Powder: Opt for a good quality cocoa powder for the deepest chocolate flavor.
- Granulated Sugar: Provides sweetness and helps with the chewiness of the cookie.
- Vegetable Oil: Keeps the cookies moist and tender — I wouldn’t swap it lightly.
- Large Eggs: Make sure they’re at room temperature to mix in smoothly without cooling down the batter.
- Vanilla Extract: Just a couple of teaspoons really lift all the chocolate notes.
- All-Purpose Flour: The base of your cookie structure; measure carefully for best results.
- Baking Powder: Gives a little lift while still keeping the fudgy center.
- Salt: Balances the sweetness and intensifies the chocolate flavor.
- Powdered Sugar: For coating — it creates that signature crackled look and adds a touch of sweetness on the outside.
Variations
I like to play around with this Chocolate Crinkle Cookies Recipe depending on the season or my mood — and honestly, the variations only make the cookie better. Don’t hesitate to add your personal twist, whether it’s a dash of extract or some mix-ins to surprise your taste buds.
- Peppermint Extract: I first added this during the holidays and my family went crazy for the subtle minty chocolate flavor.
- Orange Extract: A splash of orange zest or extract brightens up the deep cocoa richness beautifully.
- Espresso Powder: Adding a teaspoon amps up the chocolate flavor without making it taste like coffee — it’s a game changer.
- Gluten-Free Flour: I successfully swapped in a gluten-free blend to cater to friends with sensitivities and still got great results.
How to Make Chocolate Crinkle Cookies Recipe
Step 1: Mix Sugar, Cocoa, and Oil Until Shiny
Start by combining the granulated sugar, cocoa powder, and vegetable oil in your mixing bowl. Using a hand mixer or stand mixer fitted with the paddle attachment, beat on medium speed until the mixture looks smooth and glossy. This step is where the cookie’s rich chocolate flavor begins to shine, so take a moment to really blend everything well.
Step 2: Add Eggs and Vanilla
Next, add the eggs one at a time, beating well after each addition. This helps incorporate air for a lighter texture. Then beat in the vanilla extract — I always use pure vanilla because you can really taste the difference. The batter should be silky and well combined at this point.
Step 3: Fold in Dry Ingredients
In a separate bowl, whisk together the flour, baking powder, and salt. Slowly add these dry ingredients to the wet mixture, mixing on low speed just until everything comes together — don’t overmix here or your cookies will turn out tough. The dough will be thick and slightly sticky, which is totally normal for this recipe.
Step 4: Chill the Dough
Cover the dough tightly with plastic wrap and refrigerate for at least 4 hours or overnight. Trust me, this chilling step is crucial — it firms up the dough so you can roll it easily and ensures your cookies bake with that perfect crinkle pattern rather than spreading flat. It’s a little patience that pays off big time.
Step 5: Scoop, Roll, and Coat with Powdered Sugar
Once your dough is chilled, preheat the oven to 350°F (175°C) and line your baking sheets with parchment paper. Scoop dough using a small ice cream scoop or tablespoon, roll it into approximately 1-inch balls, and coat each ball generously in powdered sugar. Only coat as many balls as fit on your baking sheets to make sure the sugar doesn’t melt into the dough too soon.
Step 6: Bake Until Crinkled and Puffed
Bake the cookies for 10 to 12 minutes. You’re looking for firm edges and a puffed, slightly wet center. Once out of the oven, let the cookies cool on the baking sheet for a few minutes before transferring to a wire rack. Don’t worry if they deflate in the middle — that fudgy center is exactly where the magic happens!
Pro Tips for Making Chocolate Crinkle Cookies Recipe
- Chilling Is Key: I learned early on that skipping the fridge step yields flat cookies — so don’t rush it!
- Room Temperature Eggs: These blend better for a uniform batter and better texture.
- Roll Quickly: Powdered sugar melts quickly, so roll only as many dough balls as you plan to bake immediately.
- Watch Your Bake Time: Cookies might look slightly underdone in the center but will firm as they cool — trust this to keep them fudgy.
How to Serve Chocolate Crinkle Cookies Recipe
Garnishes
I like to garnish these cookies with a light dusting of extra powdered sugar just before serving to bring out the crackled effect even more. Occasionally, a few chocolate shavings or a tiny sprinkle of flaky sea salt on top adds a lovely balance to the sweetness, especially if you’re sharing with folks who appreciate that sweet-salty contrast.
Side Dishes
These cookies pair beautifully with a steaming cup of coffee, hot chocolate, or even a glass of cold milk — all classics that accentuate that rich cocoa flavor. For a more decadent treat, I sometimes serve them alongside vanilla ice cream or whipped cream, turning it into an indulgent dessert experience.
Creative Ways to Present
During the holidays, I arrange these cookies on a festive platter layered with some fresh mint leaves and bright red cranberries for a pop of color. Wrapping a stack of these cookies with a ribbon also makes an easy and thoughtful homemade gift that my friends always appreciate. You can even sandwich some flavored cream between two cookies for a chocolate crinkle cookie sandwich surprise!
Make Ahead and Storage
Storing Leftovers
When storing leftover cookies, I keep them in an airtight container at room temperature for up to 5 days. Placing a slice of bread inside the container helps keep the cookies soft and chewy — I discovered this trick when my cookies felt a bit dry after day two, and it really works!
Freezing
If you want to freeze for longer storage, the dough balls freeze very well. I portion the dough into balls, freeze them on a tray until solid, then transfer to a freezer-safe bag. You can bake straight from frozen — just add a couple of extra minutes to the bake time. This has saved me when I needed fresh cookies on short notice!
Reheating
To reheat leftover cookies, I pop them in the microwave for about 10 seconds or warm them in a low oven (300°F) for 5 minutes. This revives their soft texture and slightly melty center without drying them out. Just avoid overheating, as it can make them crumbly.
FAQs
-
Can I use butter instead of vegetable oil in this Chocolate Crinkle Cookies Recipe?
You can substitute melted butter for vegetable oil, but it will change the texture slightly. Butter tends to make cookies a bit firmer and less fudgy, so if you want to keep that melt-in-your-mouth softness, I recommend sticking with oil.
-
Why do my chocolate crinkle cookies spread too much?
Usually, spreading is caused by the dough being too warm or not chilled long enough. Make sure to chill the dough at least 4 hours and bake immediately after rolling in powdered sugar. Also, be careful not to over-oil your baking sheet—using parchment paper helps prevent excess spreading.
-
How do I get the cracked look on chocolate crinkle cookies?
The classic crinkle look comes from coating the cold dough balls generously in powdered sugar before baking. As the cookies bake and expand, the sugar cracks on the surface. Chilling the dough is key to prevent spreading and promote cracking.
-
Can this Chocolate Crinkle Cookies Recipe be made gluten-free?
Yes! I’ve successfully swapped in a gluten-free all-purpose flour blend with xanthan gum and gotten great results. Just watch the dough’s consistency and adjust slightly with a tablespoon of flour if needed.
-
How do I know when to take the cookies out of the oven?
Look for cookies with firm edges and a puffed center that still looks slightly wet. They will continue to set as they cool, so removing them at this stage guarantees a fudgy, soft interior.
Final Thoughts
This Chocolate Crinkle Cookies Recipe holds a special place in my heart — it’s one of those recipes I turn to whenever I want to impress without the fuss. The combination of fudgy centers, crackly sugary tops, and rich chocolate flavor always brings smiles around the table. I really hope you’ll try it out and enjoy these cookies as much as my family and I do — it’s like sharing a little love in every bite.
Print
Chocolate Crinkle Cookies Recipe
- Prep Time: 15 minutes
- Cook Time: 10 minutes
- Total Time: 4 hours 25 minutes
- Yield: 48 cookies
- Category: Dessert
- Method: Baking
- Cuisine: American
Description
Delight in these classic Chocolate Crinkle Cookies, featuring a rich cocoa flavor and a signature powdered sugar coating that cracks as they bake. Perfectly fudgy in the center and crisp at the edges, these cookies are easy to prepare with simple ingredients and a chilling step that ensures the ideal texture.
Ingredients
Dry Ingredients
- 2 cups all-purpose flour (240g)
- 2 teaspoons baking powder
- 3/4 teaspoon salt
- 1 cup powdered sugar (120g), for coating
- 1 cup unsweetened cocoa powder (100g)
Wet Ingredients
- 1 3/4 cups granulated sugar (350g)
- 1/2 cup vegetable oil (120mL)
- 4 large eggs, room temperature
- 2 teaspoons vanilla extract
Instructions
- Prepare the Cocoa Mixture: In a large mixing bowl, combine granulated sugar, cocoa powder, and vegetable oil. Using a hand mixer or stand mixer fitted with a paddle attachment, beat on medium speed until the mixture is well combined and has a shiny, smooth texture.
- Add Eggs and Vanilla: Add eggs one at a time, beating well after each addition to incorporate fully. Then mix in the vanilla extract until combined.
- Mix Dry Ingredients: In a separate medium bowl, whisk together all-purpose flour, baking powder, and salt. Gradually add this flour mixture to the cocoa mixture and mix on low speed just until combined, ensuring not to overmix.
- Chill the Dough: Cover the dough tightly with plastic wrap and refrigerate for at least 4 hours or overnight. This will firm up the dough and make it easier to handle.
- Preheat and Prepare Baking Sheets: When ready to bake, preheat your oven to 350°F (175°C). Line two large baking sheets with parchment paper. Pour the powdered sugar into a small bowl for coating.
- Shape and Coat Dough Balls: Using a small ice cream scoop or tablespoon, scoop the chilled dough into roughly one-inch balls. Roll each ball generously in powdered sugar, then place on the prepared baking sheets about 2 inches apart. Work in batches if needed, keeping remaining dough refrigerated until coated.
- Bake the Cookies: Bake for 10 to 12 minutes until the edges are firm and the centers are puffed but still slightly wet. The cookies will crack on top and look crinkled.
- Cool: Let cookies cool on the baking sheets for a few minutes before transferring them to a wire rack to cool completely. The centers will deflate slightly and stay fudgy.
Notes
- Do not rush the chilling time; the dough is sticky initially and needs to firm up for successful rolling and coating.
- The cookies naturally deflate in the center as they cool, which indicates a fudgy interior—this is desirable.
- Experiment with flavor by adding 1 teaspoon of peppermint or orange extract to the dough.
- Boost the chocolate flavor by adding 1 teaspoon of instant espresso powder to the sugar and oil mixture.
Nutrition
- Serving Size: 1 cookie
- Calories: 87 kcal
- Sugar: 10 g
- Sodium: 61 mg
- Fat: 3 g
- Saturated Fat: 1 g
- Unsaturated Fat: 2 g
- Trans Fat: 0.02 g
- Carbohydrates: 15 g
- Fiber: 1 g
- Protein: 1 g
- Cholesterol: 16 mg

