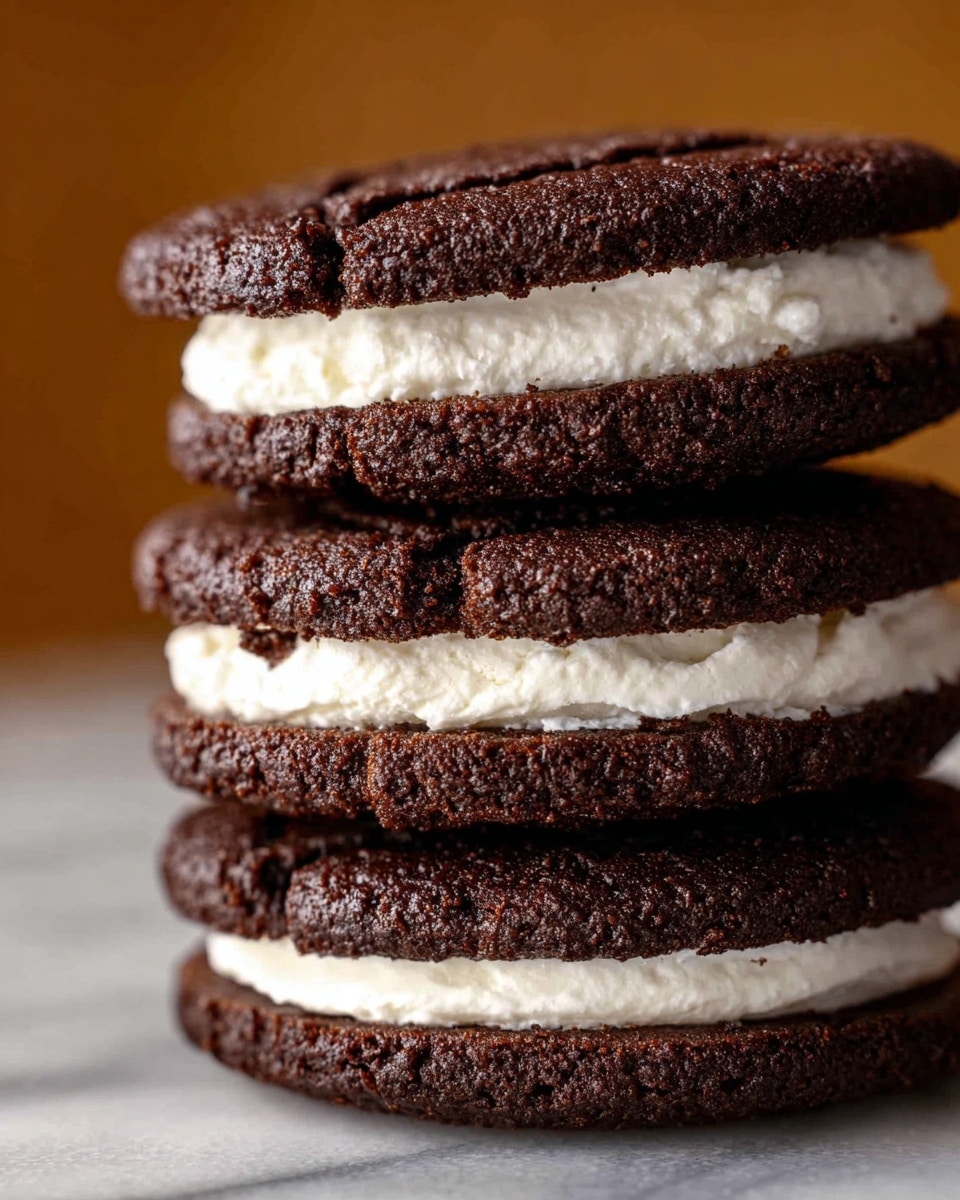
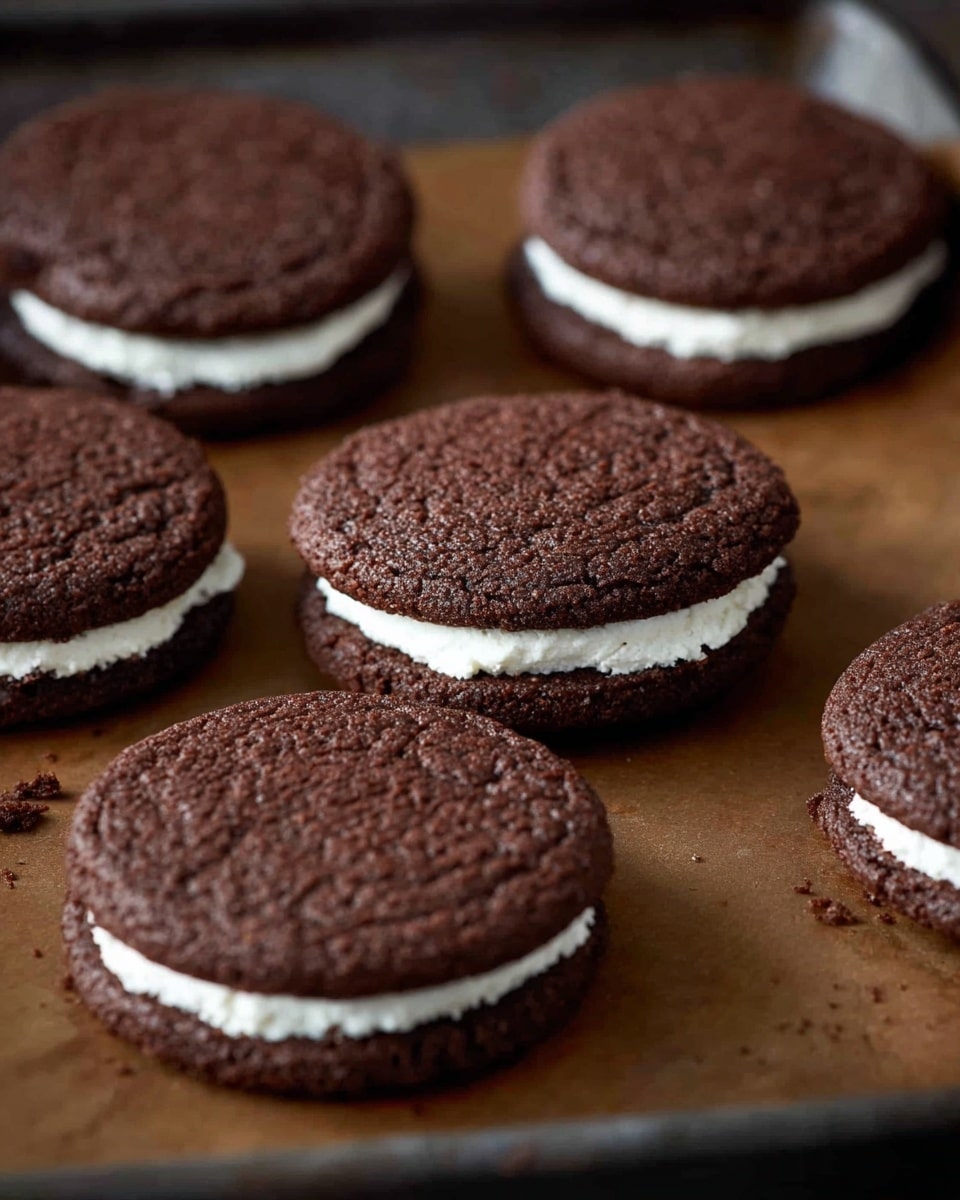
I absolutely love this Chocolate Sandwich Cookies Recipe — it’s one of those treats that feels both nostalgic and a little fancy at the same time. When I first tried making these, I was amazed by how the combination of black cocoa and espresso powder gave them this deep, intense chocolate flavor that’s hard to resist. You’ll find that these cookies are perfect for any occasion, whether it’s a cozy afternoon with coffee or a fun dessert at a party.
What makes this Chocolate Sandwich Cookies Recipe truly stand out is how the cookies turn out crisp on the edges yet tender in the middle, making them the perfect base for any filling you like. I’ve made these countless times, and each batch gets devoured fast — they’re a guaranteed crowd-pleaser that I’m sure you’ll enjoy too.
Why You’ll Love This Recipe
- Rich Chocolate Flavor: The mix of black cocoa and Dutch-process cocoa gives a deep, intense taste you won’t find in ordinary cookies.
- Perfect Texture: Crispy edges with a slightly soft center make these cookies ideal for sandwiching with any filling.
- Easy to Work With Dough: Chilling the dough slightly makes rolling out a breeze—even for beginners.
- Versatile and Fun: Customize with your favorite fillings or shapes to match your style or occasion.
Ingredients You’ll Need
Each ingredient in this Chocolate Sandwich Cookies Recipe plays a special role in creating perfect cookies that hold together well and taste incredible—plus, I’ll share a few tips on picking the best versions of each.
- Unsalted Butter: I always use unsalted so I can control the saltiness, and make sure it’s softened to room temperature for smooth mixing.
- Vegetable Oil: This adds a touch of tenderness to the cookies that butter alone can’t quite achieve.
- Granulated Sugar: Use regular white sugar for that classic sweetness and crisp finish.
- Vanilla Extract: Adds warmth and depth—don’t skimp on this; it really brightens the flavors.
- Salt: Enhances the chocolate flavor and balances the sweetness perfectly.
- Egg: Binds everything together while adding richness to the dough.
- Cornstarch: This is my secret to tender, slightly cakey cookies instead of hard ones.
- Black Cocoa Powder: Gives the cookies that dramatic dark color and intense flavor—if you don’t have this, regular cocoa powder works, just expect a lighter cookie.
- Dutch-Process Cocoa Powder: Adds smooth chocolate richness with less acidity.
- Espresso Powder: Just a pinch boosts the chocolate notes without making the cookies taste like coffee.
- All-Purpose Flour: Provides structure—measure carefully to avoid dry cookies.
Variations
I like to mix things up depending on my mood or who I’m baking for, and you can make this Chocolate Sandwich Cookies Recipe your own with just a few tweaks. It’s such a forgiving dough, so don’t hesitate to get creative!
- Using All Regular Cocoa: When I didn’t have black cocoa on hand, I switched to all Dutch-process cocoa—the cookies were lighter but still delicious.
- Filling Ideas: Try classic vanilla buttercream, peanut butter frosting, or even a dreamy salted caramel spread—my family goes crazy for the peanut butter combo.
- Diet-Friendly Adjustments: I’ve swapped in coconut oil for vegetable oil before for a dairy-free touch, and it worked well but changed the flavor slightly.
- Shape Variations: Scalloped edges add a fun twist and make your cookies look like they’re from a bakery.
How to Make Chocolate Sandwich Cookies Recipe
Step 1: Cream the Butter, Oil, and Sugar Until Light and Fluffy
Start by placing your softened butter, vegetable oil, and granulated sugar into the bowl of a stand mixer fitted with the paddle attachment. Beat them together on medium speed until the mixture becomes pale and fluffy—that usually takes about 3-5 minutes. This part is key because it incorporates air, which helps make those cookies light yet tender. Don’t rush here, you want to see the change in color and texture.
Step 2: Add Vanilla and Egg, Then Mix Until Combined
Once your butter mixture is perfect, add in the vanilla extract and egg. Beat again until everything is well combined and smooth. This step ensures that the dough has the right consistency and that your cookies will bake evenly.
Step 3: Combine Dry Ingredients and Mix into Wet
In a separate bowl, whisk together the salt, cornstarch, black cocoa powder, Dutch-process cocoa powder, espresso powder, and all-purpose flour. Then, add these dry ingredients gradually to the wet mixture and stir just until combined. Overmixing at this point can make your cookies tough, so keep it gentle. This is the stage where the magic happens—you’ll start to see a lovely chocolate dough forming.
Step 4: Chill the Dough Before Rolling
Pop your dough in the fridge for about 20 minutes. I discovered this little trick helps the dough firm up a bit, making it much easier to roll out without getting sticky. While chilling isn’t absolutely essential, trust me—it saves a lot of frustration, especially if your kitchen is warm.
Step 5: Roll and Cut Out Your Cookies
Preheat your oven to 350°F (175°C). Take half the dough out of the fridge to keep the rest cool, and roll it to about 1/4 inch thickness on a surface lightly dusted with cocoa powder to prevent sticking. Using a round or scalloped cookie cutter, cut out your cookies, then transfer them carefully to a parchment-lined baking sheet. Working in batches like this keeps the dough from warming too much and getting sticky again.
Step 6: Bake and Cool
Bake the cookies for 10-12 minutes—keep an eye on them! They should smell deliciously chocolatey and look just set. When you pull them out, they’ll feel soft, but don’t worry—they crisp up nicely as they cool. This is one of those moments where patience pays off.
Step 7: Fill and Assemble
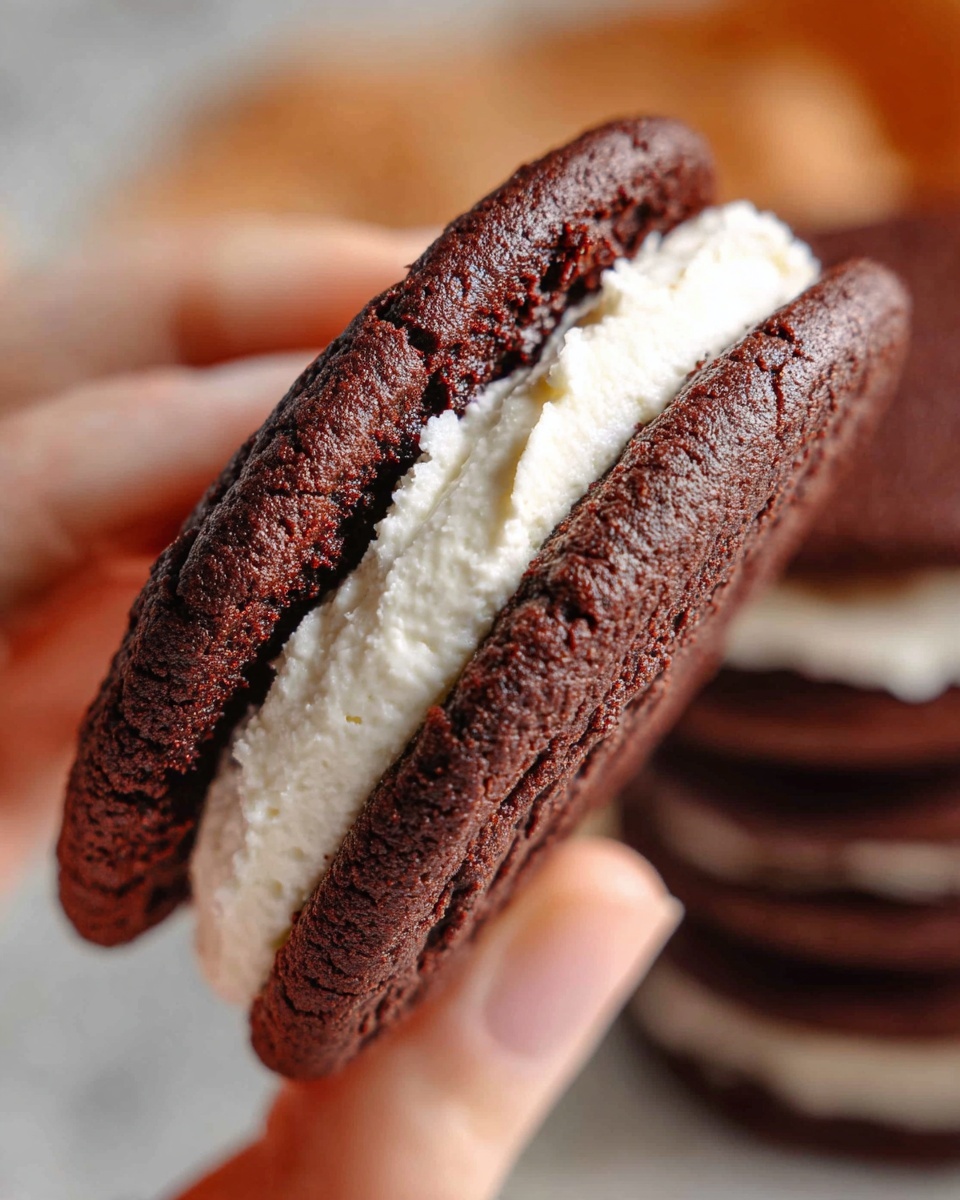
Once your cookies are completely cooled, it’s time to sandwich them with your favorite filling. I like a smooth buttercream or even a quick whipped cream cheese frosting—both bring a lovely contrast. You’ll love how the flavors come together in every bite!
Pro Tips for Making Chocolate Sandwich Cookies Recipe
- Don’t Skip the Chilling: I’ve learned that even a brief rest in the fridge prevents sticking and cracking when rolling.
- Use Cocoa Powder to Dust: Cocoa works better than flour here so the dough stays beautifully chocolatey, and your cookies don’t lose color.
- Watch Your Oven Time Closely: Take your cookies out when just set to avoid overbaking; they firm up as they cool.
- Mix Dry Ingredients Thoroughly: Ensuring your cocoa powders and flour are evenly mixed keeps color and flavor consistent.
How to Serve Chocolate Sandwich Cookies Recipe
Garnishes
I like to dust my finished cookies lightly with powdered sugar for a charming contrast—the dark cocoa and white sugar create a beautiful look that also adds a little extra sweetness. Sometimes, I press a tiny piece of chopped nuts or colorful sprinkles lightly onto the filling edges for a fun finish.
Side Dishes
Serve these with a glass of cold milk, a cup of rich coffee, or even hot cocoa for a comforting dessert experience. I often pair them with simple fresh berries on the side, which add a refreshing tartness that balances the richness perfectly.
Creative Ways to Present
For special occasions, I love arranging these cookies in a circular tower or stacking them like mini cakes with ribbons tied around them as little gift packs. Another fun idea is to drizzle melted white or dark chocolate over the top before sandwiching for a swirled effect—your guests will think you went all-out!
Make Ahead and Storage
Storing Leftovers
I store leftover cookies in an airtight container at room temperature, separating layers with parchment paper to keep them from sticking. They stay fresh and delicious for up to a week, and the texture holds up well thanks to the balanced fat content.
Freezing
I’ve successfully frozen both baked cookies and unbaked dough portions. For cookies, wrap them well and chill them in a sealed container or freezer bag—the flavor and texture come out almost like fresh! For dough, freeze it in discs wrapped in plastic, then thaw in the fridge before rolling out.
Reheating
If you want to warm up your sandwich cookies slightly, a few seconds in the microwave (about 10-15 seconds) does wonders without making them hard or chewy. Just be sure to let them cool a bit afterward so the filling isn’t too melty.
FAQs
-
Can I use regular cocoa powder instead of black cocoa powder?
Yes, you can! Just be aware that black cocoa powder gives the cookies a darker color and a more intense chocolate flavor. Using all regular or Dutch-process cocoa will result in a lighter cookie but still tasty. Adjust expectations on color but feel confident your cookies will still be delicious.
-
How should I store these Chocolate Sandwich Cookies?
Store them in an airtight container at room temperature with parchment paper between layers to keep cookies from sticking. They’ll stay fresh for about a week. For longer storage, freezing works great and won’t affect their texture much.
-
Can I make the dough ahead of time?
Absolutely! The dough can be chilled or frozen ahead—just thaw completely before rolling out. I find that resting the dough overnight in the fridge actually deepens the flavor.
-
What kind of filling do you recommend?
I love vanilla buttercream or cream cheese frosting, but you can get creative with peanut butter frosting, salted caramel, or even marshmallow fluff. The cookies are versatile and pair well with many creamy fillings.
-
How do I prevent cookies from cracking when rolling?
Chilling the dough for at least 20 minutes before rolling helps keep it firm and less sticky, reducing cracks. Also, rolling between sheets of parchment paper or lightly dusting with cocoa powder prevents sticking and tearing.
Final Thoughts
This Chocolate Sandwich Cookies Recipe holds a special place in my kitchen because it’s both simple and elegant. Every time I whip up a batch, I’m reminded of how a few quality ingredients and simple techniques can create something truly memorable. I can’t wait for you to try this recipe—you’ll enjoy the process as much as the delicious results, and your family or friends will definitely be asking for seconds!
Print
Chocolate Sandwich Cookies Recipe
- Prep Time: 20 minutes
- Cook Time: 12 minutes per batch, approximately 20 minutes total
- Total Time: 40 minutes
- Yield: 24 sandwich cookies
- Category: Dessert
- Method: Baking
- Cuisine: American
Description
Deliciously rich and intensely chocolatey sandwich cookies made with a blend of black cocoa and Dutch-process cocoa powders for a striking color and deep flavor, paired with a buttery, crisp texture perfect for filling with your favorite cream or frosting.
Ingredients
Cookie Dough
- 1/2 cup (113 grams, 1 stick) unsalted butter
- 1 tablespoon vegetable oil
- 2/3 cup (132 grams) granulated sugar
- 1 teaspoon vanilla extract
- 1/2 teaspoon salt
- 1 egg
- 1/4 cup cornstarch
- 1/4 cup black cocoa powder (can substitute all regular cocoa for less intense color)
- 1/4 cup Dutch-process cocoa powder
- 1/2 teaspoon espresso powder
- 1 1/2 cup (180 grams) all-purpose flour
Instructions
- Mix Butter, Oil, and Sugar: In the bowl of a stand mixer, beat together the unsalted butter, vegetable oil, and granulated sugar until the mixture is pale and fluffy. This step is critical for achieving a light texture in the cookies.
- Add Vanilla and Egg: Beat in the vanilla extract and egg until fully incorporated, ensuring the dough has the proper moisture and flavor balance.
- Combine Dry Ingredients: In a separate bowl, whisk together cornstarch, black cocoa powder, Dutch-process cocoa powder, espresso powder, all-purpose flour, and salt. Gradually add these dry ingredients to the wet mixture and mix until just combined to avoid overworking the dough.
- Chill the Dough: Cover and chill the dough in the refrigerator for about 20 minutes. While not essential for flavor, chilling makes the dough easier to roll out and cut.
- Preheat and Roll Out: Preheat your oven to 350°F (175°C). Roll out the dough to approximately 1/4-inch thickness. Working with half the dough at a time prevents it from becoming too warm. If the dough sticks, dust your work surface lightly with cocoa powder.
- Cut and Arrange: Use a round or scalloped-edge cookie cutter to cut out cookies. Place them on a baking sheet lined with parchment paper, spacing them evenly to allow for slight spreading.
- Bake the Cookies: Bake in the preheated oven for 10-12 minutes. The cookies should smell like chocolate and be just set on the edges when done. They may feel soft initially but will firm up as they cool.
- Cool Completely: Remove the cookies from the oven and allow them to cool fully on a wire rack. Once cooled, they are ready to be filled with your favorite sandwich filling such as buttercream, ganache, or jam.
Notes
- Chilling the dough helps with rolling and shaping but can be skipped in a pinch.
- If you prefer a less intense black color, substitute black cocoa powder with regular cocoa powder.
- Using espresso powder enhances the chocolate flavor without adding coffee taste.
- Store baked cookies in an airtight container to maintain crispness.
- For the sandwich filling, try chocolate ganache, vanilla buttercream, or raspberry jam for variety.
Nutrition
- Serving Size: 1 sandwich cookie (approx. 20g)
- Calories: 120
- Sugar: 8g
- Sodium: 60mg
- Fat: 6g
- Saturated Fat: 3.5g
- Unsaturated Fat: 2g
- Trans Fat: 0g
- Carbohydrates: 16g
- Fiber: 1.5g
- Protein: 1.5g
- Cholesterol: 25mg

