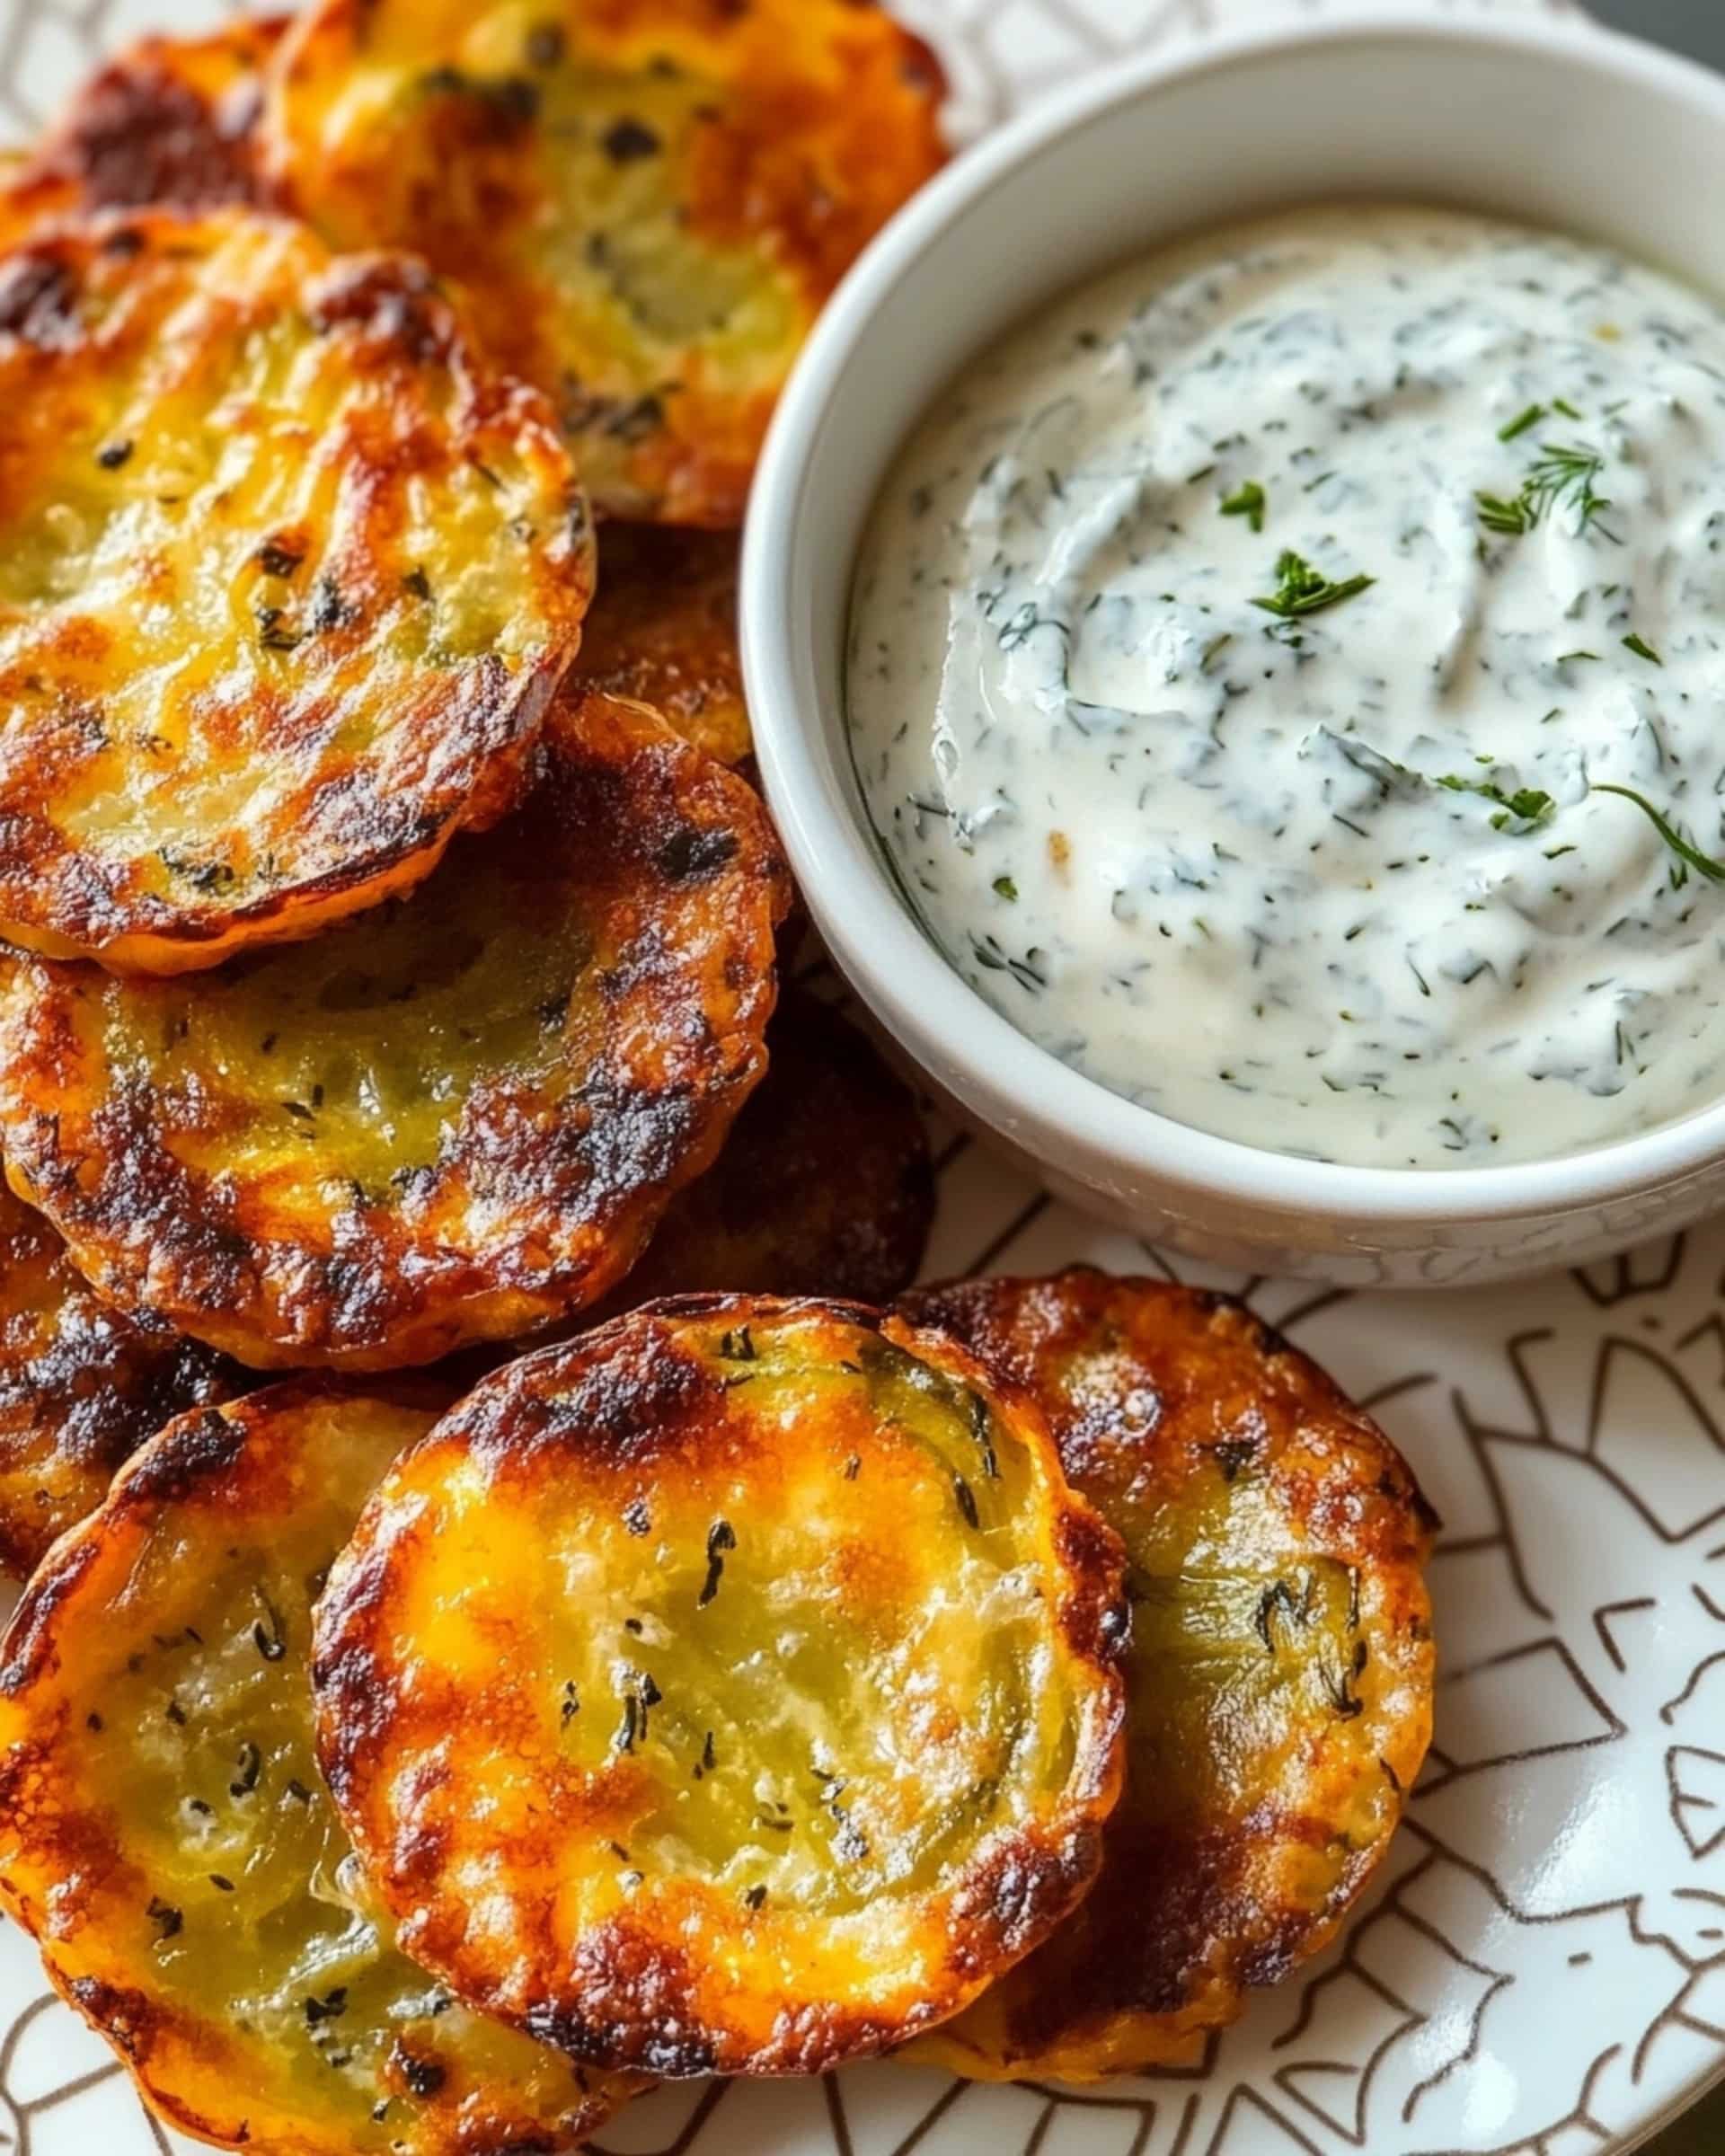
This mind-blowing Crispy Cheesy Dill Pickle Chips recipe transforms ordinary pickle chips into an irresistible snack that’s ready in just 20 minutes! Perfectly crispy cheese encases tangy dill pickle slices, creating a flavor explosion that’s sure to satisfy your snack cravings without the guilt of deep frying. Perfect for game day, afternoon munchies, or anytime you need a quick, impressive appetizer!
Why You’ll Love This Recipe
- Ridiculously Easy: With just 3 ingredients and minimal prep, these cheesy pickle chips come together in minutes—perfect for when snack cravings strike!
- Keto-Friendly: These little flavor bombs are naturally low-carb, making them perfect for anyone watching their carb intake while still wanting something indulgent.
- Better Than Deep-Fried: You get all the satisfaction of fried pickle chips without the mess, hassle, and extra calories of deep frying—but with an added cheese bonus!
- Customizable: Switch up the cheese or seasonings to create endless flavor combinations that match your mood or what you have in your pantry.

Ingredients You’ll Need
- Shredded Cheese: The star of the show that creates that irresistible crispy, golden exterior. Colby Jack offers the perfect melt and flavor, but any good melting cheese works beautifully.
- Dill Pickle Chips: Provides that tangy, briny center that contrasts perfectly with the rich cheese. Make sure to pat them dry for maximum crispiness!
- Seasoning: Blackening seasoning adds a wonderful depth of flavor, but feel free to experiment with everything from ranch powder to Italian seasoning or even taco seasoning.
Note: You’ll find the complete list of ingredients, along with their exact measurements, in the printable recipe card at the bottom of this post.
Variations
Want to mix things up? Here are some delicious twists on the basic recipe:
Different Cheese Options
Try pepper jack for a spicy kick, sharp cheddar for more robust flavor, or a mixed cheese blend for complex flavor notes.
Seasoning Adventures
Swap the blackening seasoning for ranch powder, garlic parmesan blend, everything bagel seasoning, or even a pinch of cayenne for heat lovers.
Add-Ins
Place a tiny piece of cooked bacon or a jalapeño slice on top of the pickle before covering with cheese for an extra flavor dimension.
Serving Style
Make mini versions using a mini muffin tin for bite-sized party appetizers that disappear in seconds!
How to Make Crispy Cheesy Dill Pickle Chips
Step 1: Prep
Preheat your oven to 400°F. Take your dill pickle chips and thoroughly pat them dry with paper towels. This step is crucial for achieving maximum crispiness!
Step 2: Assemble
Grab a non-stick 12-cup muffin tin. Start by placing a generous pinch of shredded cheese in each cup, creating a base layer. Place 2-3 dried pickle chips on top of the cheese. Sprinkle your chosen seasoning over the pickles, then add another layer of cheese to completely cover the pickles.
Step 3: Bake
Slide the muffin tin into your preheated oven and bake for approximately 15 minutes, or until the cheese has melted, spread out, and developed a beautiful golden-brown color around the edges.
Step 4: Crisp Up (Optional but Recommended!)
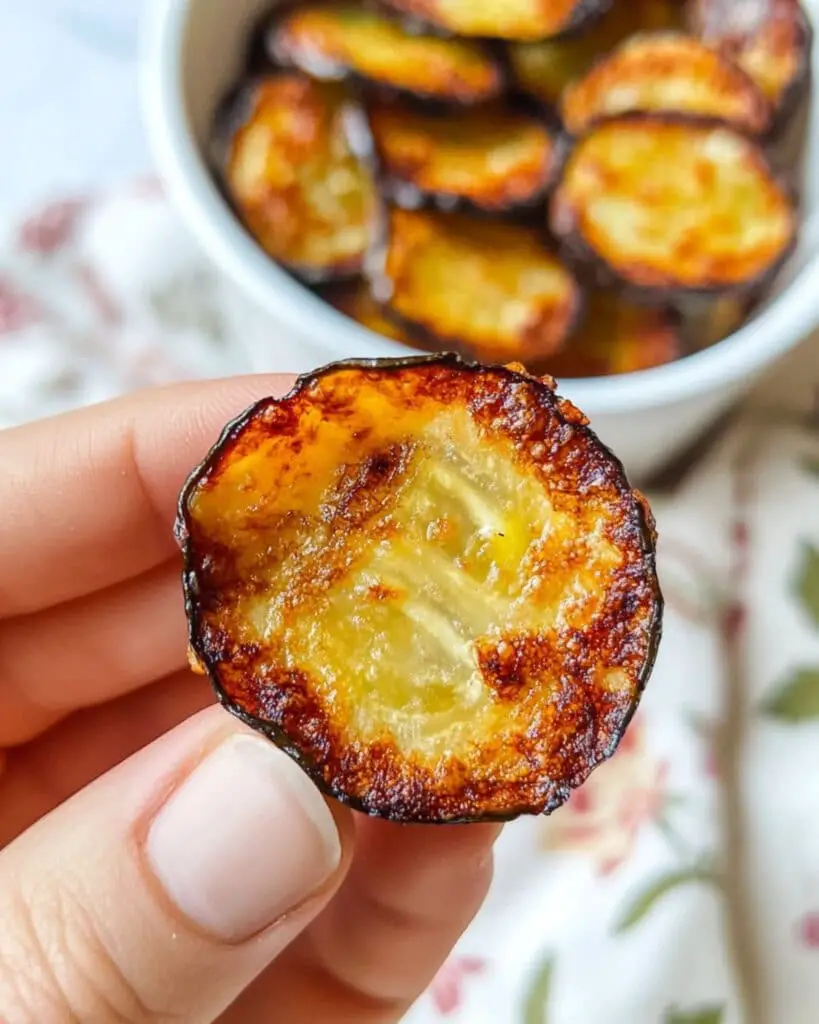
For the ultimate crispiness, transfer the baked cheese pickle chips to an air fryer set at 400°F for an additional 5 minutes. This step takes them from good to absolutely irresistible!
Step 5: Serve
Let them cool just enough to handle, then serve immediately with your favorite dipping sauce for maximum enjoyment.
Pro Tips for Making the Recipe
- Dry Those Pickles: The dryer your pickle chips, the crispier your final result will be. Take the extra minute to pat them thoroughly!
- Cheese Selection: Pre-shredded cheese works perfectly fine, but freshly grated cheese melts more evenly and doesn’t contain the anti-caking agents that can sometimes affect texture.
- Even Distribution: Make sure your cheese layer is even across the top and bottom to ensure uniform melting and that perfect crispy texture.
- Watch Carefully: Ovens vary, so start checking at the 12-minute mark to prevent burning. You want golden-brown, not charred!
- Rest Briefly: Let them cool for just a minute before removing from the muffin tin—they’ll be easier to handle and will firm up slightly.
How to Serve
These crispy cheesy pickle chips shine brightest when served with complementary dipping options:
Dipping Sauces
Ranch dressing is a classic pairing, but also try Alabama white sauce, spicy mayo, or sriracha ketchup for a flavor adventure.
Perfect Pairings
Serve alongside burgers instead of regular pickles for a game-changing upgrade, or add to a snack board with cold cuts and other nibbles for a memorable spread.
Complete the Meal
These make an amazing appetizer before a casual dinner of burgers, sandwiches, or BBQ—or simply enjoy them on their own as a satisfying snack!
Make Ahead and Storage
Storing Leftovers
While best enjoyed fresh and hot, leftovers can be stored in an airtight container in the refrigerator for up to 2 days. They won’t maintain their original crispiness, but they’ll still be delicious!
Reheating
For the best texture when reheating, place them on a parchment-lined baking sheet in a 350°F oven for 5-7 minutes, or pop them in the air fryer at 350°F for 2-3 minutes until heated through and crispy again.
Freezing
These can technically be frozen after cooking and cooling completely, though the texture may change slightly. Reheat from frozen in a 375°F oven until hot and crispy again.
FAQs
-
Why are my cheese chips not getting crispy?
Make sure you’re patting the pickle chips very dry before assembling. Excess moisture prevents crispiness. Also, try the air fryer step for maximum crunch!
-
Can I use different pickles for this recipe?
Absolutely! While dill chips work perfectly, bread and butter or even spicy pickle chips can create interesting flavor variations. Just remember to dry them thoroughly.
-
Is there a dairy-free alternative I can use?
While traditional cheese creates the best crispy texture, there are plant-based shredded cheeses designed to melt that can work. Results may vary slightly in texture and crispiness.
-
How do I prevent the cheese from sticking to the muffin tin?
A good non-stick muffin tin usually works fine without additional help, but if sticking is a concern, a light spray of cooking oil before adding the cheese will help them release easily.
Final Thoughts
These Crispy Cheesy Dill Pickle Chips perfectly blend simplicity with “wow factor” flavor! They’re the kind of snack that has friends begging for the recipe after one bite. I love how they transform ordinary pickle chips into something extraordinary with minimal effort. Whether you’re movie-watching, game-day snacking, or just need a quick flavor fix, give these cheesy pickle delights a try – they just might become your new go-to recipe when cravings strike!
Print
Crispy Cheesy Dill Pickle Chips Recipe
- Prep Time: 5 minutes
- Cook Time: 20 minutes
- Total Time: 25 minutes
- Yield: 12 servings
- Category: Snacks
- Method: Air Frying
- Cuisine: American
- Diet: Gluten Free
Description
Crispy Cheesy Dill Pickle Chips are a quick and savory snack made with just three main ingredients: shredded cheese, dill pickle chips, and blackening seasoning. Oven-baked for ultimate crunch and optional extra crispiness in the air fryer, these low-carb, gluten-free chips are bursting with flavor and pair perfectly with your favorite dipping sauce.
Ingredients
Cheesy Pickle Chips
- 2 cups shredded cheese (Colby Jack recommended, or any melting cheese)
- 24 – 36 dill pickle chips, patted dry
- 1 tbsp blackening seasoning (or seasoning blend of your choice)
Instructions
- Prep the Pickles: Pat 24 – 36 dill pickle chips completely dry using a few paper towels. Removing excess moisture ensures your chips bake up extra crispy.
- Prepare the Muffin Tin: Grab a non-stick 12-cup muffin tin. If you anticipate sticking, spray each cup lightly with non-stick cooking spray.
- Layer Cheese and Pickles: Sprinkle a generous pinch of shredded cheese into the bottom of each muffin tin cup. Place 2-3 pickle chips over the cheese in each cup. Sprinkle your favorite seasoning blend or blackening seasoning over the top. Add another layer of cheese to fully cover the pickles.
- Bake: Bake in a preheated 400°F oven for 15 minutes, or until the cheese is fully melted and golden brown around the edges.
- Optional Air Fry for Extra Crisp: After baking, carefully remove each cheesy pickle chip from the muffin tin. For maximum crunch, place them in an air fryer at 400°F for 5 minutes.
- Serve: Enjoy immediately with your favorite dipping sauces, such as ranch or tangy Alabama white sauce. They are best served hot and crispy!
Notes
- You can use any melting cheese you prefer—Pepper Jack is great for a spicy kick.
- Patting the pickles dry is essential for crisp texture.
- Non-stick muffin tins usually do not need added cooking spray, but use it if your pan tends to stick.
- Seasoning can be customized to your taste; try garlic powder, ranch seasoning, or Cajun spice for variety.
- Delicious as an appetizer, snack, or a crunchy addition to sandwiches and salads.
Nutrition
- Serving Size: 1 chip (approx. 1/12th of recipe)
- Calories: 65
- Sugar: 0.5g
- Sodium: 350mg
- Fat: 5g
- Saturated Fat: 3g
- Unsaturated Fat: 2g
- Trans Fat: 0g
- Carbohydrates: 1g
- Fiber: 0g
- Protein: 4g
- Cholesterol: 15mg
