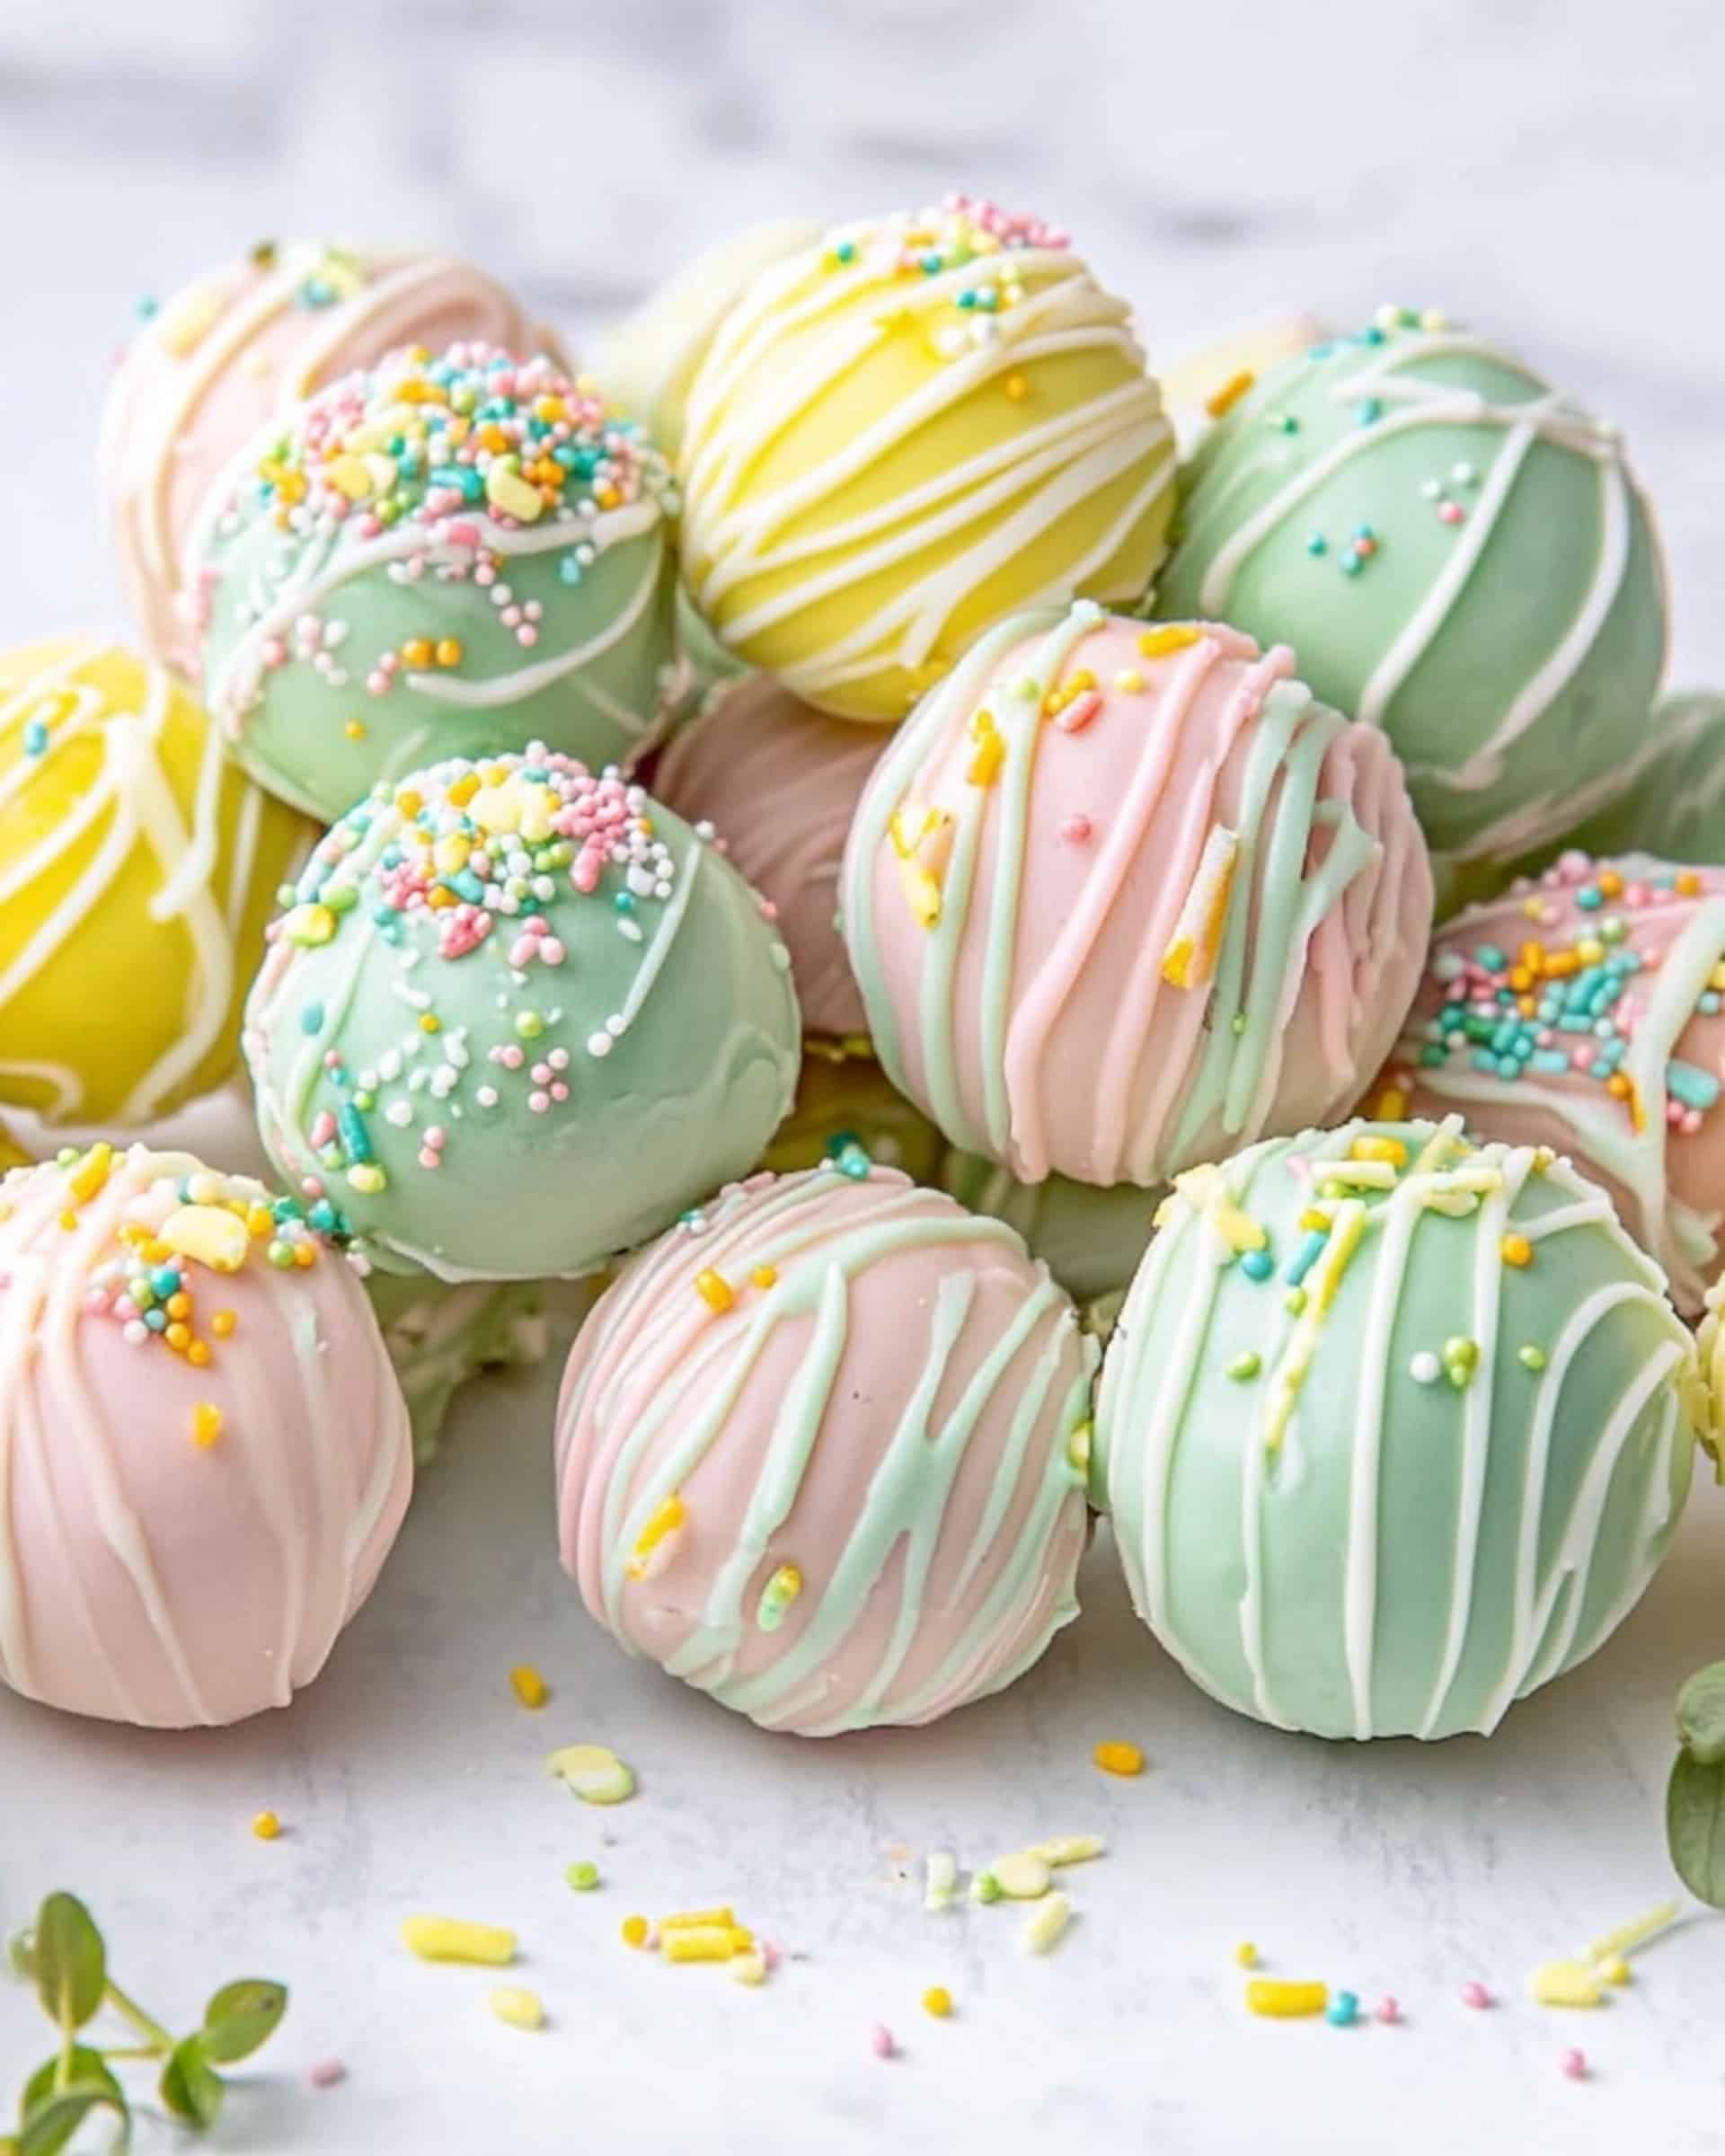
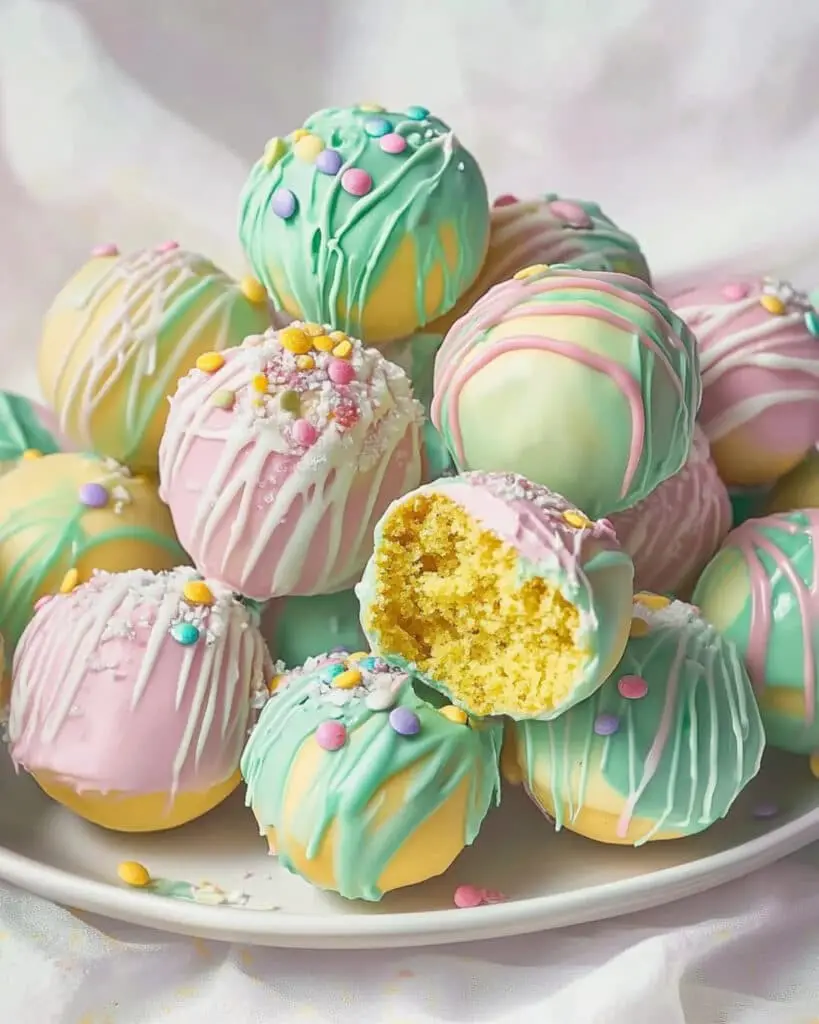
These Easter Oreo Truffles are a delightful spring treat that combines the creamy richness of Golden Oreos with smooth cream cheese, all wrapped in colorful white chocolate coating. These bite-sized delicacies are not only stunning to look at with their festive pastel colors but also incredibly simple to make with just a handful of ingredients. Perfect for your Easter celebrations or as a cheerful springtime treat that will impress everyone at your table!
Why You’ll Love This Recipe
- No Baking Required: These truffles come together without ever turning on your oven – perfect for when you need a quick dessert without heating up the kitchen.
- Make-Ahead Friendly: You can prepare these truffles days before your celebration, making them ideal for busy holiday planning.
- Customizable Colors: The pastel color scheme can be adjusted to match any spring celebration or Easter theme you have in mind.
- Kid-Friendly Activity: Let the little ones help with rolling the balls or adding sprinkles – it’s a great way to create memories while making something delicious.
- Crowd-Pleaser: The combination of cookies, cream cheese, and white chocolate is universally loved – I’ve never met someone who could resist these truffles!
Ingredients You’ll Need
- Golden Oreos: These provide the sweet vanilla-flavored base for our truffles. The golden variety gives a light color that works beautifully with pastel coating, but you could use regular Oreos for a cookies-and-cream effect.
- Cream Cheese: Adds creaminess and a slight tanginess that balances the sweetness of the cookies and coating. Always use room temperature cream cheese for the smoothest mixture.
- White Chocolate Chips or Candy Coating: Creates that perfect outer shell that holds everything together. Candy coating tends to be more forgiving than chocolate if you’re new to making truffles.
- Food Coloring: Oil-based food coloring works best with chocolate. It creates those beautiful pastel shades without causing the chocolate to seize up.
- Easter-themed or Pastel Sprinkles: These add that festive touch that makes the truffles truly special for Easter celebrations. Choose shapes like eggs, bunnies, or spring flowers for extra theming.
Note: You’ll find the complete list of ingredients, along with their exact measurements, in the printable recipe card at the bottom of this post.
Variations
Flavor Twists
- Lemon Burst: Add a teaspoon of lemon extract and some lemon zest to the Oreo mixture for a citrusy spring flavor.
- Coconut Dream: Mix in 1/4 cup of shredded coconut to the Oreo mixture and sprinkle some on top after dipping.
- Mint Chocolate: Use mint Oreos instead of golden ones and add a drop of mint extract to the filling.
Decoration Ideas
- Marbled Effect: Swirl multiple pastel colors together for a sophisticated marbled look.
- Chocolate Drizzle: Use dark or milk chocolate to drizzle contrasting lines over the pastel coating.
- Edible Glitter: Dust with edible glitter for a magical shimmer effect that will delight children and adults alike.
How to Make Easter Oreo Truffles
Step 1: Prepare the Truffle Mixture
In a large food processor, pulse the Golden Oreos until they become fine crumbs. Add the softened cream cheese and blend until you have a smooth, uniform mixture with no lumps visible. Cover the bowl and refrigerate for 30 minutes to firm up the mixture, making it easier to handle.
Step 2: Shape the Truffles
Line a baking sheet with parchment paper. Using a small cookie scoop or spoon, portion out about 1.5 tablespoons of the chilled mixture. Roll each portion between your palms to form neat balls, then place them on the prepared baking sheet. Once all balls are formed, cover the sheet and place it in the freezer for 15 minutes.
Step 3: Prepare the Coating
While the truffle balls are chilling, melt your white chocolate chips or candy coating according to package directions. If you’re creating multiple colors, divide the melted coating into separate bowls and add a few drops of your chosen oil-based food coloring to each. Stir thoroughly until the colors are vibrant and no streaks remain.
Step 4: Dip and Decorate
Working one at a time (to prevent the balls from warming up too much), dip each chilled truffle into your colored coating. Use a fork to lift it out, gently tapping to remove excess coating, then place it back on the parchment paper. While the coating is still wet, add sprinkles or drizzle with contrasting colors of coating for a festive finish.
Step 5: Set and Serve
Allow the truffles to set completely at room temperature or speed up the process by placing them in the refrigerator for about 10 minutes. Once hardened, they’re ready to serve or store for later enjoyment!
Pro Tips for Making the Recipe
- Cold Is Key: Keep the truffle mixture and formed balls chilled until the moment you’re ready to dip them. This prevents them from becoming too soft and falling apart in the warm chocolate.
- Thin Your Coating if Needed: If your white chocolate seems too thick for smooth dipping, add a teaspoon of vegetable shortening or coconut oil to thin it to the perfect consistency.
- Use the Right Tools: A fork works well for dipping, but specialized chocolate dipping tools can make the process even easier if you have them.
- Work in Small Batches: Only take a few balls out of the freezer at a time. As they warm up, they become softer and more difficult to coat neatly.
- Tap Off Excess Gently: After dipping, gently tap your fork on the edge of the bowl to remove excess coating – but don’t tap too hard or the truffle might fall off!
How to Serve
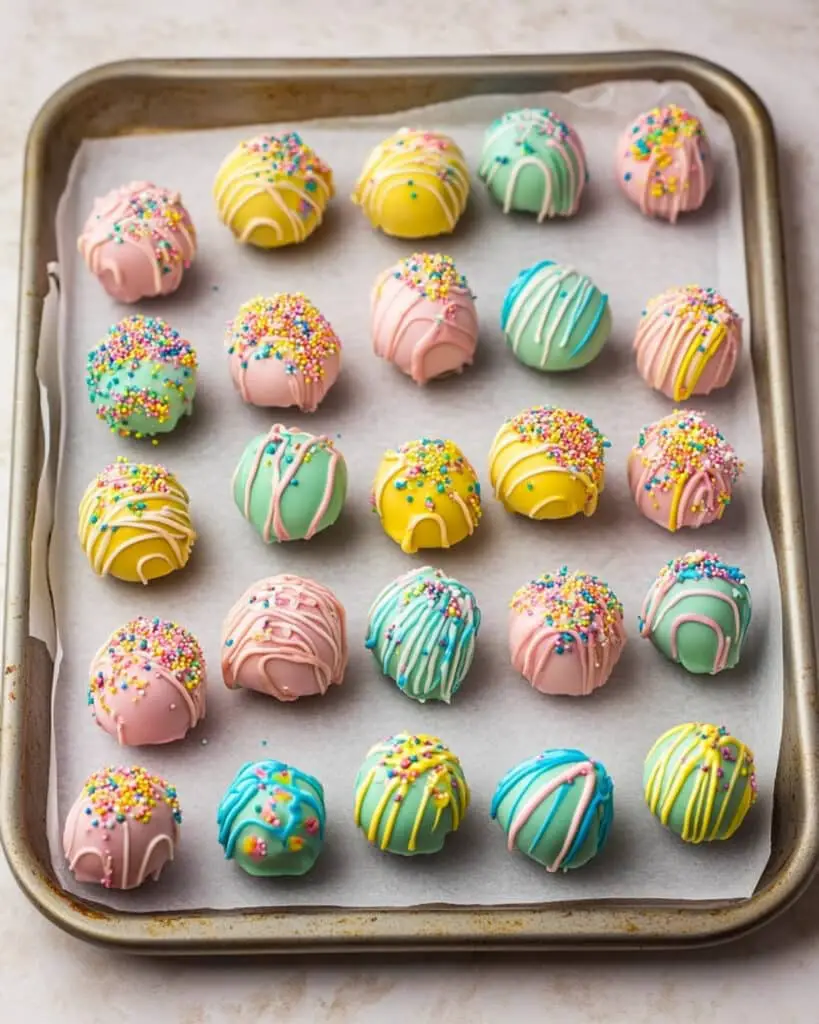
These Easter Oreo Truffles make a stunning centerpiece for any spring gathering. Here are some serving suggestions:
Display Ideas
- Arrange them on a tiered dessert stand for an elegant presentation at Easter brunch
- Place them in colorful mini cupcake liners for easy grabbing at a dessert table
- Create a “nest” display using shredded paper grass with truffles nestled inside
Perfect Pairings
- Serve alongside a cup of coffee or hot tea for an afternoon treat
- Include on a dessert board with fresh berries and other spring sweets
- Offer as part of a brunch spread with mimosas for the adults
Make Ahead and Storage
Storing Leftovers
Store these truffles in an airtight container in the refrigerator for up to 5 days. Separate layers with parchment paper to prevent sticking or color transfer between truffles.
Freezing
These truffles freeze beautifully! Place them in a single layer on a baking sheet until frozen solid, then transfer to a freezer-safe container and store for up to 2 months. This makes them perfect for advance holiday preparation.
Serving After Storage
For the best flavor and texture, allow refrigerated truffles to sit at room temperature for about 15-20 minutes before serving. If frozen, thaw them overnight in the refrigerator before bringing to room temperature.
FAQs
-
Can I use regular Oreos instead of Golden Oreos?
Absolutely! Regular Oreos will give you a cookies-and-cream look with the dark crumbs visible through the pastel coating. The flavor will be chocolate rather than vanilla, but equally delicious. You could even try other Oreo flavors like birthday cake or lemon for different taste variations.
-
Why did my white chocolate seize when I added food coloring?
This typically happens when using water-based food coloring with chocolate. Always use oil-based or specially formulated candy coloring for chocolate work. If your chocolate does seize, you can sometimes rescue it by immediately stirring in 1-2 teaspoons of vegetable oil or coconut oil to smooth it out again.
-
Can I make these truffles without a food processor?
Yes! While a food processor creates the smoothest texture, you can place the Oreos in a zip-top bag and crush them with a rolling pin until very fine. Then mix with the softened cream cheese using a hand mixer or strong spoon and plenty of elbow grease until well combined.
-
How far in advance can I make these for a party?
These truffles can be made up to five days ahead and stored in the refrigerator, or up to two months ahead if frozen. This makes them perfect for holiday preparation when you have multiple dishes to coordinate!
Final Thoughts
These Easter Oreo Truffles are truly the perfect spring treat – easy enough for beginners but impressive enough for celebrations. The combination of creamy filling and colorful coating creates a delightful bite that everyone will reach for. Whether you’re making them for Easter, a spring birthday, or just to brighten someone’s day, these little treats are sure to bring smiles all around. Give them a try and watch how quickly they disappear!
Print
Easter Oreo Truffles Recipe
- Prep Time: 45 minutes
- Cook Time: 0 minutes
- Total Time: 1 hour
- Yield: 24 truffles
- Category: Desserts
- Method: No-cook
- Cuisine: American
- Diet: Vegetarian
Description
Easter Oreo Truffles are festive, no-bake treats made with Golden Oreos and cream cheese, then coated in colorful white chocolate and decorated with pastel sprinkles. They are easy to make, perfect for the holidays, and deliver a deliciously creamy and crunchy bite sized dessert.
Ingredients
-
For the Truffles
- 1 (350g) package Golden Oreos
- 8 ounces (225g) cream cheese, softened
-
For the Coating and Decoration
- 4 cups (680g) white chocolate chips or candy coating
- Pastel-colored food coloring (oil-based, see notes)
- Easter-themed or pastel-colored sprinkles
Instructions
- Make Oreo Crumbs: In the bowl of a large food processor, pulse the Oreo cookies until fine, even crumbs are formed.
- Blend with Cream Cheese: Add softened cream cheese to the Oreo crumbs and blend until completely smooth, with no lumps remaining. Remove the bowl, cover, and refrigerate the mixture for 30 minutes until the mixture firms up.
- Shape the Truffles: Prepare a baking sheet with parchment paper. Use a small cookie scoop or a spoon to portion the chilled mixture, about 1.5 tablespoons each. Roll each portion into a ball between your palms and place onto the baking sheet. Cover the tray and freeze for 15 minutes to set.
- Melt Candy Coating: While truffles chill, melt the white chocolate chips or candy coating according to the package instructions.
- Tint the Coating (Optional): If desired, divide the melted coating into 4 bowls and color each with pastel oil-based food colorings. Mix well until smooth and free of streaks.
- Coat the Truffles: Working quickly, dip each chilled truffle ball into the melted candy coating, using a fork to lift them out, letting excess coating drip off. Place the coated truffles back on the parchment-lined tray.
- Decorate: Drizzle extra colored coating over each truffle and add sprinkles on top, if desired. Allow truffles to set and harden completely.
- Serve or Store: Once set, serve the truffles or store them in an airtight container in the fridge.
Notes
- Use room-temperature cream cheese for ultra smooth blending.
- Use only oil-based food coloring to prevent seizing of the chocolate.
- If the coating seizes, add a teaspoon of coconut or vegetable oil to recover texture.
- For neat decorating, use a piping bag to drizzle colored chocolate.
- Store truffles in an airtight container in the refrigerator for up to 5 days.
Nutrition
- Serving Size: 1 truffle
- Calories: 197 kcal
- Sugar: 18g
- Sodium: 59mg
- Fat: 13g
- Saturated Fat: 8g
- Unsaturated Fat: 4.5g
- Trans Fat: 0g
- Carbohydrates: 19g
- Fiber: 0.1g
- Protein: 2g
- Cholesterol: 16mg

