
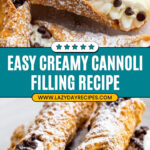
If you’ve ever wanted to whip up a show-stopping dessert without all the fuss, then you’re absolutely going to adore this Easy Homemade Cannoli Filling Recipe. It’s the kind of recipe that turns a simple pantry stash into a creamy, dreamy filling that you can spoon into crispy shells or dollop on top of cakes for an Italian-inspired treat that’s bound to impress. Trust me, once you try this, you’ll wonder why you ever settled for store-bought filling!
Why You’ll Love This Recipe
- Super Simple Ingredients: You only need a handful of pantry staples that come together quickly.
- No Frying Required: I love skipping the shell frying step by using ready-made shells to save time and mess.
- Creamy with a Twist: The addition of orange zest gives it that authentic fresh zing you’ll love.
- Versatile and Crowd-Pleasing: Your family and friends will go crazy every time you serve it, perfect for holidays or weeknight treats.

Ingredients You’ll Need
When it comes to making the perfect Easy Homemade Cannoli Filling Recipe, quality ingredients make all the difference. Each element plays its own role to create that smooth, sweet, and slightly tangy filling everyone raves about.
- Ricotta Cheese: Use whole-milk ricotta for the creamiest texture; draining it well is key to avoid watery filling.
- Confectioners’ Sugar: This dissolves beautifully to sweeten the ricotta without grittiness.
- Mini Chocolate Chips: Tiny chips are best here so they don’t overpower the creamy filling texture.
- Vanilla Extract: Pure vanilla adds warmth and depth—don’t substitute with imitation if you can help it!
- Fresh Orange Zest: This brightens the flavor and is one of my favorite touches to make the filling memorable.
- Cannoli Shells: Whether homemade or store-bought, crispy shells are a must to contrast the luscious filling.
Variations
I like to keep this Easy Homemade Cannoli Filling Recipe pretty classic, but the beauty is you can customize it to fit your tastes or dietary needs. I’ve played around enough to know what works and what’s just okay!
- Chocolate Lovers’ Variation: Toss in mini chunks of dark chocolate or even a sprinkle of cocoa powder for an extra rich twist—I did this once for a birthday and it was a hit!
- Dairy-Free Option: Swap the ricotta for a coconut cream base—but be warned, the texture will be different, so expect a creamier but less tangy result.
- Citrus Flair: Try lemon zest instead of orange if you want a sharper citrus flavor—my friends loved this fresh variation in summer.
- Nutty Add-Ins: Chopped pistachios on top add a nice crunch and look gorgeous, perfect for entertaining.
How to Make Easy Homemade Cannoli Filling Recipe
Step 1: Drain the Ricotta for Creamy Perfection
This is the secret I discovered that makes all the difference. Place your ricotta cheese in a fine mesh strainer lined with cheesecloth or a clean kitchen towel, and let it drain in the fridge for at least 6 hours or even overnight. This step removes excess moisture so your filling won’t be watery—it’ll be thick, luscious, and ready to hold its shape inside the shells.
Step 2: Mix the Filling Ingredients
Once your ricotta is perfectly drained, transfer it to a mixing bowl. Add the confectioners’ sugar and vanilla extract, then gently fold them together until smooth. This is also when you’ll stir in the fresh orange zest for that signature pop of brightness. Finally, add about half of the mini chocolate chips to combine—saving the rest to sprinkle on when assembling.
Step 3: Fill Your Cannoli Shells
If you’re using store-bought shells like I do for ease, grab a piping bag or a resealable plastic bag with a corner snipped off to pipe your filling neatly inside each shell. You want to fill them right before serving so the shells stay crisp. I learned this the hard way the first time I made cannolis; filling them too early leads to soggy shells, and no one wants that.
Step 4: Garnish and Serve
Use the remaining mini chocolate chips to dot the edges of each filled cannoli, and finish with a light dusting of confectioners’ sugar on top. The contrast of crunchy shell, rich filling, and little bursts of chocolate is absolutely irresistible.
Pro Tips for Making Easy Homemade Cannoli Filling Recipe
- Drain the Ricotta Properly: Don’t rush this step; well-drained ricotta means no watery filling and richer flavor.
- Piping Bag Is Your Best Friend: It helps you fill shells evenly without mess, especially if you’re serving guests.
- Fill Just Before Serving: Avoid sogginess by waiting to fill your shells no more than an hour before eating.
- Fresh Zest Upgrades Flavor: Always use freshly grated orange zest, frozen citrus zest just doesn’t have the same punch.
How to Serve Easy Homemade Cannoli Filling Recipe

Garnishes
I love garnishing my cannoli with a sprinkle of extra mini chocolate chips around the edges and a dusting of powdered sugar for that picture-perfect finish. Sometimes I’ll add chopped pistachios too, which add a gorgeous color contrast and a subtle crunch that everyone asks about.
Side Dishes
Serve these with a cup of espresso or a refreshing citrusy cocktail for a dessert course that feels festive and just right. Fresh berries on the side also work wonders for a light, balanced treat.
Creative Ways to Present
For special occasions, I’ve arranged filled cannoli on a bed of edible flowers or laid them in a rustic wooden box lined with parchment paper for an elegant touch. You can also cut the filled cannoli into bite-size pieces and serve as finger food at parties—a total crowd-pleaser!
Make Ahead and Storage
Storing Leftovers
If you have leftover filling, store it in an airtight container in the fridge for up to 3 days. I like to keep it chilled and fresh, then fill shells as I need them. Avoid storing already filled cannoli to keep the shells crisp!
Freezing
I’ve frozen leftover filling in small containers successfully, but I don’t recommend freezing assembled cannoli because the texture of the shells won’t hold up. When you’re ready, thaw the filling overnight in the fridge and stir before using.
Reheating
You generally don’t want to reheat the filling. If chilled filling is too stiff, let it sit at room temperature for 10–15 minutes and give it a gentle stir to soften it before filling your shells again.
FAQs
-
Can I use low-fat ricotta in this Easy Homemade Cannoli Filling Recipe?
While you can use low-fat ricotta, I’ve found that whole-milk ricotta yields a creamier, richer filling that better mimics classic cannoli. Low-fat versions tend to be grainier and less smooth.
-
How long can I store the cannoli filling before it spoils?
Stored in an airtight container in the fridge, this filling stays fresh for about 3 days. Always give it a quick smell and stir before use, and avoid leaving it out at room temperature for long.
-
Can I make this filling without orange zest?
Absolutely! The orange zest adds a lovely brightness, but if you don’t have any, you can leave it out or substitute lemon zest for a slightly different citrus kick.
-
What if I can’t find mini chocolate chips?
If mini chips aren’t available, chop regular-size chocolate chips into smaller pieces. This way, you still get those delightful little bursts of chocolate without overwhelming the filling’s texture.
Final Thoughts
I absolutely love how this Easy Homemade Cannoli Filling Recipe transforms even the simplest gathering into something special. It’s creamy, slightly tangy, sweet, and loaded with personality thanks to the orange zest and chocolate chips. When I first tried making cannoli filling from scratch, I was hooked by how easy and fast it was once I nailed draining the ricotta properly. Give yourself the gift of this delightful recipe, and I promise it’ll become a family favorite you’ll reach for again and again.
Print
Easy Homemade Cannoli Filling Recipe
- Prep Time: 15 minutes
- Cook Time: 0 minutes
- Total Time: 6 hours 15 minutes
- Yield: 8 cannolis
- Category: Dessert
- Method: No-Cook
- Cuisine: Italian
Description
This classic Italian dessert recipe shows you how to make a creamy and delicious cannoli filling using ricotta cheese, confectioners’ sugar, and mini chocolate chips, paired perfectly with crispy cannoli shells. Ideal for holiday celebrations or any special occasion, this easy no-fry approach uses store-bought or homemade shells for convenience without sacrificing traditional flavor.
Ingredients
Cannoli Shells
- 8 cannoli shells, homemade or store-bought
Cannoli Filling
- 2 cups ricotta cheese
- 1/2 cup confectioners’ sugar, plus extra for dusting
- 3/4 cup mini chocolate chips, divided
- 1 and 1/2 teaspoons pure vanilla extract
- 2 teaspoons fresh orange zest
Instructions
- Drain the Ricotta: Place the ricotta cheese into a fine mesh strainer and set it in the refrigerator to drain for at least 6 hours and up to 24 hours. This step removes excess moisture to ensure a thick, creamy filling.
- Prepare the Filling: Once drained, transfer the ricotta to a mixing bowl. Add the confectioners’ sugar, 1/2 cup of the mini chocolate chips, vanilla extract, and fresh orange zest. Gently fold the ingredients together until evenly combined and smooth.
- Fill the Cannoli Shells: Using a piping bag or a spoon, carefully fill each cannoli shell with the ricotta mixture. Be generous to get a creamy center in every bite.
- Garnish and Serve: Sprinkle the remaining 1/4 cup of mini chocolate chips over the ends of the cannoli or on top of the filling. Dust each filled cannoli lightly with confectioners’ sugar just before serving for a beautiful finishing touch.
Notes
- This recipe eliminates the need for frying by using store-bought cannoli shells, saving time and effort while still delivering traditional flavor and texture.
- Draining the ricotta is essential for a thick and creamy filling rather than a runny mixture.
- Add fresh orange zest to brighten the flavor and add an aromatic note to the filling.
- Perfect for Christmas or any festive occasion where you want a classic Italian dessert without complicated preparation.
Nutrition
- Serving Size: 1 cannoli
- Calories: 230
- Sugar: 12g
- Sodium: 60mg
- Fat: 13g
- Saturated Fat: 8g
- Unsaturated Fat: 4g
- Trans Fat: 0g
- Carbohydrates: 22g
- Fiber: 1g
- Protein: 6g
- Cholesterol: 35mg


