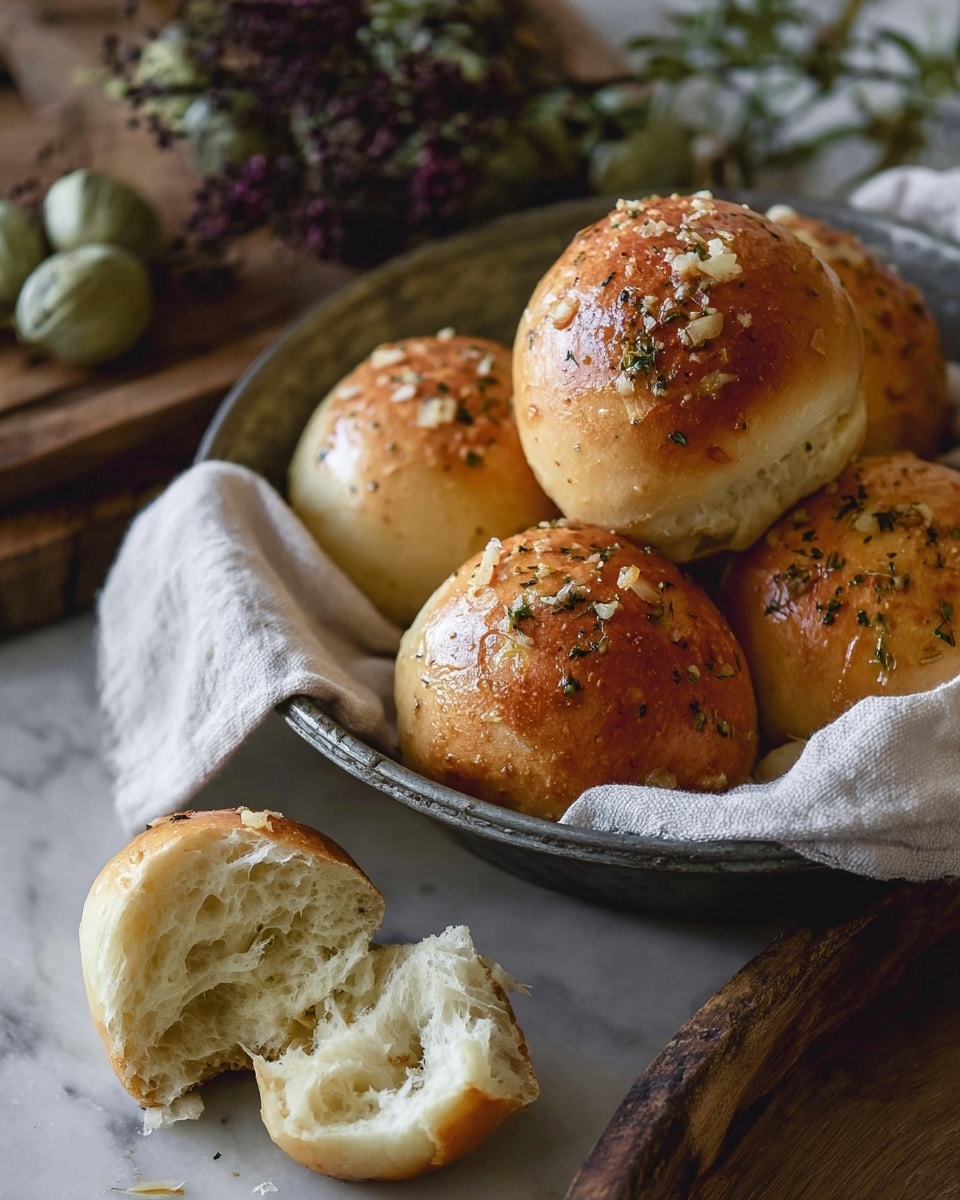
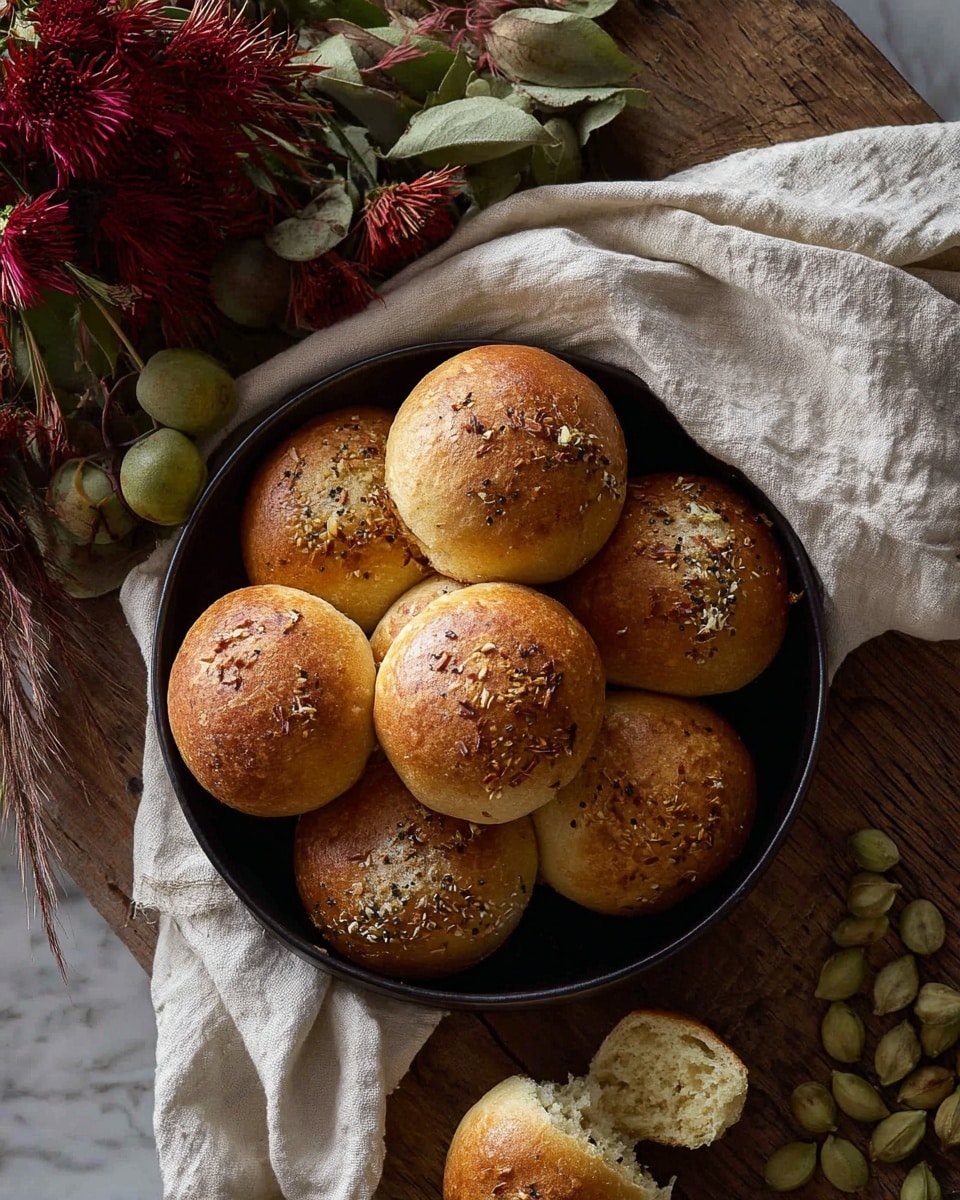
If you’re hunting for the perfect soft, buttery rolls to jazz up any meal, you’re in for a treat with this Homemade Garlic Herb Rolls Recipe. I absolutely love this recipe because it’s a total game-changer—those fluffy, garlicky bites just melt in your mouth, and the herby butter glaze on top? Pure magic. Whether it’s a holiday feast or a casual family dinner, these rolls never fail to impress, and honestly, they’re easier than you’d think!
Why You’ll Love This Recipe
- Soft, Fluffy Texture: Thanks to the way the dough is handled and the perfect balance of ingredients, the rolls come out irresistibly tender every time.
- Bursting with Flavor: The fresh garlic and Italian herbs in the butter glaze give these rolls a deliciously savory kick that your guests will rave about.
- Great for Any Occasion: Whether it’s Thanksgiving dinner, a weeknight meal, or a special brunch, these rolls fit right in and elevate the whole table.
- Make Ahead Friendly: You can prep and freeze these rolls, making your mealtime stress-free and just as delicious.
Ingredients You’ll Need
The ingredients for these rolls combine simple pantry staples and fresh aromatics that work harmoniously to create a rich, garlicky bread experience. When shopping, try to find good quality butter and fresh garlic—the difference really shines through!
- Whole milk: Using whole milk gives the rolls a rich, tender crumb.
- Unsalted butter: Unsalted lets you control the saltiness perfectly; plus, fresh butter is key for that luscious buttery flavor.
- Sugar: Adds just a touch of sweetness, helping the yeast activate and balancing the savory herbs.
- Active dry yeast: Make sure it’s fresh and check the expiration date—this ensures your dough rises beautifully.
- Warm water: Warm, not hot, to gently wake up the yeast without killing it.
- Fresh garlic cloves: Finely chopped—to infuse the dough with a subtle yet unmistakable garlicky goodness.
- Large eggs: Adds richness and structure to the rolls.
- Salt: Balances flavors and enhances the natural taste of the ingredients.
- All-purpose flour: The backbone of the dough—measuring carefully helps with the perfect dough consistency.
- Italian seasoning: A fragrant blend that brings a Mediterranean herb aroma to the butter glaze.
- Parmesan cheese: Finely grated to sprinkle on top, adding a sharp, nutty finish.
Variations
I love experimenting with these rolls depending on the season or what’s in the fridge. Feel free to tweak the herbs or add extras like cheese inside the dough. It’s your homemade roll adventure—make it yours!
- Herb Variations: I sometimes swap Italian seasoning for fresh rosemary or thyme for a different flavor profile that works beautifully with garlic.
- Cheese-Stuffed Rolls: Adding a small cube of mozzarella or cheddar inside each dough ball before rising makes for a delightful surprise.
- Garlic Substitute: If you’re expecting little ones or prefer a milder flavor, roasting the garlic beforehand softens the sharpness but keeps that yummy aroma.
- Gluten-Free Version: While I haven’t tried it myself, using a blend of gluten-free flours with xanthan gum might yield tasty rolls with some extra kneading patience.
How to Make Homemade Garlic Herb Rolls Recipe
Step 1: Warm the Milk and Butter Mixture
Start by placing the whole milk in a small saucepan and gently bringing it to a simmer—don’t let it boil. Then, remove it from the heat and stir in the unsalted butter and sugar until melted and combined. Let this mixture cool to around room temperature so it won’t kill the yeast when added later. Patience here pays off for a great rise.
Step 2: Activate the Yeast
While the milk mixture cools, dissolve your active dry yeast in the warm water and let it rest until it’s foamy—about 5 to 10 minutes. This tells you the yeast is alive and ready to work its magic in your dough.
Step 3: Make the Dough
In your mixer fitted with a dough hook (or by hand if you’re up for some elbow grease), combine the cooled milk mixture, finely chopped garlic, lightly beaten eggs, salt, and half of the flour. Mix until the dough is smooth. Then add the remaining flour, half a cup at a time, until a smooth, elastic ball forms. Too sticky? Add just a bit more flour, but be careful not to dry it out.
Step 4: Knead and Let Rise
Transfer the dough onto a floured surface and knead it for about 5 minutes—this helps develop the gluten for that perfect texture. Place it in a greased bowl, cover it with a clean towel or plastic wrap, and set it in a warm spot to rise until doubled in size, roughly 1 hour. I usually put mine near the oven or microwave—just a cozy warm spot.
Step 5: Shape the Rolls and Second Rise
Punch down the risen dough gently to release the air, then divide it into 15 equal pieces—about the size of a tennis ball, or roughly 2.5 ounces each. Shape each piece into a smooth ball and arrange them on parchment paper-lined baking sheets with some space between. Cover again and let them rise until doubled in size, about 30 to 40 minutes.
Step 6: Bake and Brush with Garlic Herb Butter
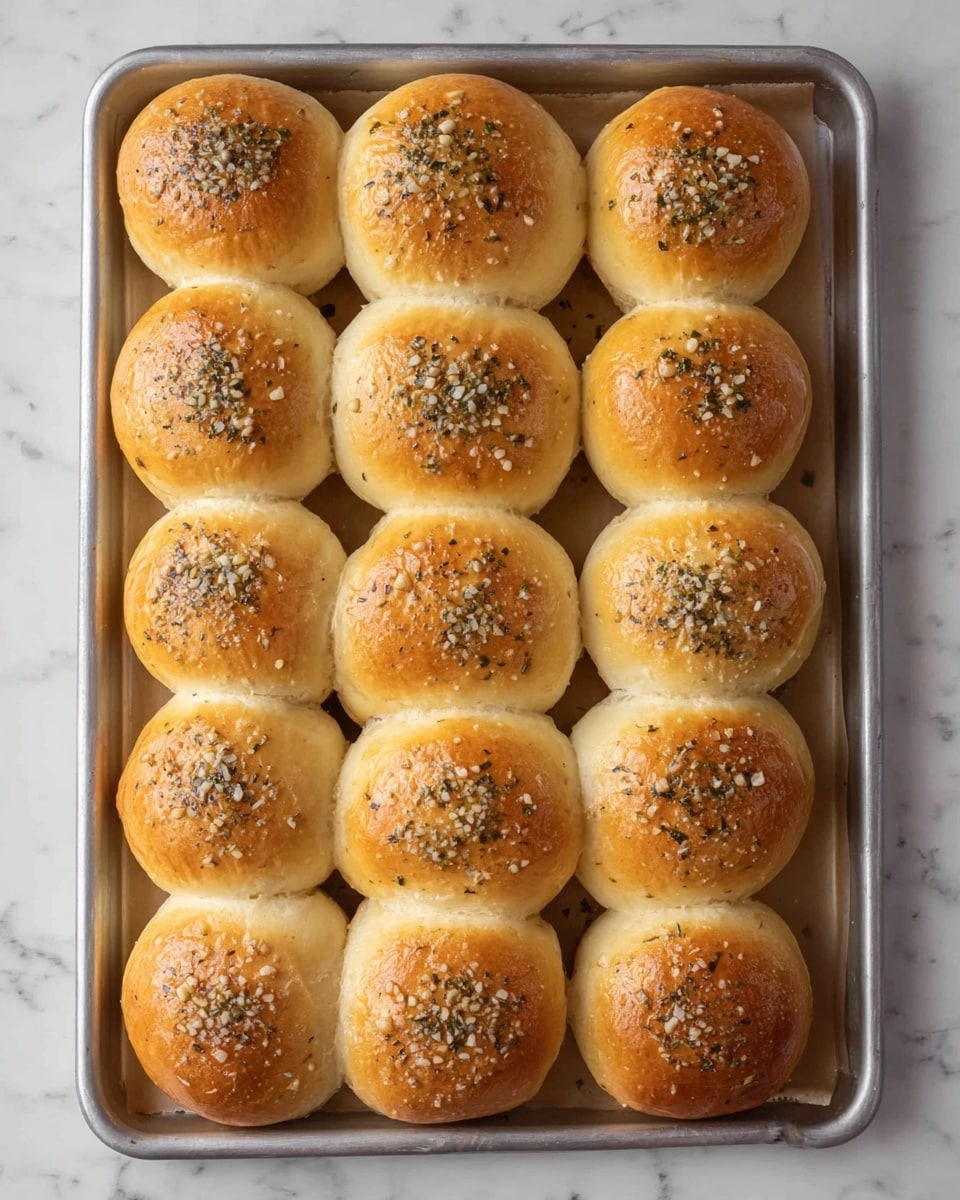
Preheat your oven to 350°F. Bake the rolls for about 20 minutes, or until they’re gloriously golden brown on top. Meanwhile, melt ½ cup of butter with your Italian seasoning in a small saucepan over low heat. Remove from heat, stir in the finely grated parmesan cheese. When the rolls come out hot, brush them generously with this heavenly garlic herb butter. That final step is a total crowd-pleaser!
Pro Tips for Making Homemade Garlic Herb Rolls Recipe
- Use Room Temperature Ingredients: I learned the hard way that cold eggs or milk slow the yeast down, so bringing ingredients to room temp helps the dough rise faster and more evenly.
- Don’t Overflour the Dough: It’s tempting to keep adding flour to handle sticky dough, but a slightly tacky dough ensures the rolls stay soft and fluffy.
- Watch Your Oven Temperature: Ovens vary, so start checking the rolls a few minutes before the recommended 20 minutes to avoid over-baking and losing moisture.
- Brush Butter While Rolls Are Hot: This helps butter absorb better and the herbs and cheese stick perfectly, creating that irresistible glossy finish.
How to Serve Homemade Garlic Herb Rolls Recipe
Garnishes
My go-to garnish is a quick sprinkle of extra parmesan or freshly chopped parsley right after brushing with the garlic herb butter—it adds a fresh pop of color and brightness. If you’re feeling fancy, a light dusting of flaky sea salt works wonders, too.
Side Dishes
I often serve these rolls alongside cozy soups like creamy tomato basil or loaded potato soup. They also shine at hearty dinners with roast chicken, turkey, or even alongside pasta with a rich sauce. My family goes crazy for them dipped in herbed olive oil or honey butter!
Creative Ways to Present
For holidays or special meals, I like arranging the rolls in a circular wreath shape on a large platter, then drizzling the garlic herb butter over the whole ring—it makes for a stunning centerpiece that everyone immediately reaches for. Wrapping individual rolls in festive napkins or placing them in a lined bread basket also adds a cozy, inviting touch.
Make Ahead and Storage
Storing Leftovers
I usually store leftover rolls in an airtight container or resealable plastic bag at room temperature for up to two days. They stay soft and fresh enough to enjoy without reheating—although a quick warm-up definitely revives them beautifully.
Freezing
Freezing is a lifesaver when it comes to these rolls! After the first rise but before baking, I shape the rolls and flash freeze them on a lined tray. Then I toss them into a freezer bag. When I’m ready to bake, I let them thaw and proof at room temperature until doubled, then bake as usual. This keeps that fresh-baked flavor intact.
Reheating
To reheat leftover rolls, I wrap them in foil and warm them in a 300°F oven for about 10 minutes. This keeps them moist without drying out the crust. A quick brush of melted garlic herb butter after reheating brings them back to life, just like fresh!
FAQs
-
Can I make the dough by hand instead of using a mixer?
Absolutely! I’ve made this recipe by hand plenty of times. Just mix the wet ingredients and flour in a large bowl, then knead on a floured surface for 8-10 minutes until the dough is smooth and elastic. It’s a great way to connect with the dough and often feels very satisfying.
-
What if I don’t have Italian seasoning?
No worries! You can easily make your own blend using dried basil, oregano, thyme, rosemary, and a pinch of sage. Or just use whichever herbs you love—the recipe is forgiving and will still taste amazing.
-
How can I tell when the rolls are done baking?
Look for a golden-brown top and a hollow sound when you gently tap the bottom of a roll. If you have a thermometer, the internal temperature should be about 190°F. Don’t worry if you don’t—just trust your eyes and that delicious aromas fill the kitchen!
-
Can I add extra garlic to the dough for more punch?
You can! I suggest sticking to fresh garlic finely chopped or minced so it incorporates well. Too much might overpower or make the dough too wet, but if you love bold garlic flavors like I do, bumping it up a little is fun. You’ll just want to balance it with the butter glaze.
Final Thoughts
I truly believe this Homemade Garlic Herb Rolls Recipe has become one of my kitchen staples because it’s a wonderful blend of comforting and fancy all at once. Every time I pull these golden, garlicky gems out of the oven, the whole house smells like a dream, and my family can’t get enough. I hope you’ll give them a try and enjoy that cozy, homemade bread bliss as much as I do—it’s such a joy to make and share!
Print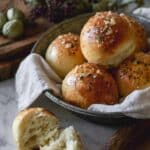
Homemade Garlic Herb Rolls Recipe
- Prep Time: 35 minutes
- Cook Time: 20 minutes
- Total Time: 1 hour 45 minutes
- Yield: 15 rolls
- Category: Bread
- Method: Baking
- Cuisine: American
Description
These Homemade Garlic Herb Rolls are soft, fluffy, and packed with delicious garlic and herb flavors. Perfect for holidays, dinner sides, or anytime you want buttery, savory bread fresh from your oven. The rolls are made with a simple yeast dough enriched with milk, butter, and eggs, then brushed with melted herb butter and Parmesan cheese for an irresistible finish.
Ingredients
Dough Ingredients
- 1 1/2 cups whole milk
- 1 stick unsalted butter (cut into pieces)
- 1/3 cup sugar
- 1 package active dry yeast
- 1/2 cup warm water
- 4 cloves garlic (finely chopped)
- 3 large eggs (lightly beaten)
- 2 teaspoons salt
- 6 cups all-purpose flour
Topping Ingredients
- ½ cup butter
- 1 tablespoon Italian seasoning
- Finely grated Parmesan cheese (to taste)
Instructions
- Prepare Milk Mixture: Place the whole milk in a small saucepan and bring it to a gentle simmer. Remove from heat and stir in the stick of unsalted butter and sugar. Allow this mixture to cool to room temperature to avoid killing the yeast later.
- Activate Yeast: In a small bowl, dissolve the active dry yeast in 1/2 cup of warm water and let it sit until it becomes foamy, indicating the yeast is active, about 5-10 minutes.
- Mix Dough: In a mixer fitted with a dough hook, combine the cooled milk mixture, finely chopped garlic, lightly beaten eggs, activated yeast, salt, and half of the all-purpose flour. Mix on low speed until smooth. Gradually add the remaining flour, about 1/2 cup at a time, continuing to stir until the dough forms a smooth, cohesive ball.
- Knead Dough: Remove the dough from the mixer and place it on a floured surface. Knead by hand for about 5 minutes until the dough is elastic and smooth.
- First Rise: Place the kneaded dough into a greased bowl and cover with a clean towel or plastic wrap. Let it rise in a warm place until it doubles in size, approximately 1 hour.
- Shape Rolls: Punch the risen dough down to release air. On a floured surface, divide the dough into small balls, each about 2.5 ounces, slightly smaller than a tennis ball. Arrange the rolls on a parchment paper-lined baking sheet.
- Second Rise: Cover the rolls again and let them rise until they double in size, around 30 to 40 minutes.
- Preheat Oven: Preheat your oven to 350°F (175°C).
- Bake Rolls: Bake the rolls for about 20 minutes or until they turn golden brown on top.
- Prepare Herb Butter: While the rolls bake, melt ½ cup butter in a small saucepan over low heat. Stir in 1 tablespoon Italian seasoning, then remove from heat.
- Finish and Serve: Once the rolls are baked, remove them from the oven and immediately brush them generously with the melted herb butter. Sprinkle finely grated Parmesan cheese over the top while the butter is still warm. Serve warm and enjoy!
Notes
- For the best flavor, finely chop fresh garlic rather than using garlic powder.
- Ensure the milk mixture is cooled before adding yeast to prevent killing it.
- You can substitute whole milk with 2% milk if preferred.
- Parmesan cheese adds a salty, nutty flavor but can be omitted for a simpler roll.
- These rolls freeze well; store cooled rolls in an airtight container for up to 2 months.
- If you want a softer crust, brush the rolls with melted butter again after baking.
- These rolls are perfect for festive occasions like Thanksgiving or Christmas dinners.
Nutrition
- Serving Size: 1 roll
- Calories: 338 kcal
- Sugar: 6 g
- Sodium: 383 mg
- Fat: 14 g
- Saturated Fat: 9 g
- Unsaturated Fat: 5 g
- Trans Fat: 0.5 g
- Carbohydrates: 44 g
- Fiber: 2 g
- Protein: 7 g
- Cholesterol: 68 mg

