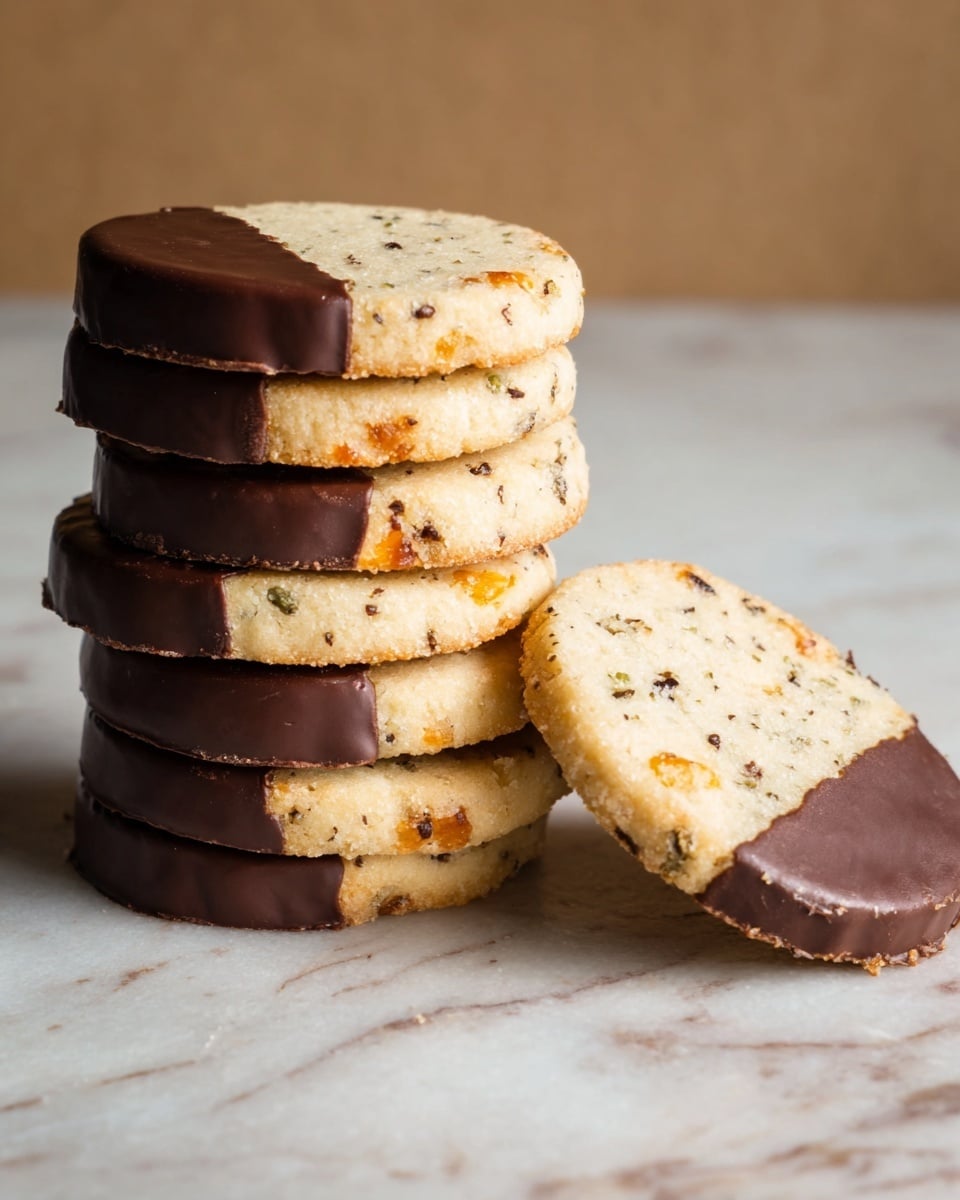
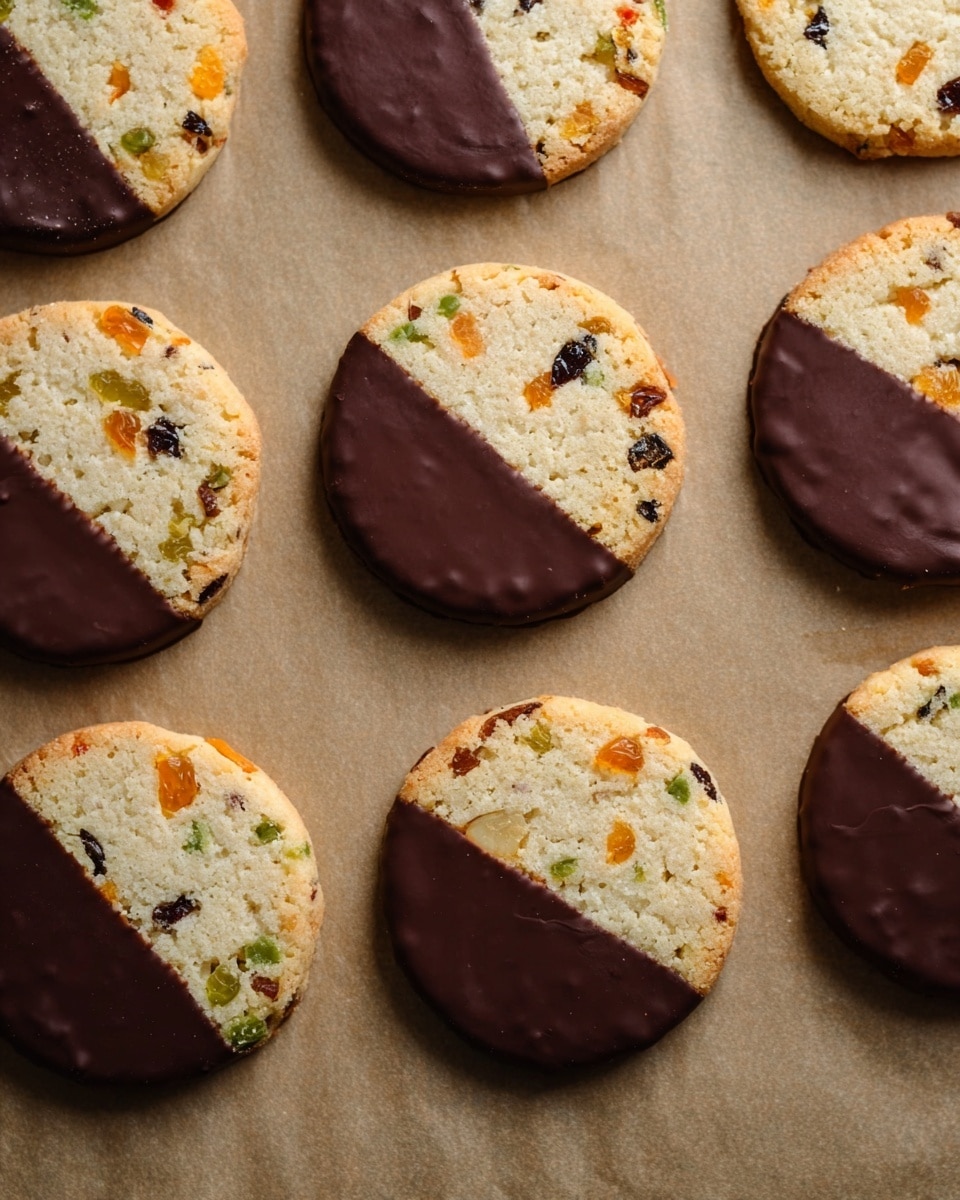
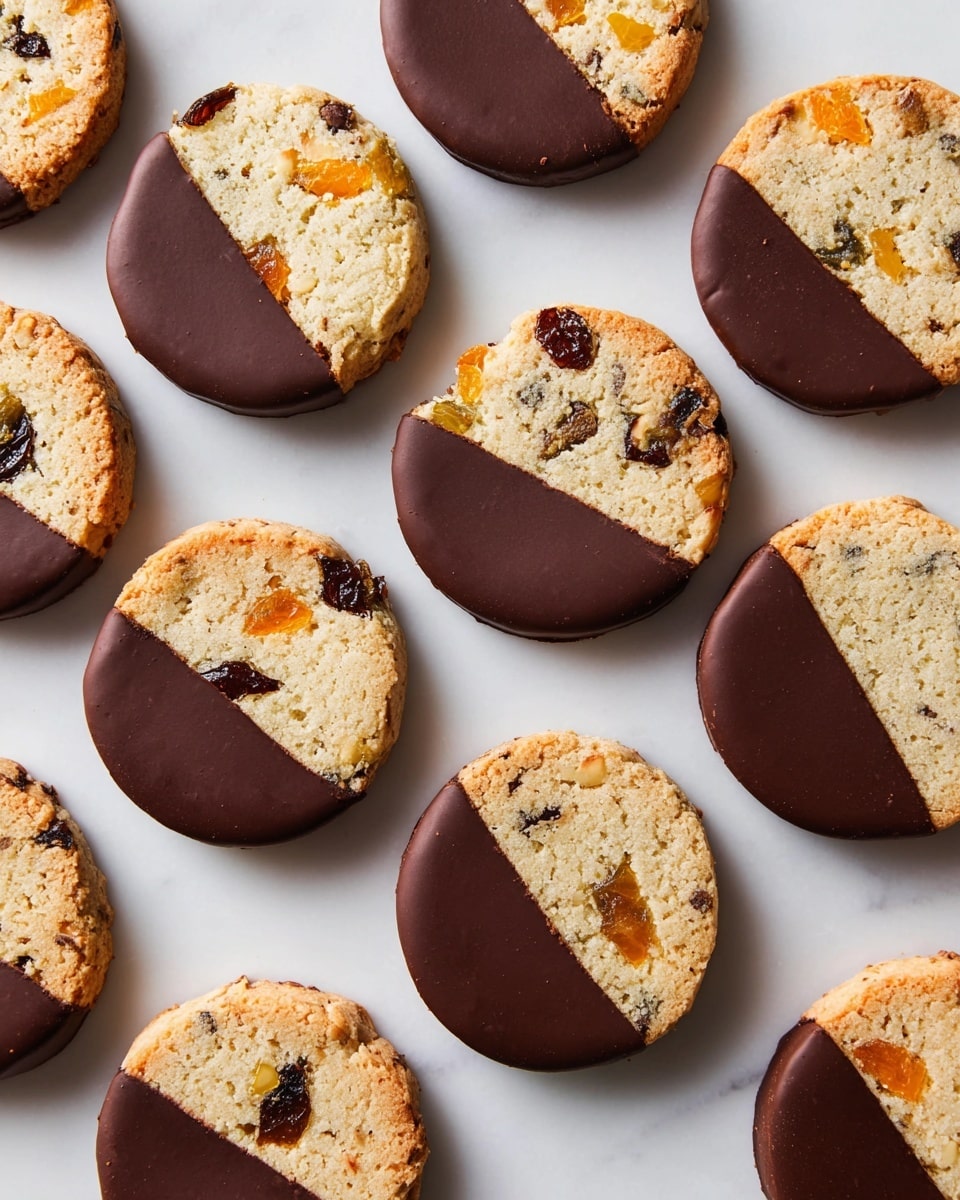
I absolutely love this Jeweled Butter Cookies with Dried Fruits and Chocolate Glaze Recipe because it’s like a little burst of celebration in every bite. The bright colors from the dried apricots, cherries, and pistachios make these cookies feel festive and special, perfect for holiday gatherings or a cozy afternoon treat. When I first tried this recipe, the balance of buttery richness, fruity sweetness, and just a hint of citrus color me hooked right away.
You’ll find that these cookies aren’t just pretty—they’re delightfully tender and melt in your mouth. The chocolate glaze on top adds that perfect glossy finish and a touch of bitterness to counter the sweet jewels inside. Whether you’re gifting them or enjoying with a cup of tea, this Jeweled Butter Cookies with Dried Fruits and Chocolate Glaze Recipe always feels like a winner.
Why You’ll Love This Recipe
- Vibrant and Festive: The mix of dried fruits and pistachios gives every cookie a jewel-like look that’s a feast for the eyes.
- Perfectly Buttery Texture: These cookies are tender but hold their shape beautifully—thanks to the careful ingredient balance.
- Simple Yet Impressive: You don’t need fancy tools or exotic ingredients to pull these off, just some patience and a little freezing time.
- Delicious Chocolate Glaze: The bittersweet glaze adds a sophisticated finishing touch that complements the fruity cookies perfectly.
Ingredients You’ll Need
All the ingredients for this Jeweled Butter Cookies with Dried Fruits and Chocolate Glaze Recipe are easy to find, and they balance flavor and texture beautifully. The dried fruits bring sweetness and chewiness, while the pistachios add crunch and a pop of color, making these cookies uniquely delightful.
- Unsalted Butter: Using room temperature butter makes creaming easier and ensures a tender crumb.
- Granulated Sugar: Adds sweetness and helps create the cookie’s classic buttery texture.
- Egg Yolks: They enrich the dough, making cookies soft and slightly dense, with a beautiful golden color.
- Freshly Grated Orange Zest: This brightens the flavor and pairs wonderfully with dried fruits.
- All-Purpose Flour: The base of the dough, it provides structure without being too dense.
- Baking Powder: Gives just a little lift to lighten up the cookie texture.
- Kosher Salt: Enhances all the flavors—never skip it!
- Pistachios: Roughly chopped for that perfect nutty crunch and vibrant green contrast.
- Dried Apricots: Chopped for chewiness and fruity sweetness that’s not overpowering.
- Dried Sour Cherries: Their tartness balances the sweet and buttery notes perfectly.
- Bittersweet Chocolate: Melted for the glaze, it adds richness without too much sweetness.
- Neutral Oil (like coconut or vegetable): Mixed into the chocolate for a smooth, shiny glaze.
Variations
I like to mix things up a bit depending on the season or what I have on hand. This Jeweled Butter Cookies with Dried Fruits and Chocolate Glaze Recipe is flexible, so feel free to swap fruits or nuts to suit your taste or dietary needs. Personalizing this recipe is part of the fun!
- Fruit Variations: I’ve tried using dried cranberries or golden raisins instead of sour cherries and apricots, and it’s just as delicious with a different twist.
- Nut Substitutions: If you’re not a pistachio fan, chopped almonds or walnuts work great too for that extra crunch.
- Gluten-Free Version: Swapping all-purpose flour for a gluten-free blend has worked well for me; just keep an eye on the dough texture.
- Chocolate-Free: If you prefer, simply dust the cookies with powdered sugar instead of dipping them in chocolate glaze.
How to Make Jeweled Butter Cookies with Dried Fruits and Chocolate Glaze Recipe
Step 1: Cream Butter and Sugar to Perfection
Start by beating your room-temperature butter and sugar together on medium speed until light and fluffy—this usually takes about 2 minutes. This step is key because it traps air, making your cookies tender and light. Then, beat in the egg yolks and freshly grated orange zest until everything is well combined. Use freshly grated zest rather than dried for that burst of citrus aroma.
Step 2: Add Dry Ingredients and Dried Fruits
Next, mix the flour, baking powder, and kosher salt in a separate bowl, then gradually beat them into your wet mixture just until everything comes together. Overmixing here will make the cookies tough, so it’s best to stop as soon as the flour disappears. Fold in your chopped pistachios, dried apricots, and sour cherries gently—these are your gorgeous “jewels” that give the cookies their name and charm.
Step 3: Shape and Freeze the Dough Cylinders
Divide the dough in half and shape each portion into a 2-inch cylinder using a sheet of plastic wrap to help roll and shape it smoothly. I love doing two smaller logs rather than one big one because they’re easier to slice evenly later on. Place the wrapped cylinders in the freezer for 2 to 4 hours to firm up—this step makes slicing tidy cookies a breeze and prevents spreading during baking.
Step 4: Slice and Bake Your Cookies
Preheat your oven to 350°F. Using a sharp knife, slice about ¼-inch thick cookies from one frozen cylinder. Place the slices onto parchment-lined baking sheets, spaced about 1 inch apart, then bake for approximately 15 minutes until the edges turn light golden. I recommend letting the cookies cool completely on a wire rack before handling, as they firm up beautifully and finish setting as they cool.
Step 5: Dip in Chocolate Glaze for the Finishing Touch
While the cookies cool, prepare your chocolate glaze by whisking a teaspoon of neutral oil into warm melted bittersweet chocolate—this makes the coating silky and shiny. Transfer the glaze to a narrow but deep container for easy dipping. Then, dip each cookie carefully into the chocolate and set it on parchment paper to firm up at room temperature or in the fridge. Once set, your Jeweled Butter Cookies with Dried Fruits and Chocolate Glaze Recipe is ready to impress!
Pro Tips for Making Jeweled Butter Cookies with Dried Fruits and Chocolate Glaze Recipe
- Use Room Temperature Butter: Soft butter creams more easily with sugar, creating that fluffy base essential for tender cookies.
- Freeze Dough Logs Thoroughly: Don’t rush this step—firm dough slices much better and keep their pretty shape without spreading.
- Choose Quality Dried Fruits: Go for naturally sweet, unsulfured dried fruits with good chewiness to avoid overly sticky or tough bits.
- Dip Cookies When Completely Cool: Chocolate won’t set nicely if cookies are warm, so wait for full cooling to get a perfect shine.
How to Serve Jeweled Butter Cookies with Dried Fruits and Chocolate Glaze Recipe
Garnishes
I like to sprinkle a few extra roughly chopped pistachios or a light dusting of powdered sugar on top of the chocolate glaze for an added touch of elegance and texture. Sometimes a tiny pinch of sea salt flakes on the glaze before it sets creates a lovely sweet-salty contrast that my family can’t get enough of.
Side Dishes
This cookie pairs wonderfully with a warm cup of Earl Grey tea or a rich dark coffee. For festive occasions, I often serve them alongside a cheese platter or a bowl of mixed nuts and dried fruit to complement the jewel theme with savory elements.
Creative Ways to Present
For holiday gift-giving, I like to stack these cookies in a clear box tied with a ribbon, so the colorful dried fruits peek through enticingly. Another fun idea is arranging them on a festive platter surrounded by fresh citrus slices and edible flowers for gatherings—guaranteed to get compliments!
Make Ahead and Storage
Storing Leftovers
I store leftover Jeweled Butter Cookies with Dried Fruits and Chocolate Glaze Recipe in an airtight container at room temperature, layered between parchment paper to prevent sticking. They stay fresh and flavorful for up to a week, though they rarely last that long in my house!
Freezing
If you want to freeze extras, I recommend freezing the unbaked dough cylinders wrapped tightly in plastic wrap and then in a freezer bag. When ready, slice and bake directly from frozen. Baked cookies also freeze well if wrapped individually in plastic and stored in a sealed container.
Reheating
To reheat baked cookies, pop them in a 300°F oven for 5-8 minutes to regain that fresh-baked warmth without melting the glaze. Avoid microwaving as it can make the chocolate glaze soft or messy.
FAQs
-
Can I use other dried fruits in this Jeweled Butter Cookies with Dried Fruits and Chocolate Glaze Recipe?
Absolutely! While dried apricots and sour cherries are classic in this recipe, you can substitute with dried cranberries, raisins, or even chopped figs. Just make sure they are chopped finely enough to distribute evenly without making the dough too sticky.
-
Why do I need to freeze the dough before slicing?
Freezing the dough firms it up, which helps you slice clean, even cookies without the dough sticking or losing shape. This also prevents the cookies from spreading too much when baked, giving you a neat, jewel-studded appearance.
-
What’s the best chocolate to use for the glaze?
Bittersweet chocolate is ideal because it offers rich flavor without too much sweetness, balancing the fruity cookies nicely. Avoid milk chocolate, as it can be overly sweet and less stable when melted and set.
-
Can I prepare these cookies ahead of time for a party?
Yes! The dough can be frozen for weeks before baking, and baked cookies kept in airtight containers stay fresh up to a week. You can also dip cookies in chocolate glaze a day ahead—just store them chilled for best results.
Final Thoughts
This Jeweled Butter Cookies with Dried Fruits and Chocolate Glaze Recipe has become such a favorite in my kitchen because it’s both stunning and delicious without being complicated. It’s the kind of recipe you pull out when you want to impress but also relax and enjoy the process. Give it a try—once you taste that buttery cookie with its sweet, tangy jewels and glossy chocolate coat, I bet it’ll become a staple in your baking rotation too!
Print
Jeweled Butter Cookies with Dried Fruits and Chocolate Glaze Recipe
- Prep Time: 2 hours 10 minutes
- Cook Time: 15 minutes
- Total Time: 2 hours 25 minutes
- Yield: 3 ½ dozen (approximately 42 cookies)
- Category: Baking
- Method: Baking
- Cuisine: American
Description
Jeweled Butter Cookies are a delightful treat combining a rich buttery base with vibrant dried fruits and crunchy pistachios, finished with a smooth bittersweet chocolate glaze. These elegant cookies are perfect for festive occasions or gifting, offering a beautiful mix of texture and flavor with a hint of orange zest.
Ingredients
For the cookies:
- 1 cup (2 sticks) unsalted butter, at room temperature
- 3/4 cup granulated sugar
- 3 large egg yolks
- 1 teaspoon freshly grated orange zest
- 2 1/2 cups all-purpose flour
- 1/2 teaspoon baking powder
- 1/2 teaspoon kosher salt
- 1/2 cup pistachios, roughly chopped
- 1/2 cup dried apricots, roughly chopped
- 1/2 cup dried sour cherries, roughly chopped
For the chocolate glaze:
- 4 ounces bittersweet chocolate, melted
- 1 teaspoon neutral oil, such as coconut or vegetable oil
Instructions
- Make the cookies: In a large bowl, use an electric mixer on medium speed to beat the butter and sugar together until they become fluffy and well combined, about 2 minutes. Add the egg yolks and freshly grated orange zest, then beat again until fully incorporated. Gradually mix in the all-purpose flour, baking powder, and kosher salt. Finally, fold in the chopped pistachios, dried apricots, and dried sour cherries just until evenly distributed throughout the dough.
- Shape the dough: Divide the dough into two equal halves. Place each half onto a sheet of plastic wrap and roll each into a cylinder about 2 inches in diameter. Wrapping it tightly helps maintain shape. Freeze the dough cylinders until they are solid, which should take about 2 to 4 hours. This chilling step makes slicing easier and helps keep the cookies sturdy during baking.
- Bake the cookies: Preheat the oven to 350°F (175°C). Using a sharp knife, cut the frozen dough cylinders into thin slices approximately 1/4 inch thick. Arrange the slices on parchment-lined baking sheets, spacing them evenly. Bake the cookies in the preheated oven until they are set and lightly golden around the edges, about 15 minutes. After baking, transfer the cookies to a wire rack and allow them to cool completely.
- Prepare the chocolate glaze and dip: Line two cookie sheets with parchment paper. Whisk the neutral oil into the warm melted bittersweet chocolate to create a smooth dipping glaze. Pour the chocolate mixture into a short glass or ramekin that is wide enough to dip the cookies but narrow enough to have about 1 ½ inches depth of chocolate. Dip each cooled cookie halfway into the chocolate glaze, then set them onto the prepared parchment-lined sheets. Allow the chocolate to set at room temperature or refrigerate briefly until firm.
- Storage: Once the chocolate has set, place the cookies in an airtight container. They can be stored at room temperature for up to one week, maintaining their freshness and texture.
Notes
- Freezing the dough cylinders before slicing prevents the dough from spreading and helps keep the cookie shape uniform.
- Using a sharp knife ensures clean slices, providing even cookies that bake uniformly.
- Substitute dried fruits with your favorites such as cranberries or cherries for variation.
- To make the chocolate glaze shinier, tempering the chocolate can be done before mixing in the oil.
- Ensure the cookies are completely cool before dipping to prevent the chocolate from melting unevenly.
Nutrition
- Serving Size: 1 cookie (approx. 20 g)
- Calories: 110
- Sugar: 7 g
- Sodium: 55 mg
- Fat: 7 g
- Saturated Fat: 4.5 g
- Unsaturated Fat: 2 g
- Trans Fat: 0 g
- Carbohydrates: 12 g
- Fiber: 1 g
- Protein: 1.5 g
- Cholesterol: 30 mg

