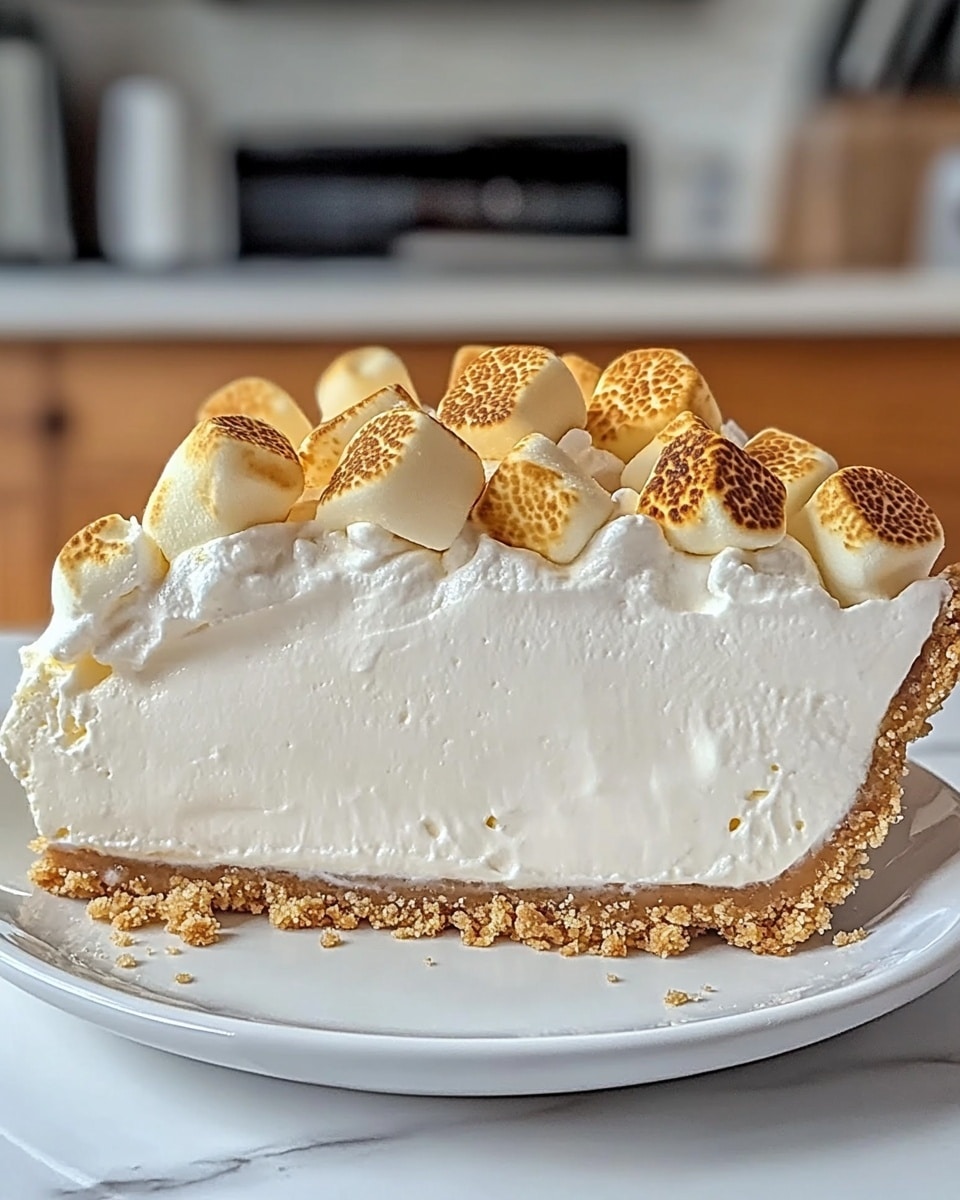
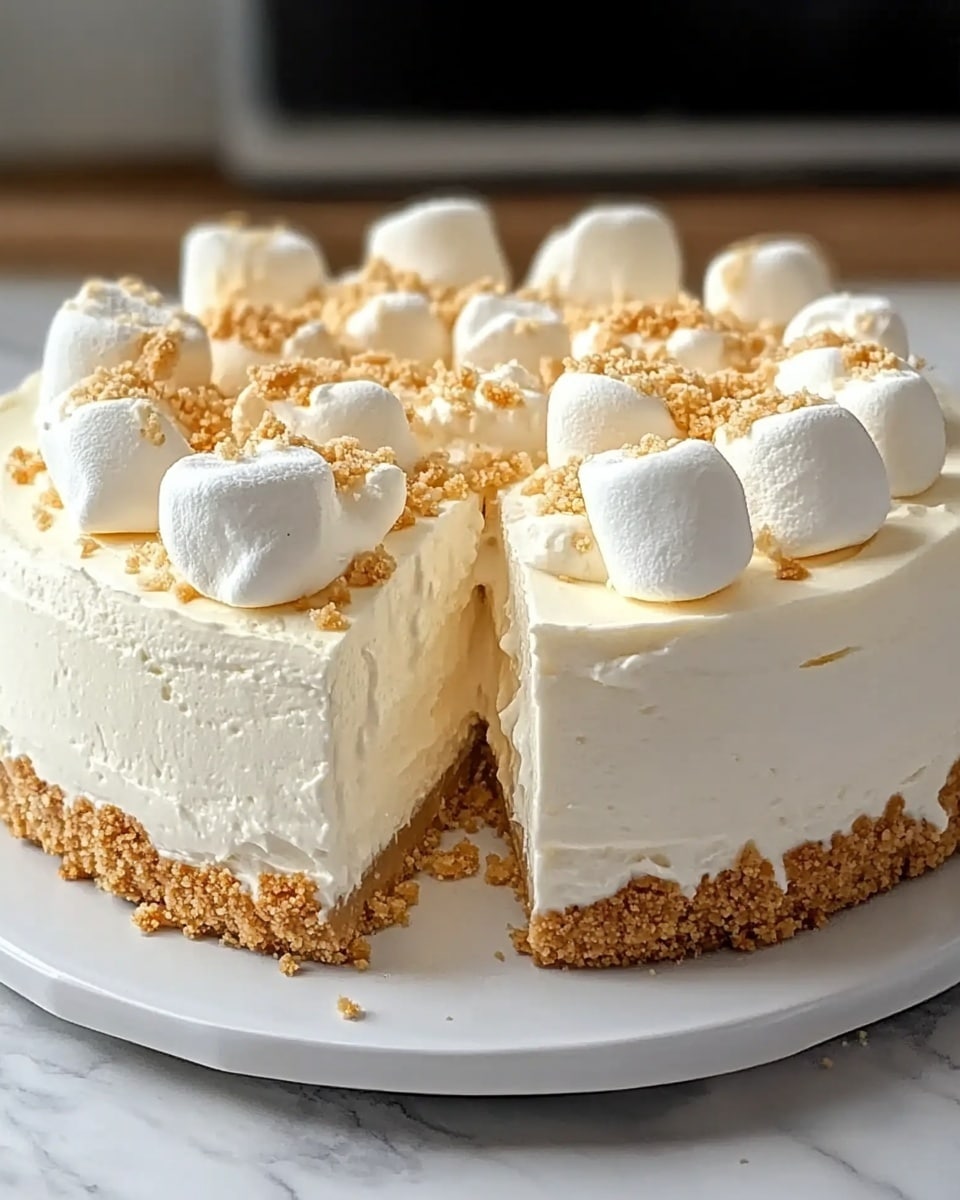
I absolutely love sharing this Marshmallow Whip Cheesecake: No-Bake Dream Dessert Recipe because it’s one of those magical treats that feels fancy but is so incredibly easy to pull off. It’s perfect for when you want a show-stopping dessert without turning on the oven or spending hours in the kitchen. Seriously, once you try it, you’ll find yourself reaching for this recipe again and again.
What makes this Marshmallow Whip Cheesecake: No-Bake Dream Dessert Recipe stand out is its creamy, airy texture combined with that nostalgic marshmallow fluff sweetness. Whether you’re making it for a casual family dinner or a special celebration, it’s guaranteed to impress without stress. I love how you can customize it with different toppings to suit your mood or the season.
Why You’ll Love This Recipe
- No-Bake Convenience: You can whip this up quickly without an oven, perfect for warm days or last-minute desserts.
- Fluffy, Light Texture: The marshmallow fluff and whipped topping create an irresistibly airy cheesecake filling.
- Easy Customization: Simple swaps and add-ins let you tailor the flavors and toppings to your taste or occasion.
- Crowd-Pleaser: My family goes crazy for this dessert – it’s sweet but balanced and not too heavy.
Ingredients You’ll Need
This Marshmallow Whip Cheesecake: No-Bake Dream Dessert Recipe calls for straightforward ingredients that blend beautifully to give you that perfect creamy and sweet cheesecake feel. I recommend using high-quality cream cheese for the smoothest filling, and the graham cracker crust really brings that classic cheesecake base flavor.
- Graham cracker crumbs: This classic base sets the perfect crunchy foundation; store-bought or homemade crumbs work great.
- Granulated sugar: Just a small amount to sweeten the crust without overpowering the filling.
- Unsalted butter: Melted to bind the crust crumbs together – using unsalted lets you control saltiness better.
- Cream cheese: Softened room temperature cream cheese blends smoothly with the fluff for that luscious texture.
- Marshmallow fluff: The star ingredient adding sweetness and the “whip” in this dessert’s texture.
- Vanilla extract: Adds warmth and depth to the filling’s flavor; pure extract is best.
- Whipped topping (like Cool Whip): Thawed and folded in to lighten the cheesecake mix – makes it airy and dreamy.
- Optional Toppings: Think fresh berries for brightness, mini marshmallows for fun texture, chocolate shavings or drizzle for richness, and crushed graham crackers for extra crunch.
Variations
I love tweaking this Marshmallow Whip Cheesecake: No-Bake Dream Dessert Recipe depending on the season or what I have on hand. Once you get the hang of it, you’ll find it’s super forgiving and welcomes your personal twists.
- Lemon Zest Twist: I once added lemon zest to the filling for a bright, citrusy kick that balanced the sweetness perfectly.
- Chocolate Crust Swap: Switching the graham cracker crust for crushed Oreos gives a rich, chocolatey surprise that my kids adore.
- Raspberry Swirl: Swirling in raspberry jam before chilling adds a pop of fruity flavor and a pretty look that’s great for special occasions.
- Mini Cheesecakes: Use a muffin tin lined with cupcake liners for adorable single-serve desserts — perfect for parties!
How to Make Marshmallow Whip Cheesecake: No-Bake Dream Dessert Recipe
Step 1: Create the Perfect Crust
Start by mixing the graham cracker crumbs and granulated sugar in a bowl. Then stir in the melted butter until everything is fully combined and the mixture feels like damp sand—it should hold together when pressed. Press this firmly and evenly into the bottom of a 9-inch springform pan. I like to use the bottom of a glass or measuring cup to really pack it in tight. Pop it in the fridge while you get on with the filling — chilling helps it set just right.
Step 2: Whip Up the Cheesecake Filling
In a large bowl, beat the softened cream cheese until it’s smooth and fluffy—this usually takes around 2-3 minutes with a hand mixer. Next, add in the marshmallow fluff and vanilla extract and mix until creamy and well combined. The marshmallow fluff gives this filling its signature lightness and sweetness. Finally, gently fold in the thawed whipped topping. This step is key: folding keeps the mixture airy, so don’t rush or stir too vigorously. You want your filling to be fluffy and dreamy.
Step 3: Assemble & Chill
Spread the cheesecake filling evenly over the chilled crust, smoothing the top with a spatula. Cover with plastic wrap to protect it from fridge odors, then pop it back in the fridge for at least 4 hours to fully set — I usually let it chill overnight for the best texture. This waiting is tough, but so worth it!
Step 4: Decorate & Serve
When you’re ready to serve, remove the plastic wrap and add your favorite toppings. I love fresh berries for a burst of color and tartness, or mini marshmallows sprinkled on top for extra whimsy. Sometimes, a light drizzle of melted chocolate makes the whole thing feel extra special. Carefully remove the springform pan ring, slice into generous pieces, and serve chilled. Trust me, your friends will ask for seconds.
Pro Tips for Making Marshmallow Whip Cheesecake: No-Bake Dream Dessert Recipe
- Softened Cream Cheese: Always let your cream cheese sit out until fully softened — this keeps your filling ultra smooth and lump-free.
- Gentle Folding: When combining the whipped topping, fold gently to keep the airy texture; overmixing will deflate your filling.
- Chilling Patience: Don’t rush chilling time — a fully set cheesecake slices beautifully and tastes better.
- Crust Pressure: Press your crust firmly and evenly to avoid crumbly edges when slicing; using a flat-bottomed glass helps a lot.
How to Serve Marshmallow Whip Cheesecake: No-Bake Dream Dessert Recipe
Garnishes
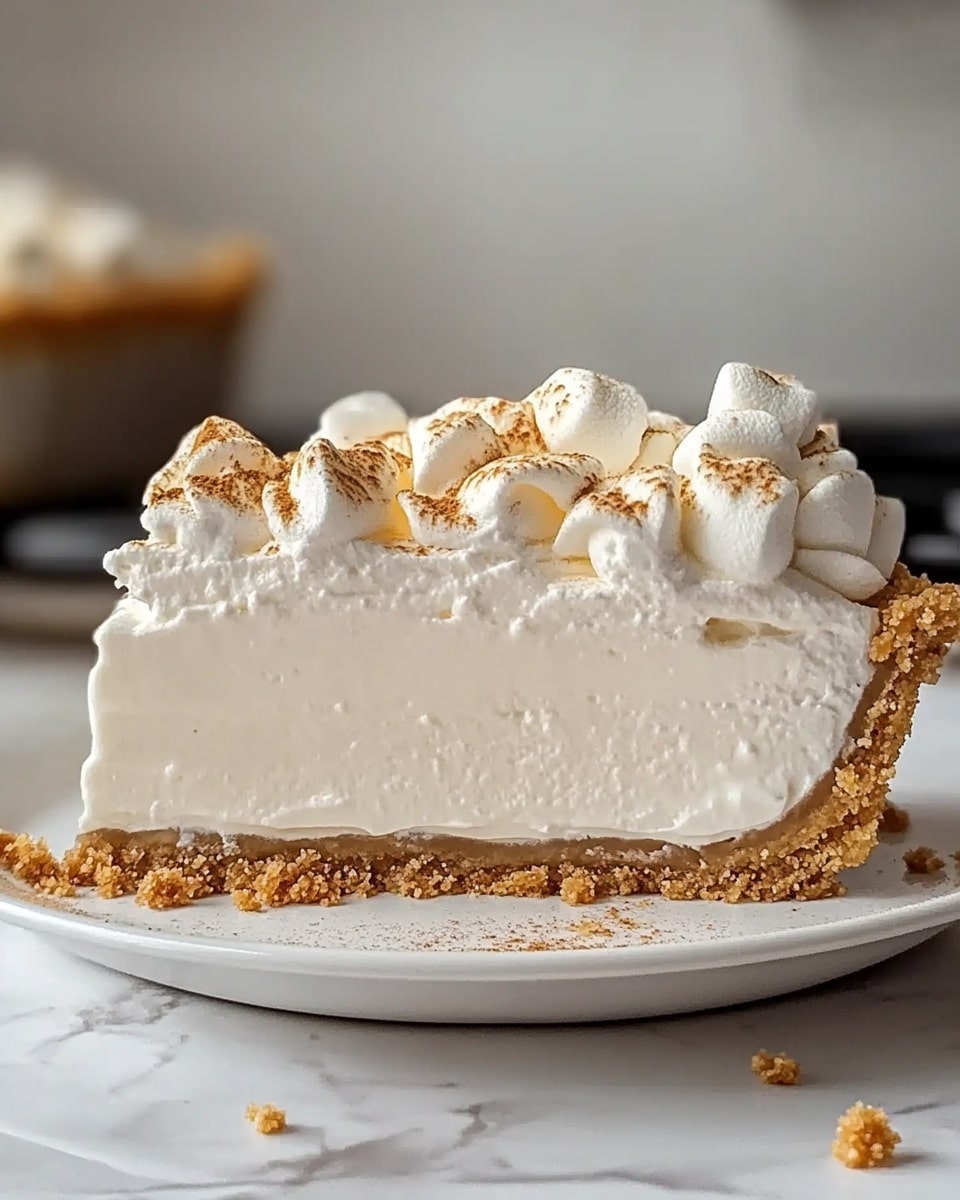
When it comes to garnishes, I love sticking with fresh berries because they add brightness and a pop of color that balances out the sweetness wonderfully. Mini marshmallows sprinkled on top bring a playful touch and extra chewiness. Sometimes I add chocolate shavings or a drizzle of melted chocolate for a little bit of decadence — it’s so simple but makes it look like you spent hours on the dessert.
Side Dishes
This marshmallow cheesecake pairs surprisingly well with light, fresh side dishes. I often enjoy it alongside a tangy citrus salad or even a scoop of tart sorbet to cut through the richness. Pairing it with coffee or a sweet dessert wine can also turn a simple dinner into an indulgent experience.
Creative Ways to Present
For special occasions, I’ve experimented with serving this cheesecake in small parfait glasses layered with crushed graham crackers and fruit for a no-fuss mini dessert. It’s a great way to dress it up and make it more festive. Another idea is swirling in a fruit sauce or jam before chilling to create a beautiful marbled effect inside the cheesecake.
Make Ahead and Storage
Storing Leftovers
I usually store leftover cheesecake in the springform pan, tightly covered with plastic wrap, in the fridge. This keeps it fresh and prevents it from absorbing other fridge odors. Leftovers generally keep beautifully for about 3-4 days and still taste just as creamy and delicious.
Freezing
Freezing this Marshmallow Whip Cheesecake: No-Bake Dream Dessert Recipe works well if you wrap it very tightly in plastic wrap and then with foil to prevent freezer burn. When you’re ready to eat, thaw it overnight in the fridge. The texture is still wonderful, though a bit softer than fresh, but totally worth it if you want to prep in advance.
Reheating
Since this is a no-bake and chilled dessert, reheating isn’t necessary or recommended. Instead, simply let frozen cheesecake slices thaw slowly in the fridge to maintain their creamy texture and fresh flavor.
FAQs
-
Can I make Marshmallow Whip Cheesecake: No-Bake Dream Dessert Recipe without a springform pan?
Yes! If you don’t have a springform pan, you can use a regular 9-inch pie dish. Just be mindful that you’ll need to slice and serve it directly from the dish, as you won’t be able to remove the sides easily.
-
What’s the best way to soften cream cheese quickly?
Cut cream cheese into small cubes and let it sit at room temperature for about 30 minutes. If you’re in a hurry, microwave it in 10-second bursts on low power, checking often so it doesn’t melt.
-
Can I substitute fresh whipped cream for the whipped topping?
Absolutely! Freshly whipped cream can be folded in instead of store-bought whipped topping, which adds a lovely homemade touch. Just make sure it’s whipped to soft peaks for the best texture.
-
Is this recipe gluten-free?
The crust uses graham cracker crumbs, which usually contain gluten. To make it gluten-free, substitute with gluten-free graham crackers or crushed gluten-free cookies.
-
How long does this cheesecake last in the fridge?
Stored properly covered, it stays fresh for up to 4 days. After that, the texture and flavor may start to decline.
Final Thoughts
This Marshmallow Whip Cheesecake: No-Bake Dream Dessert Recipe holds a special place in my heart — it’s saved many of my get-togethers when I wanted dessert to be easy but still feel special. It’s simple, sweet, and endlessly adaptable, making it a perfect go-to recipe to keep in your back pocket. I really hope you enjoy making and sharing this as much as I do — it’s honestly a crowd-pleaser that brings everyone back for seconds!
Print
Marshmallow Whip Cheesecake: No-Bake Dream Dessert Recipe
- Prep Time: 20 minutes
- Cook Time: 0 minutes
- Total Time: 4 hours 20 minutes
- Yield: 10 slices
- Category: Dessert
- Method: No-Cook
- Cuisine: American
Description
This Marshmallow Whip Cheesecake is a light, fluffy, and no-bake dessert that’s perfect for any occasion. Featuring a crunchy graham cracker crust paired with a creamy, airy filling made of cream cheese, marshmallow fluff, and whipped topping, this cheesecake offers a dreamy texture with a hint of sweetness. It’s easy to assemble, requires no oven time, and can be customized with various toppings like fresh berries, mini marshmallows, or chocolate drizzle.
Ingredients
For the Graham Cracker Crust:
- 1 1/2 cups graham cracker crumbs
- 1/3 cup granulated sugar
- 1/2 cup (1 stick) unsalted butter, melted
For the Cheesecake Filling:
- 16 oz cream cheese, softened
- 7 oz marshmallow fluff (1 jar)
- 1 tsp vanilla extract
- 1 container (8 oz) whipped topping (like Cool Whip), thawed
Optional Toppings:
- Fresh berries
- Mini marshmallows
- Chocolate shavings or drizzle
- Crushed graham crackers
Instructions
- Make the Crust: In a medium bowl, mix graham cracker crumbs and granulated sugar. Stir in the melted butter until the mixture is well combined. Press the mixture firmly into the bottom of a 9-inch springform pan to form an even crust. Place the crust in the refrigerator to chill while you prepare the filling.
- Prepare the Filling: In a large mixing bowl, beat the softened cream cheese until smooth and fluffy using a hand mixer or stand mixer. Add the marshmallow fluff and vanilla extract, mixing until fully combined and creamy. Gently fold in the thawed whipped topping with a spatula until the mixture becomes light and airy, taking care not to deflate the whipped topping.
- Assemble the Cheesecake: Spread the cheesecake filling evenly over the chilled crust using a spatula. Smooth the top to create a uniform layer. Cover the pan tightly with plastic wrap and refrigerate for at least 4 hours, preferably overnight, to allow the cheesecake to set properly.
- Decorate and Serve: Before serving, add your choice of optional toppings such as fresh strawberries, mini marshmallows, chocolate drizzle, or crushed graham crackers to enhance flavor and presentation. Carefully remove the springform ring, slice the cheesecake into approximately 10 servings, and serve chilled for the best texture and taste.
Notes
- Crust swaps: Try chocolate wafer cookies or crushed Oreos as an alternative base for a different flavor profile.
- Flavor twists: Add lemon zest to the cheesecake filling for a fresh citrus note, or swirl in raspberry jam before chilling for a fruity twist.
- Make it mini: Use a muffin tin lined with cupcake liners to create individual mini cheesecakes, perfect for parties or portion control.
Nutrition
- Serving Size: 1 slice (1/10th of cheesecake)
- Calories: 310 kcal
- Sugar: 14 g
- Sodium: 210 mg
- Fat: 22 g
- Saturated Fat: 13 g
- Unsaturated Fat: 7 g
- Trans Fat: 0.2 g
- Carbohydrates: 10 g
- Fiber: 0.5 g
- Protein: 4 g
- Cholesterol: 65 mg

