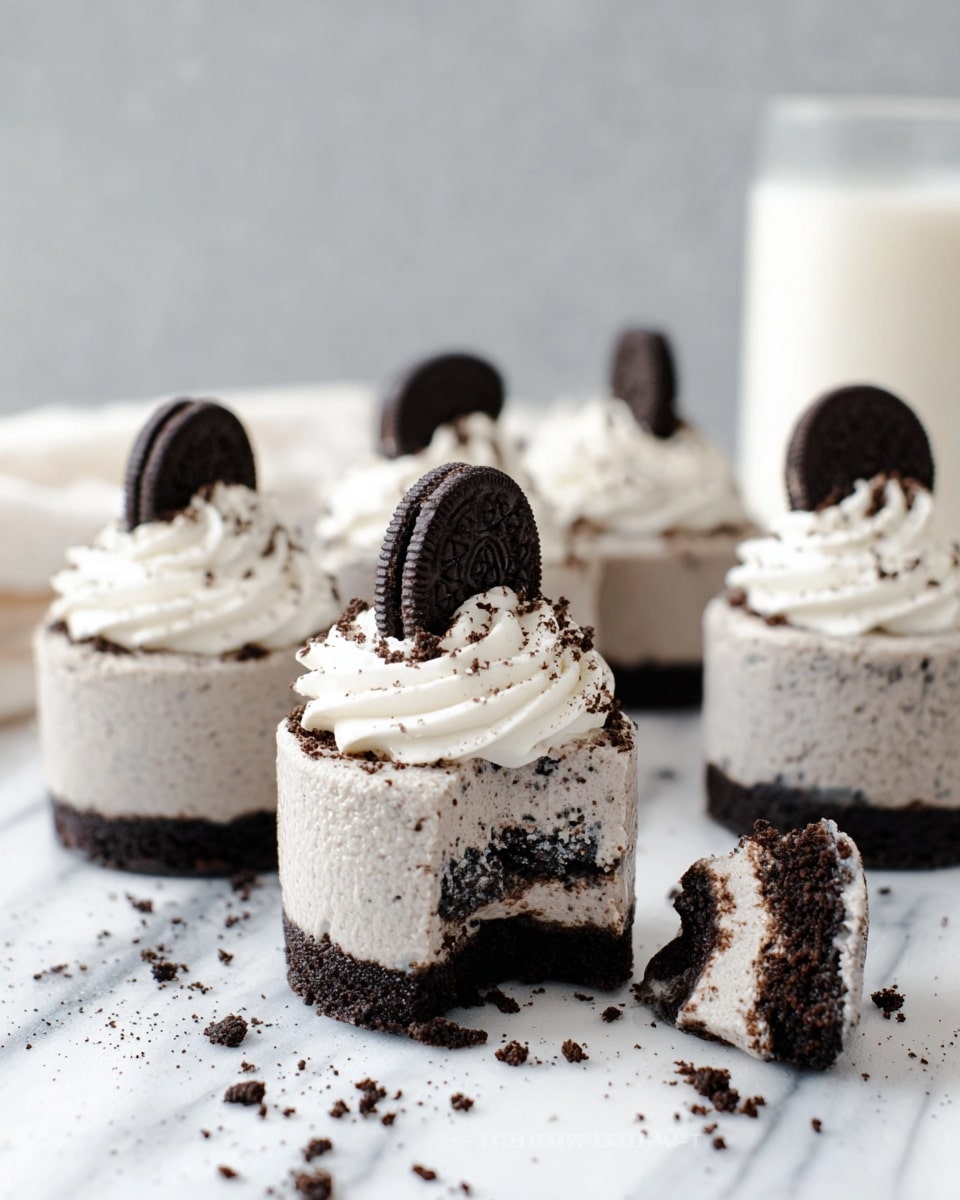
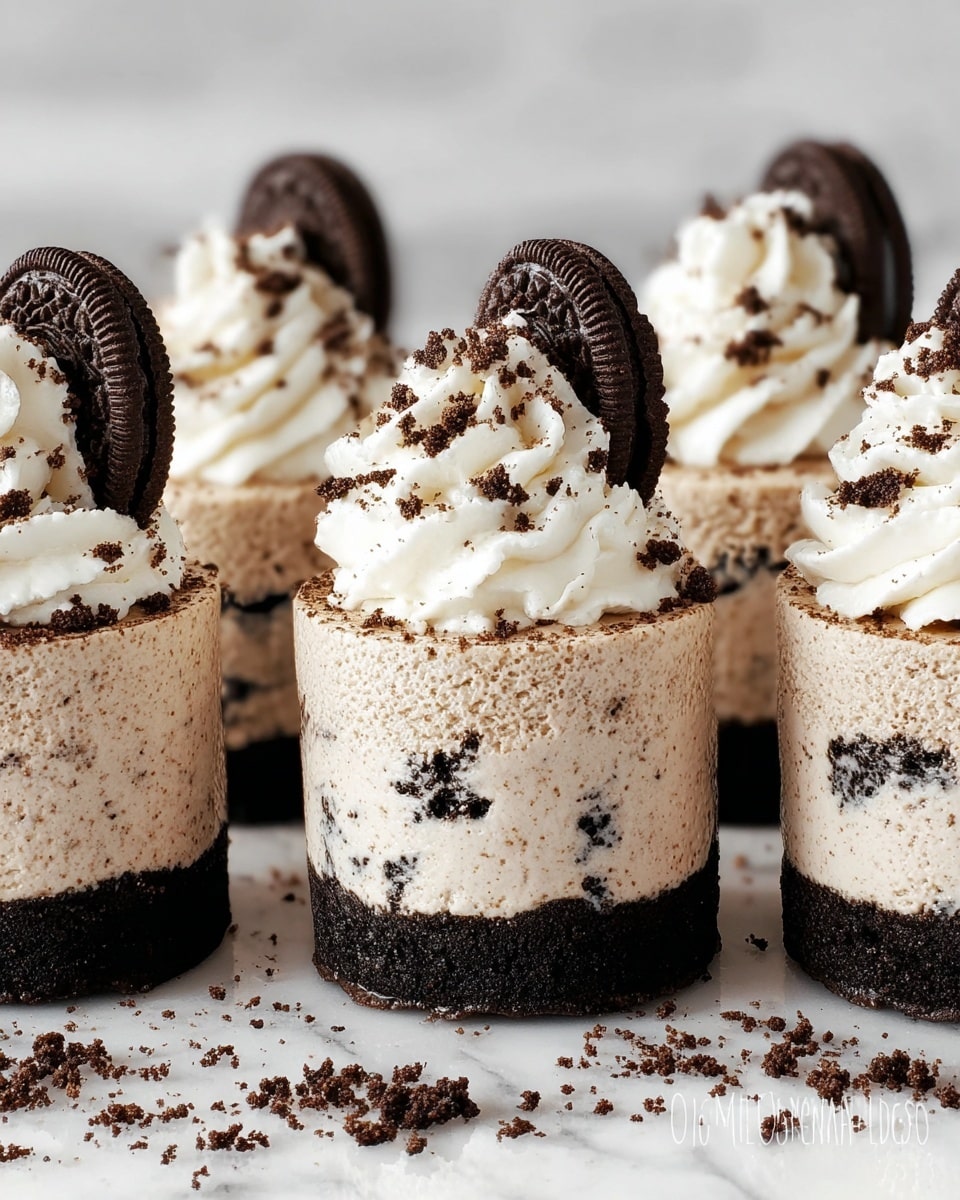
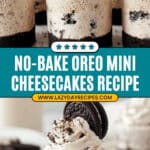
If you’re anything like me and love a good, indulgent treat without the hassle of baking, then this Mini No-Bake Oreo Cheesecakes Recipe is going to become your new best friend. These little desserts pack all the rich, creamy flavors of cheesecake paired with the irresistible crunch of Oreos, but the best part? You can whip them up in no time and without turning on the oven.
Whether you’re prepping for a party, craving a sweet snack, or just want an easy dessert to impress friends, you’ll find that this Mini No-Bake Oreo Cheesecakes Recipe hits all the right notes. I absolutely love how creamy the filling is, balanced perfectly by the crisp Oreo crust. Trust me, these bite-sized delights will have everyone asking for the recipe!
Why You’ll Love This Recipe
- No Oven Required: Perfect for warm days or last-minute dessert plans, these cheesecakes come together without any baking.
- Bite-Sized and Beautiful: Mini portions make them easy to serve at parties or enjoy as a guilt-free treat.
- Dairy-Free Delight: Made with dairy-free cream cheese and whipping cream, they’re great for vegan or lactose-intolerant friends.
- Deliciously Chocolatey: Real Oreo chunks baked into both the crust and filling bring the perfect balance of cream and crunch.
Ingredients You’ll Need
These ingredients are simple yet create a heavenly texture and flavor that’s wonderfully Oreo-forward. I always stock up on dairy-free cream cheese and unsalted butter alternatives so I can make this anytime the craving hits.
- Oreo Cookies: The foundation for both crust and filling; using original Oreos makes a huge flavor difference.
- Dairy-Free Butter or Margarine: Helps bind the crust; be sure to use a quality brand for best taste and texture.
- Dairy-Free Whipping Cream: This gives the filling its light, fluffy texture without dairy—Elmlea Plant-Based Double Cream is my go-to.
- Dairy-Free Cream Cheese: A creamy base essential to capture that classic cheesecake flavor—Violife Original Cream Cheese is fantastic here.
Variations
One of my favorite things about this Mini No-Bake Oreo Cheesecakes Recipe is how easy it is to tailor to your personal taste. I like to experiment with different mix-ins or toppings depending on the season or occasion.
- Berry Blast: I sometimes fold in a spoonful of raspberry jam into the filling for a fruity twist that pairs beautifully with the chocolatey Oreo crust.
- Peanut Butter Swirl: Swirling in a bit of smooth peanut butter before piping makes for an irresistibly rich and nutty bite.
- Nut-Free Version: Simply leave out any nuts and top with extra cookie crumbs or vegan chocolate chips for texture without allergens.
- Mini Pops: Use push-up cake pop containers for a fun, mess-free way to serve these at kids’ parties.
How to Make Mini No-Bake Oreo Cheesecakes Recipe
Step 1: Create Your Oreo Crust Base
Start by gently melting your dairy-free butter over low heat. Once melted, transfer it to a mixing bowl and blend your Oreos into fine crumbs using a food processor or blender. Mix the crumbs thoroughly into the warm butter until it feels like wet sand—this texture helps the crust set firmly. Press this mixture firmly into each mini cheesecake mold or cupcake tin using clean hands to avoid crumbling. Pro tip: compacting the crust well prevents it from falling apart later. Then pop the tray into the freezer while you prep your filling.
Step 2: Whip Up the Creamy Filling
Into a medium bowl, add your dairy-free cream cheese and whipping cream. Start whipping on low speed to keep splashes at bay, then crank it up to high and beat until the mixture thickens and just starts holding its shape—this usually takes about five minutes. Using a stand mixer with a balloon whisk attachment makes life easier, but a strong hand mixer or whisk works fine too. Once thick and creamy, add finely crushed Oreos and gently fold them in so you maintain fluffy texture.
Step 3: Pipe and Chill Your Cheesecakes
Fill a piping bag fitted with a large round tip nozzle with your cheesecake filling—if you don’t have one, simply snip the end off a freezer-safe plastic bag. Pipe the filling evenly into each Oreo crust cup and smooth the top with an offset spatula. Slide the tray into the freezer for at least four hours until the cheesecakes are firm to the touch. Just a heads-up: if they aren’t solid, they might not release neatly from the molds, so patience pays off here!
Step 4: Add the Final Whipped Cream Swirl
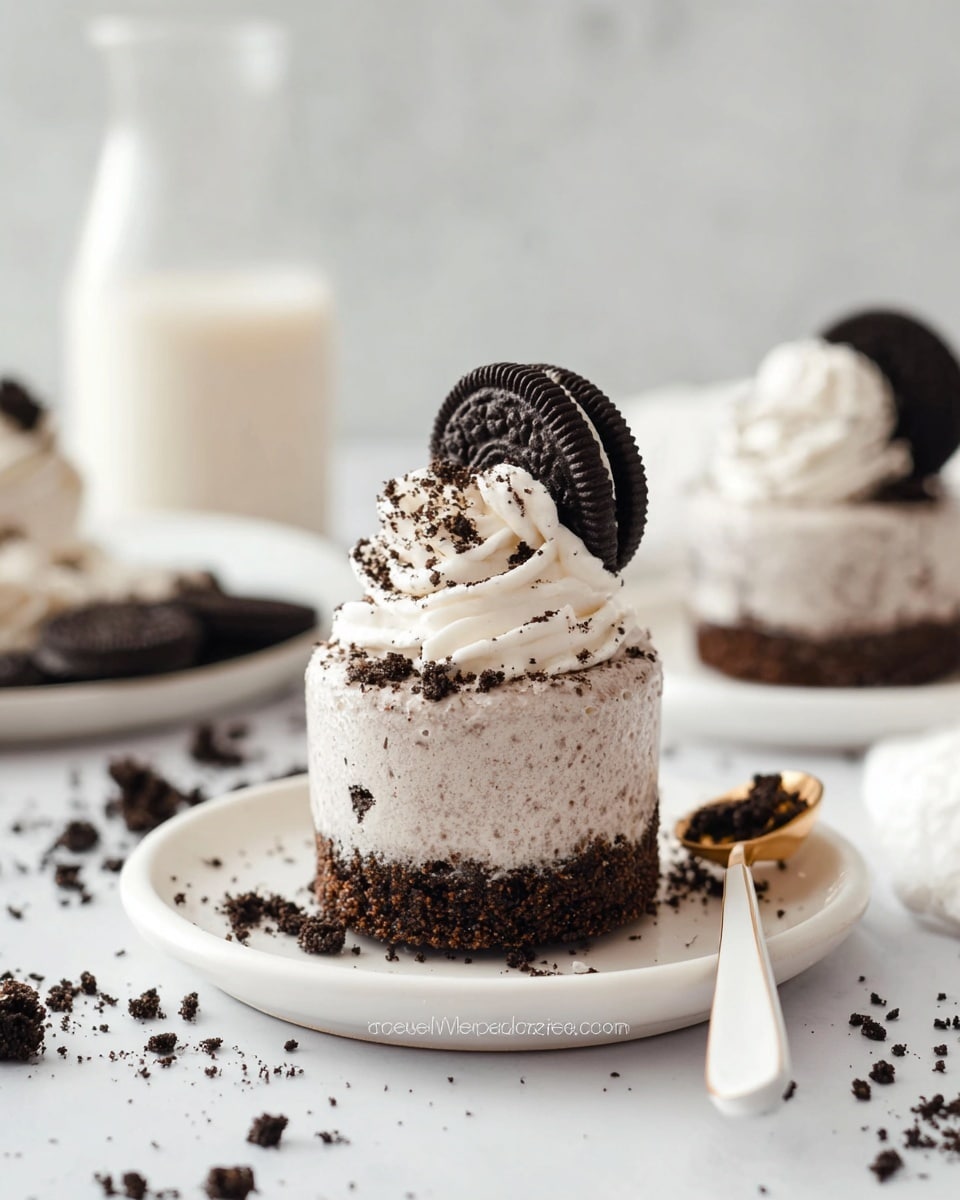
Once your mini cheesecakes are frozen solid, pop them in the fridge to gently defrost while you whip up the topping. Whip dairy-free whipping cream until thick enough to hold peaks, then pipe a pretty swirl on top using an open-star nozzle. Finish off with half an Oreo cookie and some cookie crumbs to wow your guests visually and flavor-wise.
Pro Tips for Making Mini No-Bake Oreo Cheesecakes Recipe
- Perfect Crust Compression: Press down firmly on the crust mix with your fingers so it holds together perfectly once chilled.
- Whip Slowly at First: Starting your cream on low speed helps prevent splattering and keeps the air folded in nicely.
- Freeze for Full Firmness: Don’t rush the chilling step—four hours or overnight works best for clean removal from tins.
- Use Clear Tins if Possible: It helps you see when the crust and filling layers are even and ready for the next step.
How to Serve Mini No-Bake Oreo Cheesecakes Recipe
Garnishes
I like to keep it simple by topping each cheesecake with a swirl of dairy-free whipped cream and finishing with half an Oreo cookie perched on top. Sometimes I sprinkle extra crushed Oreos or even a few vegan chocolate shavings to elevate the presentation. These little touches make your mini cheesecakes look like a professional treat without much extra effort.
Side Dishes
Since these are rich and creamy, I like to serve them alongside a light fruit salad or fresh berries that add a bit of brightness to the plate. A cup of coffee or your favorite plant-based milk pairs beautifully to balance the sweetness as well.
Creative Ways to Present
For parties, I’ve tried arranging the cheesecake cups on a pretty tiered stand or placing them in colorful cupcake liners for extra charm. Recently, I used small mason jars as containers and layered the crust and filling right inside for a fun, grab-and-go option that everyone loved. These little treats also make adorable edible favors when wrapped with a decorative ribbon.
Make Ahead and Storage
Storing Leftovers
After making these mini cheesecakes, I store any leftovers in an airtight container in the fridge. Because they’re dairy-free and chilled, they keep really well for about two days, though honestly, they rarely last that long in my house! Just remember to keep them cool until serving to maintain their lovely texture.
Freezing
I’ve frozen these cheesecakes a few times for prep ahead occasions—wrap each one tightly in plastic wrap and store them in a freezer-safe box. When ready to eat, thaw overnight in the fridge to avoid condensation that can make the crust soggy. The texture stays surprisingly good, and they taste just as delicious as freshly made.
Reheating
Since these are no-bake and best served chilled, I don’t recommend reheating. Instead, just plan ahead by allowing enough time for thawing or chilling in the fridge, which keeps that perfect creamy consistency. They’re best enjoyed cold for maximum flavor and texture!
FAQs
-
Can I make mini no-bake Oreo cheesecakes without a food processor?
Absolutely! If you don’t have a food processor, place your Oreos inside a sealed plastic bag and crush them using a rolling pin or heavy pan until they’re fine crumbs. It takes a little manual effort, but the result is just as delicious.
-
What dairy-free cream cheese works best for this recipe?
I love using Violife Original Cream Cheese or Sainsbury’s Own Free From Soft Cream Cheese because they whip up nicely and have that classic tangy flavor that’s essential for cheesecake.
-
How long do these mini cheesecakes take to set?
Plan for at least four hours in the freezer to get them firm enough to remove from the molds cleanly. Overnight chilling works perfectly if you’re prepping in advance.
-
Can I make these cheesecakes gluten-free?
You can! Just swap regular Oreos for a gluten-free cookie brand. Make sure your dairy-free products are certified gluten-free too, and you’ll have a lovely gluten-free version.
-
What if I don’t have mini tins or moulds?
No worries—use a mini muffin tin, silicone molds, or even small paper cupcake cases placed on a tray. Just be sure to press the crust well and freeze solid before trying to remove them.
Final Thoughts
This Mini No-Bake Oreo Cheesecakes Recipe holds a special place in my heart because it combines ease, crowd-pleasing flavors, and that nostalgic Oreo goodness all in one. I love recommending it when friends ask for a simple yet impressive dessert that anyone can make. Give it a try—you’ll be amazed at how effortlessly delicious these little cheesecakes are, and I’m sure your family and friends will agree!
Print
Mini No-Bake Oreo Cheesecakes Recipe
- Prep Time: 15 minutes
- Cook Time: 0 minutes
- Total Time: 4 hours 15 minutes (including chilling time)
- Yield: 6 mini cheesecakes
- Category: Dessert
- Method: No-Cook
- Cuisine: American
- Diet: Vegan
Description
These Mini No-Bake Oreo Cheesecakes are creamy, dairy-free delights perfect for any occasion. Featuring a crunchy Oreo cookie base and a luscious, whipped dairy-free cream cheese filling, topped with a swirl of dairy-free whipped cream and Oreo garnish. Easy to make with no baking required, these cheesecakes are chilled to perfection and offer a delicious plant-based dessert option.
Ingredients
Base Ingredients
- 150g Oreo Cookies
- 50g dairy-free butter or margarine
Cheesecake Filling Ingredients
- 260g dairy-free whipping cream (e.g., Elmlea Plant Based Alternative Double Cream)
- 160g dairy-free cream cheese (e.g., Violife Original Cream Cheese or Sainsbury’s Free From Soft Cream Cheese)
- 8 Oreo Cookies
Whipped Cream Topping
- 20g dairy-free whipping cream
- 4 Oreo Cookies (for garnish)
Instructions
- Prepare the Base: Melt the dairy-free butter or margarine in a small saucepan over low heat. Once fully melted, remove from heat and transfer to a medium heatproof mixing bowl. Blend 150g Oreo cookies in a food processor until fine crumbs form. Add the crumbs to the melted butter and stir thoroughly until the mixture resembles wet sand and holds shape when pressed. Press this mixture firmly into each cookie cup tin to form compact bases and place the tins in the freezer while preparing the filling.
- Make the Cheesecake Filling: In a medium bowl, combine 260g dairy-free whipping cream and 160g dairy-free cream cheese. Whip on low speed initially to avoid splashing, then increase to high speed until thick and creamy (about 5 minutes). Blend 8 Oreo cookies into fine crumbs and fold them gently into the cream cheese mixture. Transfer the filling into a piping bag fitted with a large round tip.
- Assemble the Cheesecakes: Pipe the cheesecake filling evenly into each cookie base in the tin, smoothing the tops with an offset spatula. Place the assembled cheesecakes into the freezer for at least 4 hours, or until firm to the touch. If using push-up tins, carefully push up the bases to release the cheesecakes once set.
- Prepare the Whipped Cream Topping: While the cheesecakes firm up, whip 20g dairy-free whipping cream on high speed until thick. Transfer to a piping bag fitted with an open star tip nozzle.
- Decorate and Serve: Once cheesecakes are firm, allow them to defrost slightly in the refrigerator. Pipe a swirl of whipped cream atop each cheesecake. Garnish with half an Oreo cookie and some crushed Oreo crumbs. Serve chilled and enjoy immediately.
Notes
- Store cheesecakes in the refrigerator and consume within 2 days for optimal freshness.
- Use dairy-free cream cheese brands like Violife Original Cream Cheese or Sainsbury’s Free From Soft Cream Cheese for vegan-friendly results.
- Press the base mixture firmly into tins to prevent crumbling upon removal.
Nutrition
- Serving Size: 1 mini cheesecake
- Calories: 320 kcal
- Sugar: 22 g
- Sodium: 110 mg
- Fat: 22 g
- Saturated Fat: 7 g
- Unsaturated Fat: 13 g
- Trans Fat: 0 g
- Carbohydrates: 28 g
- Fiber: 1.5 g
- Protein: 3 g
- Cholesterol: 0 mg

