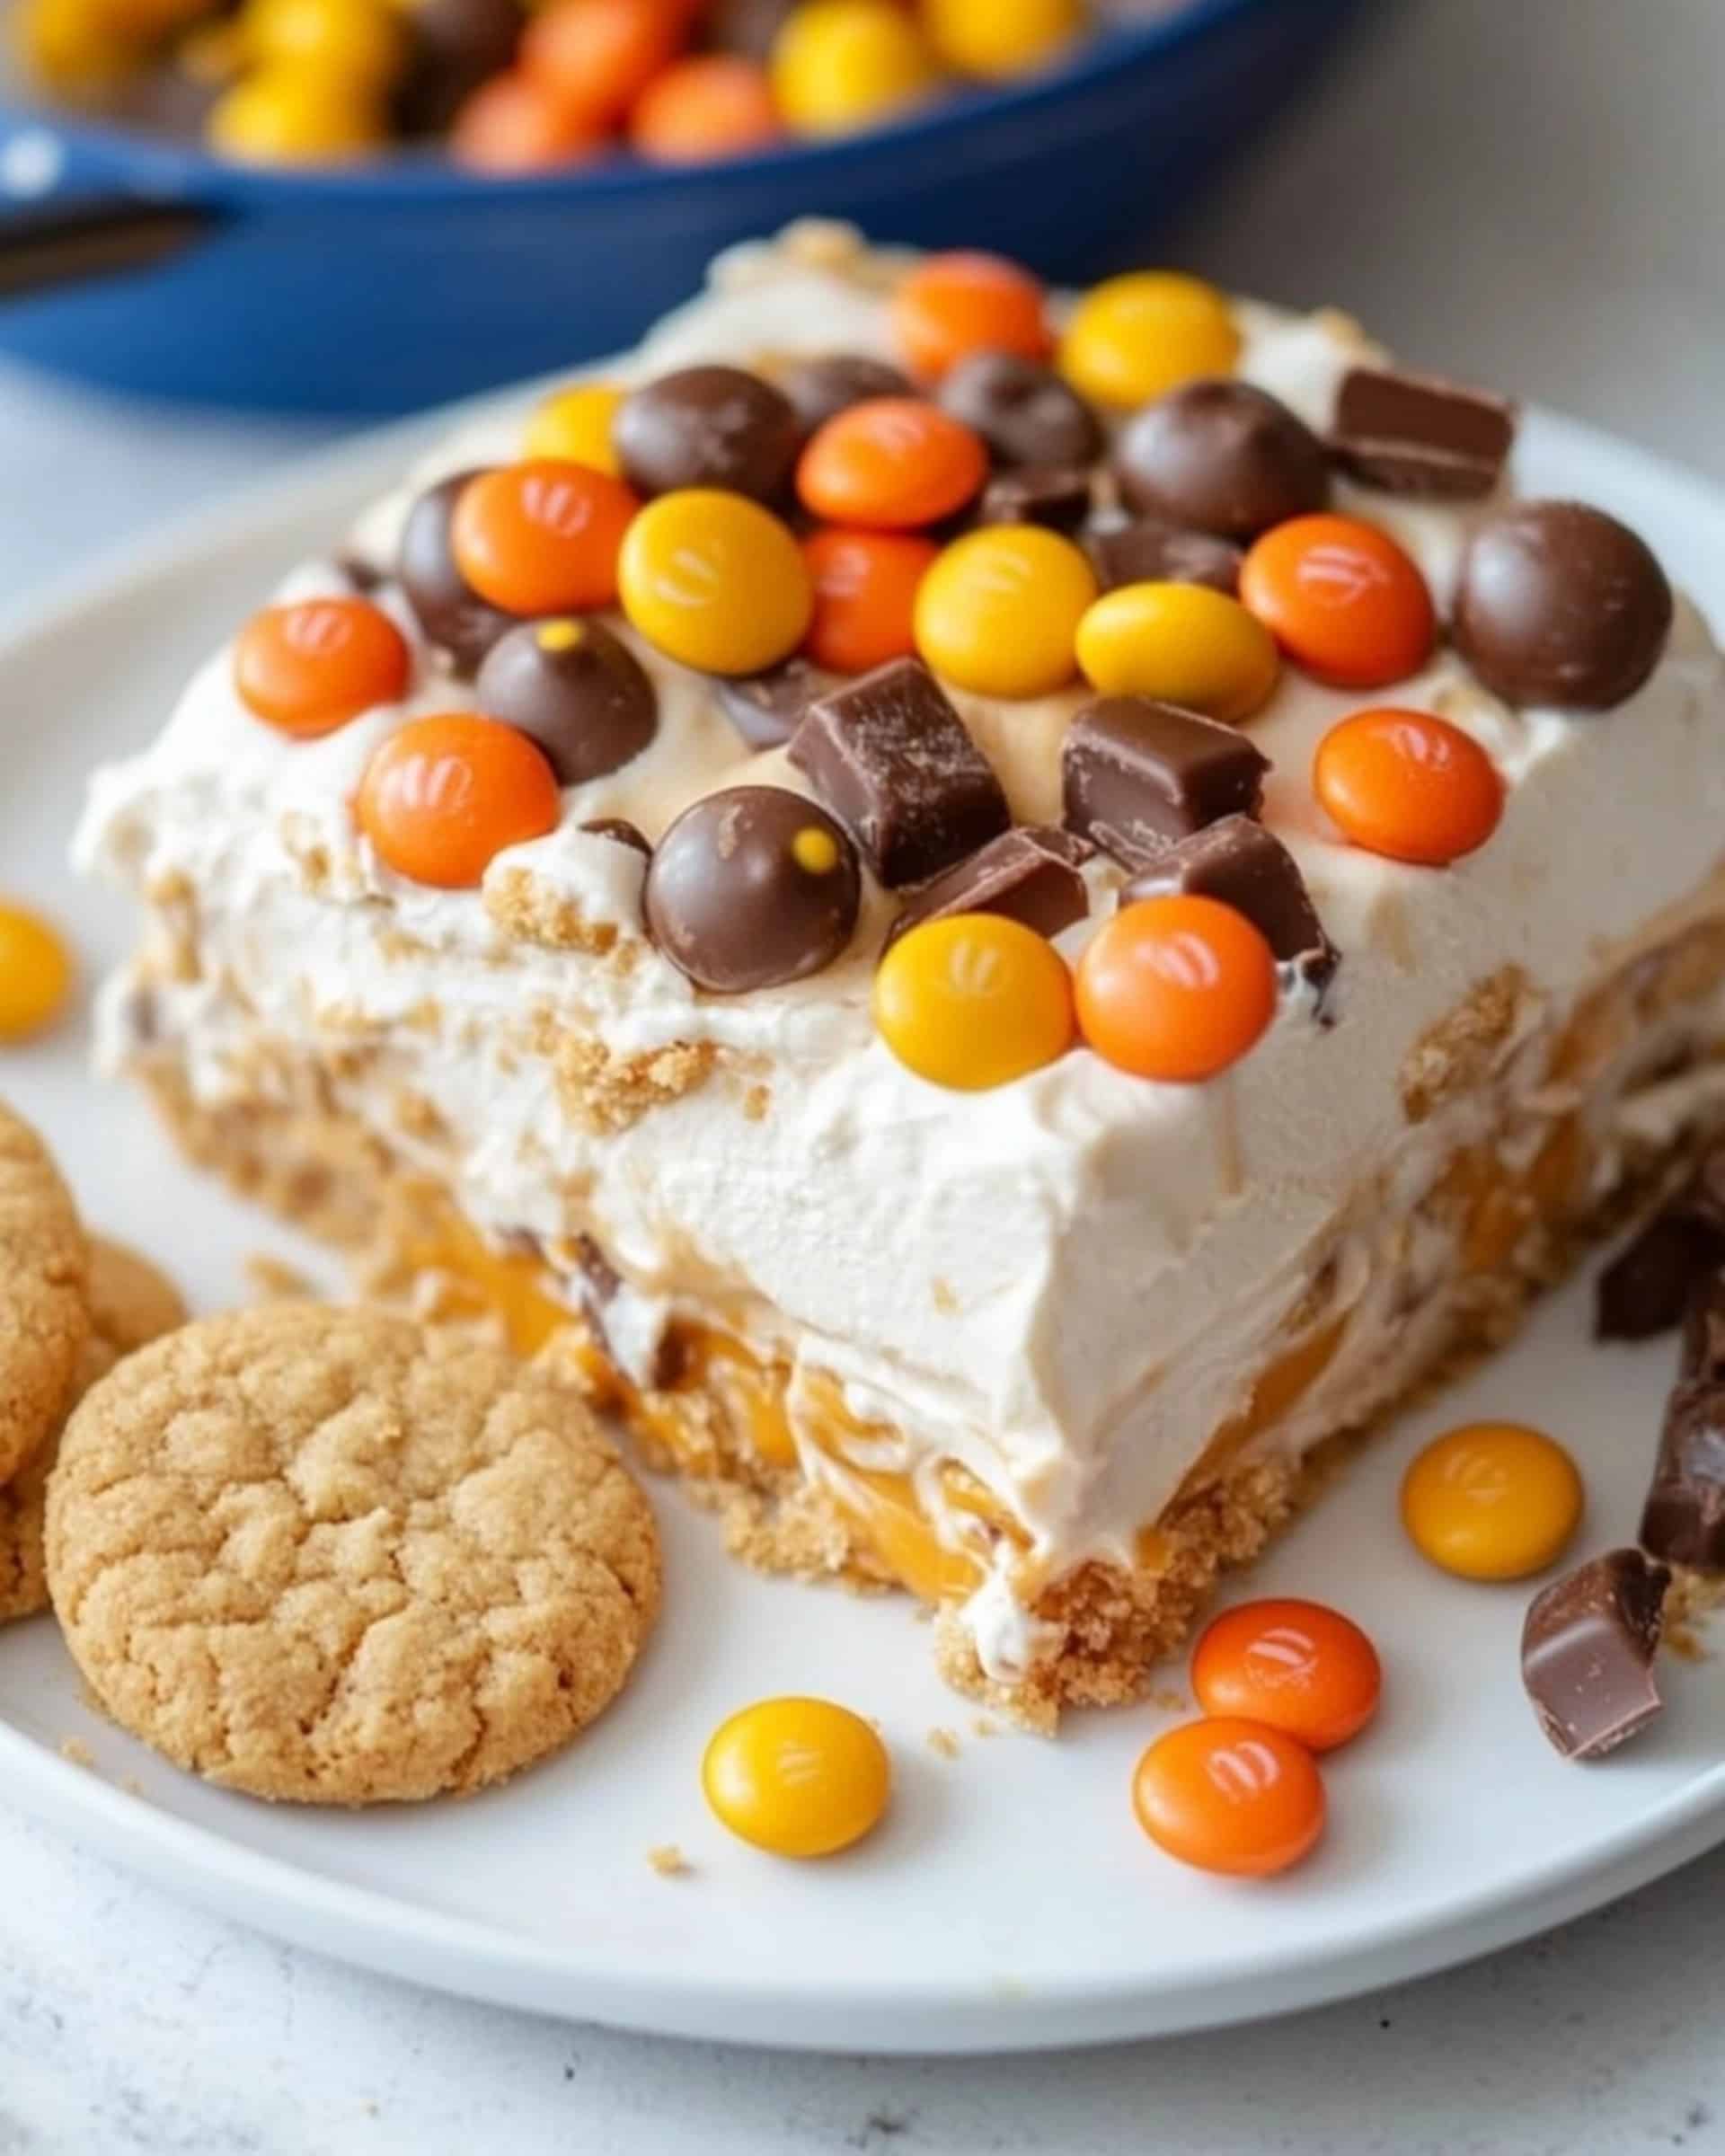
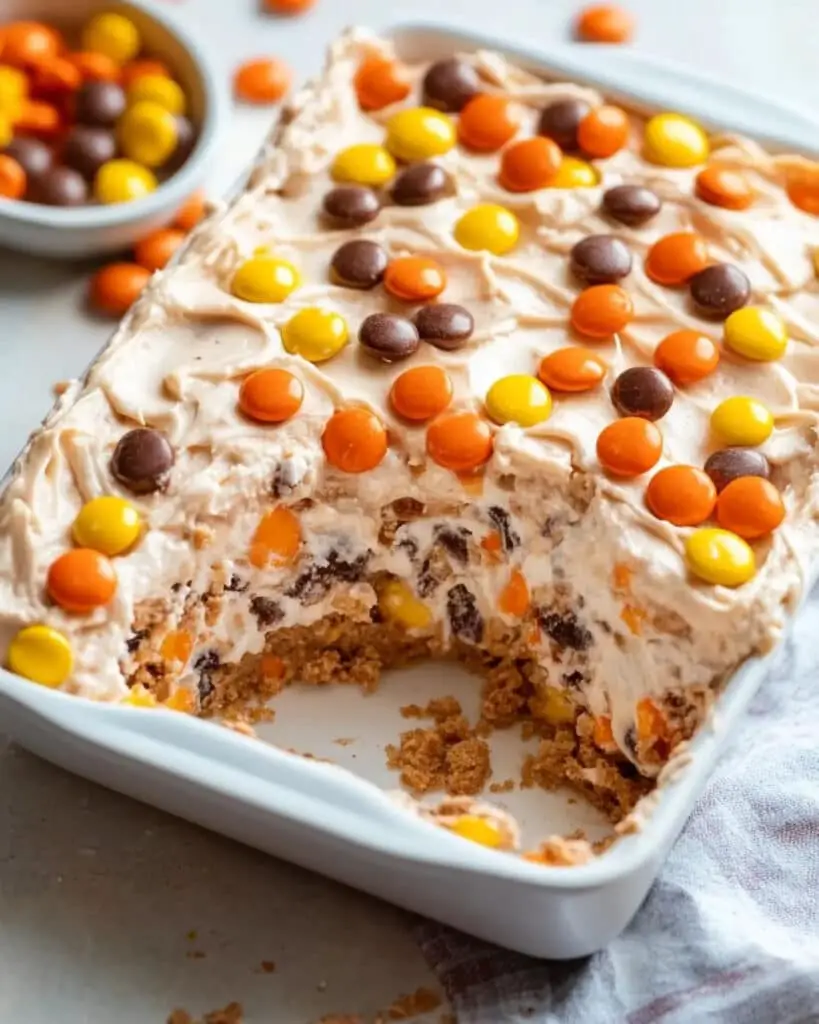
This No Bake Peanut Butter Icebox Cake is the dessert of your dreams! Layers of peanut butter cookies soaked in milk, creamy peanut butter pudding, and fluffy whipped topping come together to create a delightful treat that requires zero oven time. Perfect for hot summer days or when you need an impressive dessert without the fuss, this icebox cake delivers big peanut butter flavor in every bite!
Why You’ll Love This Recipe
- Zero Baking Required: When it’s too hot to turn on the oven or you’re short on time, this no-bake wonder saves the day. Just layer, chill, and enjoy!
- Make-Ahead Magic: This cake actually gets better as it sits in the refrigerator, making it perfect for prepping a day before your gathering.
- Peanut Butter Paradise: If you’re a peanut butter enthusiast, this cake delivers that rich, nutty flavor in multiple delicious layers.
- Crowd-Pleaser: Kids and adults alike go crazy for this dessert. It’s the perfect balance of cookies, cream, and peanut butter in every bite.
Ingredients You’ll Need
- Peanut Butter Sandwich Cookies: Nutter Butters are my go-to, but any peanut butter sandwich cookie works wonderfully. They create the cake’s structure and add amazing texture as they soften.
- Milk: The essential liquid for both softening the cookies and creating the pudding layer. It transforms the cookies from crunchy to cake-like with minimal effort.
- Instant Pudding Mix: Vanilla or cheesecake flavors work best here. This creates the creamy, set structure that holds everything together.
- Peanut Butter: The star of the show! Use creamy peanut butter for the smoothest texture. It adds rich, nutty flavor that makes this dessert unforgettable.
- Whipped Topping: Adds lightness and a cloud-like texture to the cake. The stable structure holds up well during chilling.
- Reese’s Pieces: These colorful candy pieces add a pop of color and extra peanut butter flavor. Plus, they make the dessert look spectacular!
Note: You’ll find the complete list of ingredients, along with their exact measurements, in the printable recipe card at the bottom of this post.
Variations
Want to customize your icebox cake? Here are some delicious twists:
- Chocolate Lover’s Version: Use chocolate pudding instead of vanilla and add a layer of chocolate syrup between the layers.
- Nutty Delight: Sprinkle chopped peanuts between layers for extra crunch and nutty goodness.
- Banana Split Inspired: Add sliced bananas between the layers for a fruity twist on this peanut butter treat.
- Cookie Swap: Try using chocolate sandwich cookies, graham crackers, or even chocolate chip cookies instead of peanut butter cookies.
How to Make No Bake Peanut Butter Icebox Cake
Step 1: Prepare the First Cookie Layer
Pour 1/2 cup milk into a small bowl. Quickly dip about one-third of the peanut butter cookies in the milk and arrange them in a single layer at the bottom of an 8×8″ baking dish. Don’t soak them too long – just a quick dip does the trick!
Step 2: Create the Peanut Butter Pudding Mixture
In a large mixing bowl, whisk together the remaining 1¼ cups milk with the instant pudding mix until smooth. Let it sit for about 2 minutes until it begins to thicken. Once set, stir in the peanut butter until completely incorporated, then fold in half of the whipped topping. This creates an irresistibly creamy peanut butter mixture.
Step 3: Build the Layers
Spread half of your peanut butter pudding mixture over the first cookie layer. Dip another third of the cookies in milk and create a second layer on top of the pudding. Follow with the remaining pudding mixture, then dip and place the final cookies on top.
Step 4: Add the Finishing Touches
Spread the remaining whipped topping over the final cookie layer, creating a smooth, even surface. Generously sprinkle Reese’s Pieces over the top for that perfect finishing touch of color and flavor.
Step 5: Chill and Set
Cover loosely with plastic wrap and refrigerate for at least 2 hours, though overnight is even better. The magic happens during this time as the cookies soften into cake-like layers and the flavors meld together beautifully.
Pro Tips for Making the Recipe
- Quick Dip: When soaking the cookies, a brief dip is all you need – about 1-2 seconds per cookie. Too long and they’ll fall apart!
- Smooth Spreading: Use an offset spatula for perfectly even layers that look as good as they taste.
- Patience Pays Off: While two hours of chilling is the minimum, letting it sit overnight takes this dessert to a whole new level of deliciousness.
- Room Temperature Peanut Butter: Using room temperature peanut butter makes it much easier to incorporate into the pudding mixture without lumps.
How to Serve
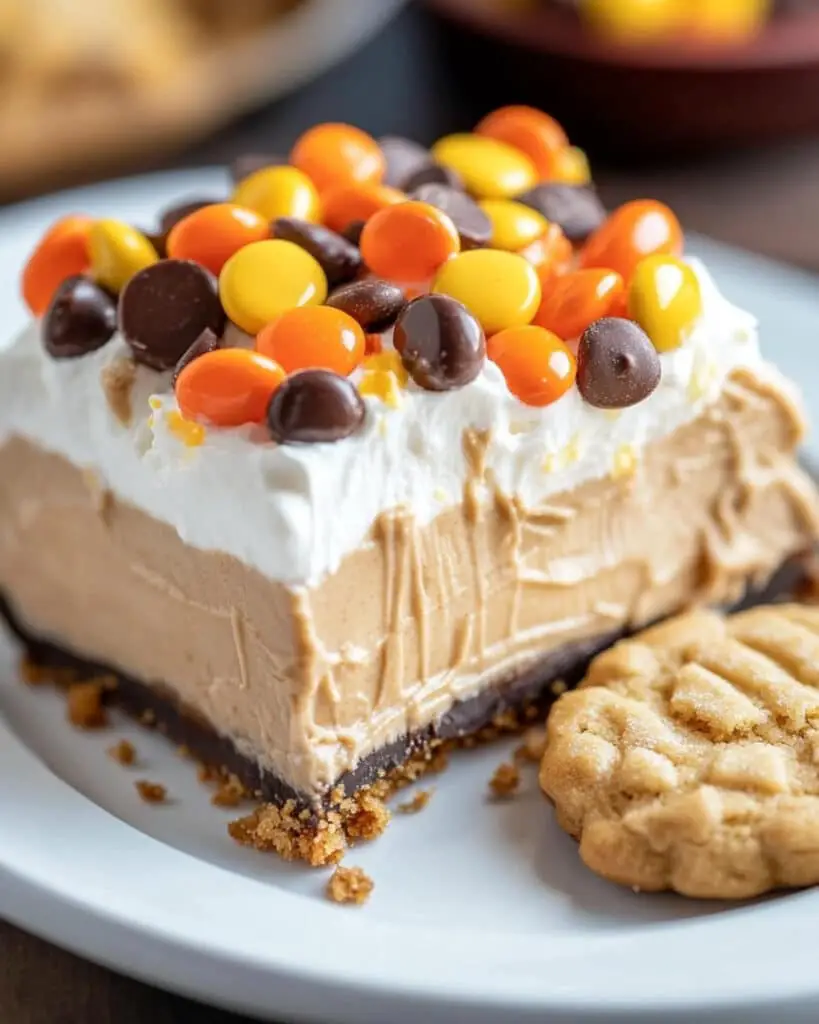
This No Bake Peanut Butter Icebox Cake is versatile when it comes to serving options:
As a Dessert:
Serve chilled with a cold glass of milk for the ultimate peanut butter experience. Cut into squares and watch them disappear!
For Special Occasions:
Dress it up with a drizzle of warm chocolate sauce and a dollop of extra whipped cream for birthdays or celebrations.
With Ice Cream:
A scoop of vanilla ice cream alongside a slice of this cake creates a dessert that’s truly over the top.
Make Ahead and Storage
Storing Leftovers
Cover any leftover cake loosely with plastic wrap and store in the refrigerator for up to 4 days. The flavors continue to develop, making day 2 or 3 potentially even more delicious than day 1!
Freezing
If you’ve used store-bought whipped topping, this cake freezes beautifully. Cover tightly with plastic wrap and then aluminum foil, and freeze for up to 1 month. If using homemade whipped cream, freezing isn’t recommended.
Reheating
No reheating necessary! Simply thaw frozen cake in the refrigerator overnight before serving chilled.
FAQs
-
Can I use crunchy peanut butter instead of creamy?
Absolutely! Crunchy peanut butter adds delightful texture to the pudding layers. Just be aware that it might be slightly more difficult to spread evenly, but the extra peanut bits add wonderful crunch throughout the cake.
-
My pudding isn’t setting up properly. What went wrong?
The most common issue is using non-dairy milk. This recipe needs cow’s milk for the pudding to set correctly due to the proteins in dairy milk. Also, make sure you’re using instant pudding, not the cook-and-serve variety, and allow enough time for it to thicken before adding other ingredients.
-
Can I make this dessert healthier?
While this is definitely an indulgent treat, you can make some adjustments. Try reduced-fat versions of the pudding mix, milk, and whipped topping. You could also use natural peanut butter with less sugar, though the texture may be slightly different.
-
How far in advance can I make this icebox cake?
This cake is perfect for making ahead! You can prepare it up to 2 days before serving. In fact, many people find the texture improves after 24 hours in the refrigerator as the cookies soften completely and the flavors meld together.
Final Thoughts
This No Bake Peanut Butter Icebox Cake brings together everything wonderful about peanut butter desserts without any of the fuss of baking. Its simplicity, make-ahead convenience, and spectacular peanut butter flavor make it perfect for everything from summer gatherings to holiday tables. The combination of creamy layers with softened cookies creates a texture that’s somewhere between cake and pudding – utterly irresistible! Give this recipe a try the next time you need an impressive dessert without turning on the oven.
Print
No Bake Peanut Butter Icebox Cake Recipe
- Prep Time: 20 minutes
- Cook Time: 0 minutes
- Total Time: 2 hours 20 minutes
- Yield: 12 servings
- Category: Desserts
- Method: No-cook
- Cuisine: American
- Diet: Vegetarian
Description
This No Bake Peanut Butter Icebox Cake is a creamy, layered dessert featuring peanut butter sandwich cookies, rich peanut butter pudding, and a fluffy whipped topping. Perfect for peanut butter lovers, this easy-to-make, chilled dessert comes together in minutes and is ideal for make-ahead parties or family gatherings.
Ingredients
Cookies & Base
-
- 27-36 peanut butter sandwich cookies (such as Nutter Butter or generic equivalent)
- 1 3/4 cups milk, divided
Filling
-
- 1 box (3.4 ounces) instant vanilla or cheesecake pudding mix
- 1/2 cup peanut butter
- 8 ounces (1 container) whipped topping
Topping
- 1 cup Reese’s Pieces (for topping)
Instructions
- Prepare Cookies: Place 1/2 cup milk in a small bowl or measuring cup. Quickly dip 1/3 of the peanut butter cookies in the milk and arrange them on the bottom of an 8×8 inch pan to form an even layer.
- Mix Pudding: In a large bowl, whisk together 1 1/4 cups milk and the pudding mix until smooth and starting to thicken. Let sit for a couple of minutes until set.
- Blend Filling: Stir peanut butter and half of the whipped topping gently into the pudding mixture, ensuring everything is well combined to create a creamy filling.
- Layer Ingredients: Spread half of the peanut butter-pudding mixture over the cookie layer in the pan. Dip another 1/3 of the cookies in milk, and arrange them over the first filling layer. Pour and spread the remaining pudding mixture on top, then finish by dipping the last 1/3 of cookies in milk and creating the final cookie layer.
- Add Topping: Evenly spread the remaining whipped topping over the top cookie layer. Sprinkle with Reese’s Pieces to add a colorful, crunchy finish.
- Chill: Refrigerate the assembled cake for at least 2 hours to allow the layers to set and flavors to meld. The longer it chills, the better the texture and taste.
- Serve: Slice and serve cold, straight from the fridge for best results.
Notes
- You can use graham crackers instead of sandwich cookies (no need to dip in milk).
- Swap peanut butter sandwich cookies with Oreos or any variety of cookie you prefer.
- Only make pudding with cow’s milk; alternate milks will not set pudding properly.
- Icebox cake is perfect to make ahead—chill for at least 2 hours for best results.
- Store the cake loosely covered in the refrigerator for freshness.
- If you prefer, use homemade whipped cream instead of whipped topping and add it just before serving.
- Customize the topping with any of your favorite candies, crushed cookies, or chopped nuts.
- If using Cool Whip, this cake can be frozen for later.
Nutrition
- Serving Size: 1 serving
- Calories: 336 kcal
- Sugar: 26 g
- Sodium: 203 mg
- Fat: 18 g
- Saturated Fat: 7 g
- Carbohydrates: 37 g
- Fiber: 2 g
- Protein: 8 g
- Cholesterol: 4 mg

