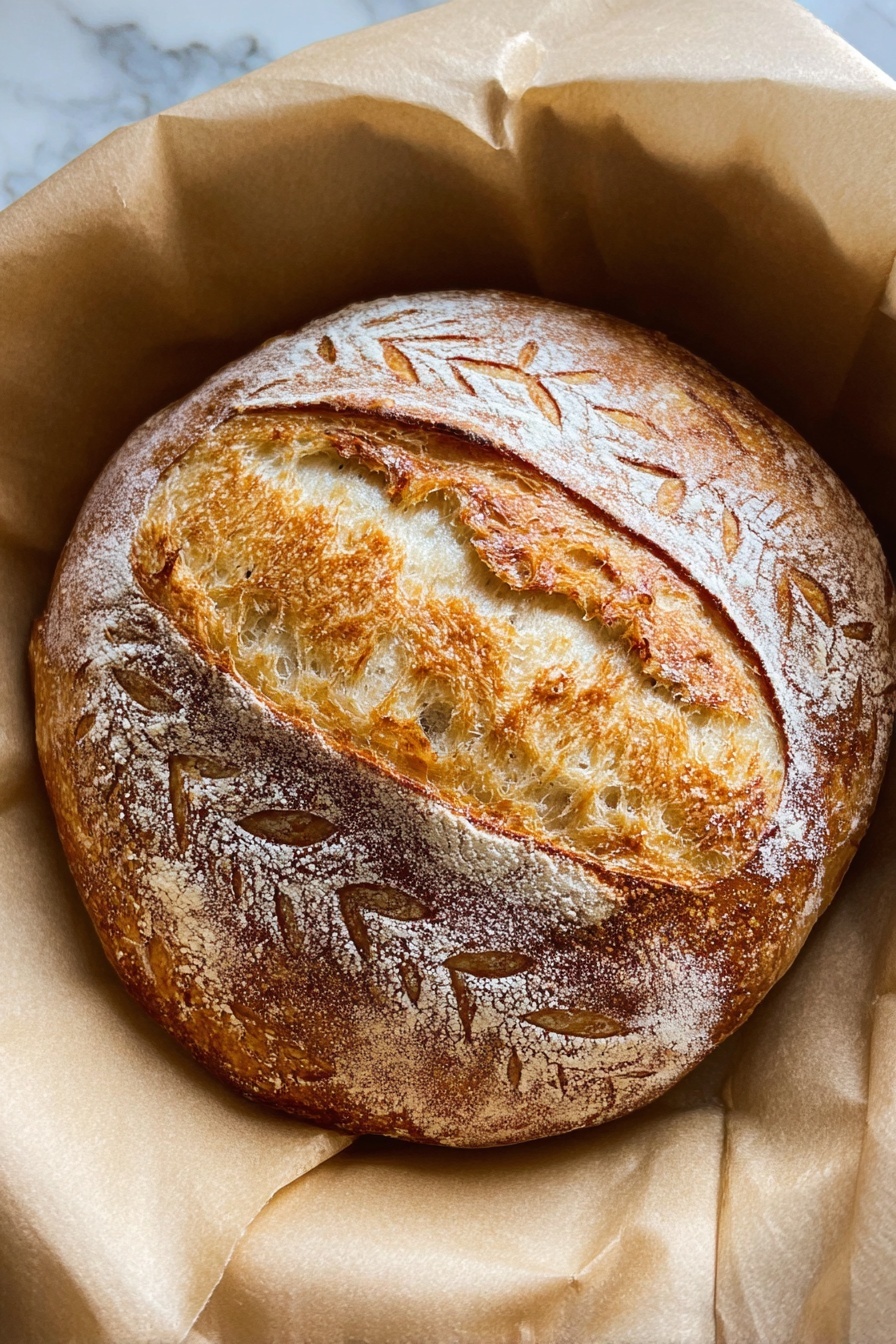
If you’ve been curious about making tangy, crusty sourdough bread but feel intimidated by the process, I’ve got you covered with my beloved Overnight Sourdough Bread Recipe. Trust me, this is a fan-freaking-tastic recipe that requires minimal fuss and rewards you with a loaf that’s bursting with flavor and texture. You’ll love how the slow overnight rise makes the bread super flavorful and perfectly airy — plus, it’s mostly hands-off, so great for busy folks or anyone who’s just dipping their toes into sourdough baking!
Why You’ll Love This Recipe
- Simplicity: No fancy equipment or complex steps—just straight-up delicious sourdough bread.
- Flavor Development: The overnight fermentation brings out that signature tang and depth.
- Hands-Off Process: Most of the work happens while you sleep, freeing up your day.
- Perfect Crust and Crumb: You’ll get that crispy crust with the soft, airy inside every time.

Ingredients You’ll Need
This recipe keeps things wonderfully simple, relying on just a handful of ingredients that work harmoniously to create that classic sourdough taste and texture. Plus, they’re pantry-friendly and easy to source!
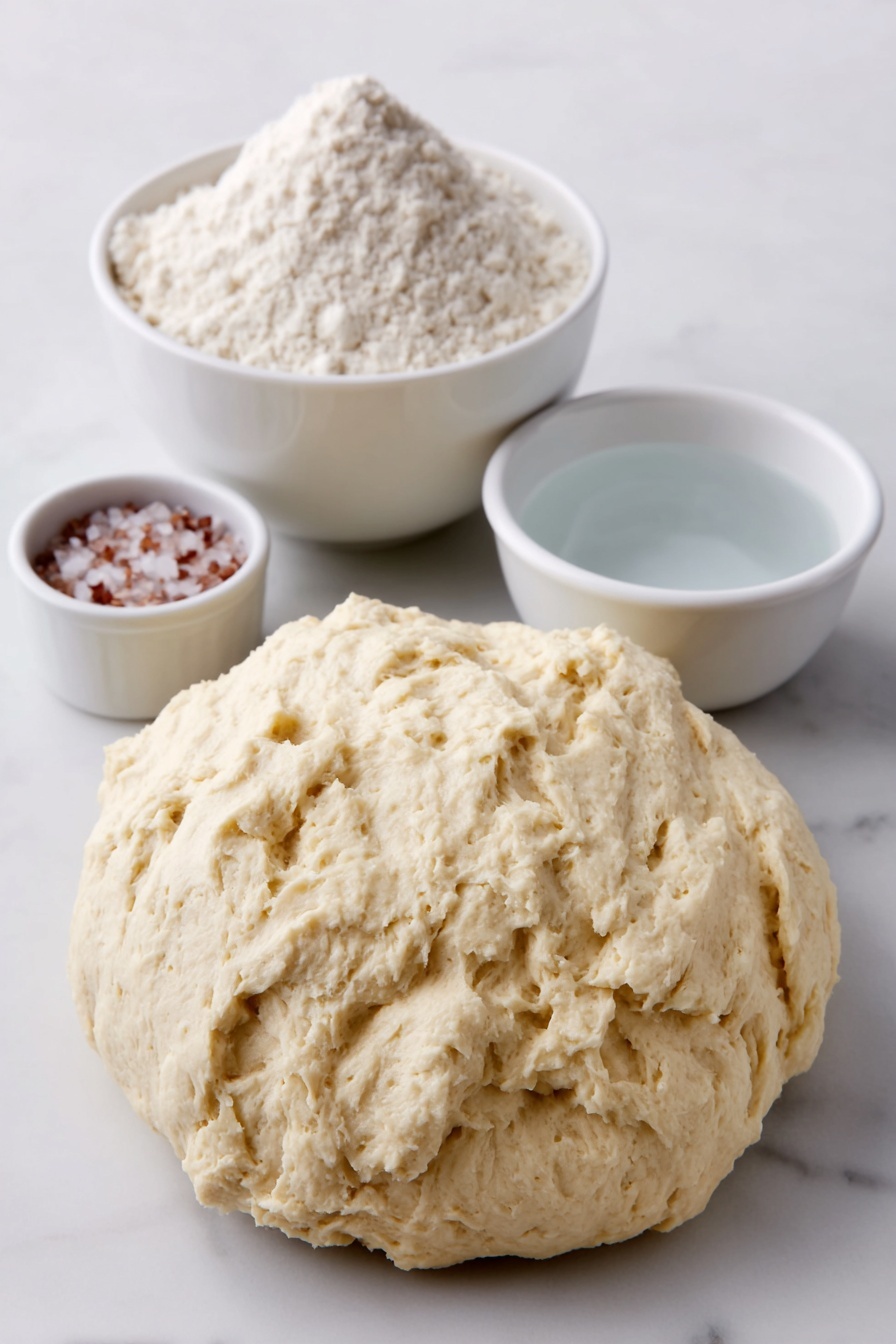
- Sourdough starter: Use an active sourdough starter; it doesn’t need to be fed right before but should be bubbly and lively.
- All-purpose flour: This provides a great balance for texture and flavor—nothing too heavy or too light.
- Salt: Essential for flavor and controlling fermentation, make sure to measure accurately.
- Water: Room temperature works best; the dough will be on the wetter side, but that’s just right.
Variations
I’m all about making this recipe your own. Whether you want to adjust the flavor, tweak the texture, or accommodate dietary needs, there’s a way to customize it while keeping that delicious sourdough magic.
- Using Whole Wheat Flour: I like to swap in half whole wheat flour for extra nuttiness and fiber—your bread will be denser but full of character.
- Add-Ins: Toss in rosemary, olives, or garlic during the folding stage for a savory twist—my family can’t get enough!
- Hydration Adjustment: If you prefer a chewier crumb, you can experiment by slightly increasing water—but watch the dough consistency closely.
- Gluten-Free Adaptation: This one’s a bit trickier, but with special gluten-free blends and xanthan gum, you can still enjoy sourdough flavor; I recommend checking dedicated gluten-free sourdough recipes for best success.
How to Make Overnight Sourdough Bread Recipe
Step 1: Mix and Rest the Dough
The night before you want to bake, dump your sourdough starter, flour, salt, and water into a large bowl. I love using my hands here; it’s messy but so satisfying. The dough will seem wet and rough—that’s exactly how it should be. Cover it with a towel and let it rest for 15 minutes. This resting period gives the flour time to absorb water, making the dough easier to work with.
Step 2: Perform the First Set of Folds
Now comes the folding. Wet your hands slightly to keep the dough from sticking. Grab a corner of the dough and fold it over the middle, then rotate the bowl and repeat. I usually fold about 15 times until the dough feels less elastic and more cohesive. This strengthens the gluten structure without kneading, which is key to achieving that wonderful texture.
Step 3: Rest and Fold Again Before Overnight Rise
Cover the dough again for another 15 minutes. Then repeat the folding process one more time. After this, cover the bowl with a towel and leave it out overnight to rise—ideally around 12 to 17 hours. You’ll wake up to a dough that’s puffy with lovely air bubbles; these are your golden ticket to a light crumb and beautiful oven spring.
Step 4: Shape and Refrigerate
Morning time! Gently wet your hands and loosen the dough from the bowl edges. Lift the dough from the center and fold the edges under three times, rotating between folds to create surface tension—it’s like tucking in the dough for a cozy nap. Transfer it to a flour-lined bowl with parchment paper. Dust the top lightly with flour and pop it in your fridge for 5 hours. This cold ferment really enhances flavor and texture.
Step 5: Preheat and Bake Your Bread
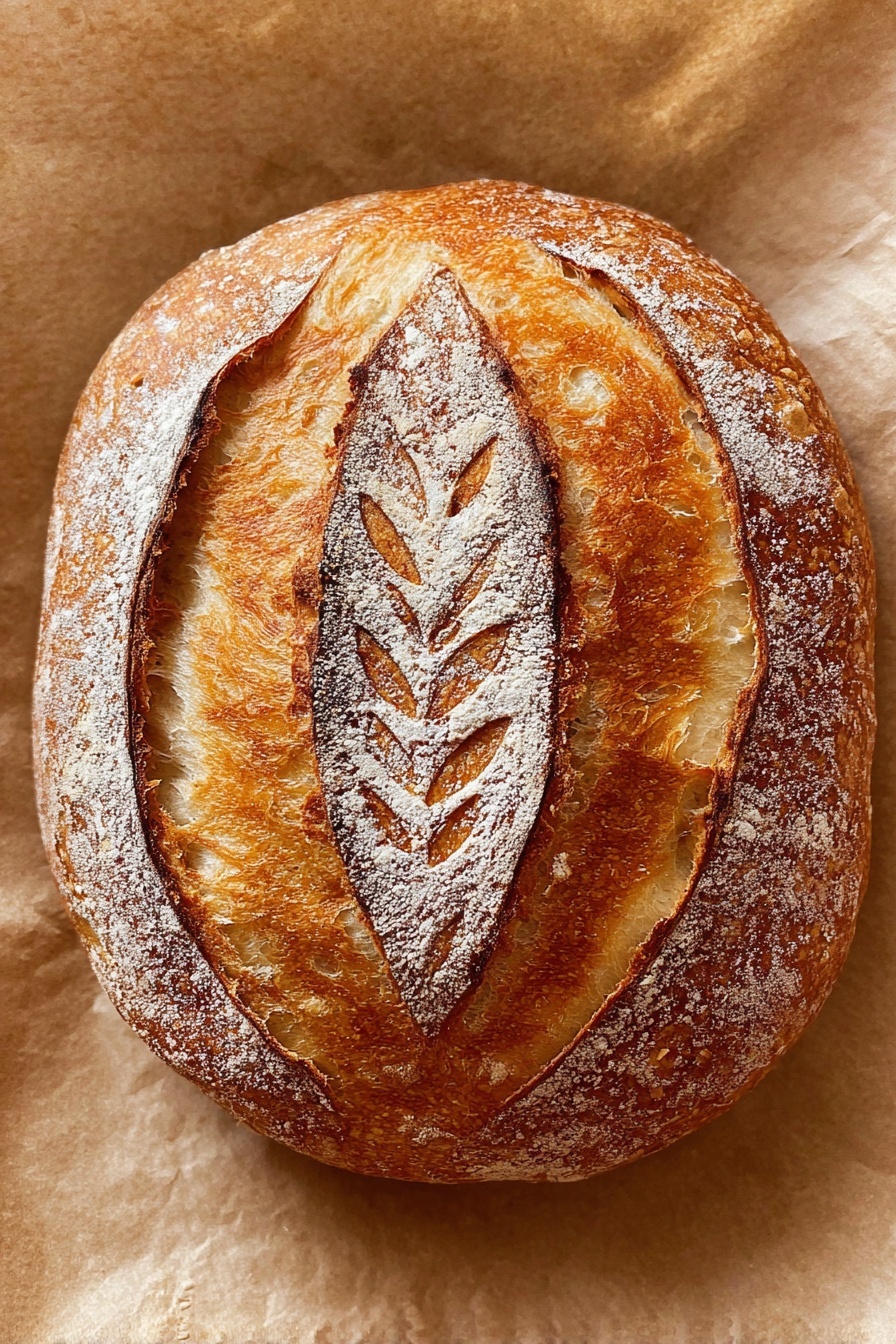
About 30 minutes before baking, preheat your oven to 500°F (I love using the convection setting if you have it). Place a Dutch oven inside to heat up—this creates steam that helps form the crust. Remove your dough from the fridge, gently score the top however you like with a sharp knife (I usually do a long slash with a few smaller cuts on the side). Using the parchment paper, carefully lift and place the dough into the hot Dutch oven.
Bake covered for 25 minutes, then remove the lid and lower the temperature to 450°F for another 12-14 minutes. The crust will turn that beautiful golden brown and crisp up. Once out of the oven, let your bread cool on a rack for at least an hour—this can be hard because it smells so good, but waiting helps the crumb set perfectly.
Pro Tips for Making Overnight Sourdough Bread Recipe
- Wet Hands During Folding: This simple trick prevents the dough from sticking and saves you a ton of frustration.
- Don’t Skip the Cold Fermentation: Refrigerating the shaped dough overnight or for several hours intensifies the flavor and improves texture.
- Use a Sharp Blade for Scoring: Clean cuts help the bread expand properly in the oven without tearing unevenly.
- Avoid Early Cutting: Letting the bread cool prevents a gummy crumb—it’s hard, but patience pays off.
How to Serve Overnight Sourdough Bread Recipe
Garnishes
When it comes to garnishes, I love brushing the crust lightly with olive oil or melted butter right out of the oven—that glossy finish not only looks stunning but adds a lovely flavor and softness to that crispy crust. A sprinkle of flaky sea salt on top before baking elevates it even more.
Side Dishes
This sourdough pairs beautifully with soups, especially creamy tomato or hearty vegetable stew, and it’s perfect for making sandwiches loaded with fresh veggies and meats. My family also loves dipping thick slices in olive oil and balsamic vinegar, making every bite a little celebration.
Creative Ways to Present
For special occasions, slice your loaf into rounds and assemble open-faced bruschetta with fresh tomatoes, basil, and mozzarella. Or turn it into a rustic bread basket centerpiece by wrapping a linen towel around the loaf—simple yet charming for guests.
Make Ahead and Storage
Storing Leftovers
I store leftover sourdough in a paper bag inside a bread box or airtight container to keep the crust from getting soggy. At room temperature, it lasts about 3 days, still tasting fresh and flavorful. Avoid plastic directly on crust to retain that crunch.
Freezing
Freezing works great here—after the bread cools completely, I slice it and freeze individual slices wrapped tightly in plastic wrap and foil. This way, I can toast just what I need without thawing the whole loaf.
Reheating
To refresh a day-old loaf, I sprinkle a bit of water over the crust and bake at 350°F for 10-15 minutes. This brings back that fresh-from-the-oven crispness and restores the chewy interior beautifully.
FAQs
-
Can I use my sourdough starter without feeding it first?
Yes! For this recipe, I actually prefer using unfed starter because it gives the bread a stronger, tangier flavor. Just make sure your starter looks active and bubbly, even if it hasn’t been fed within the last 8-12 hours.
-
My dough feels too wet and sticky—what should I do?
Wet and sticky is totally normal for this recipe! The high hydration gives sourdough its open crumb and lovely crust. Just keep your hands wet during handling and rely on the folding technique to develop strength instead of kneading.
-
How do I know when the bread is fully baked?
The crust will be a deep golden brown, and the bread should sound hollow when tapped on the bottom. If you have a thermometer, an internal temperature of around 205°F means it’s done.
-
Can I skip the cold ferment in the fridge?
The cold ferment improves flavor and makes the dough easier to score and handle, but if you’re short on time, you can skip it—just shape and bake right after folding. The flavor may be a bit milder, but it’ll still taste great.
Final Thoughts
I absolutely love how this Overnight Sourdough Bread Recipe turns out every single time—it’s proof that with just a little patience and simple ingredients, you can bake bread at home that’s better than most bakery loaves. When I first made this, I was surprised at how approachable sourdough could be, and I’m confident you’ll feel empowered too. So grab your starter, roll up your sleeves (or just get your hands wet!), and enjoy the wonderful journey from dough to delicious. Your kitchen—and taste buds—will thank you!
Print
Overnight Sourdough Bread Recipe
- Prep Time: 40 minutes
- Cook Time: 40 minutes
- Total Time: 18 hours 20 minutes
- Yield: 12 slices
- Category: Bread
- Method: Baking
- Cuisine: French-inspired
Description
This easy overnight sourdough bread recipe yields a deliciously tangy and crusty loaf with minimal hands-on time. Utilizing a simple mix of sourdough starter, all-purpose flour, salt, and water, the dough undergoes slow fermentation and gentle folding to develop texture and flavor. Baking the bread in a preheated Dutch oven ensures a perfectly crisp crust and soft interior, making it an ideal homemade artisanal bread.
Ingredients
Main Ingredients
- 90 grams sourdough starter
- 520 grams all-purpose flour
- 12 grams salt
- 1 7/8 cups water
Instructions
- Mix the dough: The night before baking, combine 520 grams of all-purpose flour, 12 grams of salt, and 90 grams of sourdough starter in a bowl. Pour in 1 7/8 cups of water and use your hands to mix until a wet, shaggy dough forms. The dough will be sticky and not smooth, which is expected.
- First rest and folds: Cover the bowl with a towel and let the dough rest for 15 minutes. Then, perform approximately 15 stretch-and-folds by pulling a corner of the dough over itself and rotating the bowl each time. Wet your hands slightly to prevent sticking. After folding, cover the bowl and let rest another 15 minutes.
- Second set of folds and overnight rise: Repeat the series of stretch-and-folds again. Cover the bowl and leave the dough to rise at room temperature overnight. The dough should rise and develop air bubbles on the surface.
- Prepare the proofing bowl: The next morning, line a mixing bowl with parchment paper and dust the bottom with flour to create a surface for the dough to rest on.
- Final fold and shaping: Wet your hands, loosen the dough from the bowl edges, and gently lift the middle, tucking the ends underneath. Rotate the bowl a quarter turn and repeat this folding process twice more. Carefully transfer the folded dough onto the prepared parchment paper in the lined bowl, tucking the ends underneath to shape it. Sprinkle the dough’s surface lightly with flour and refrigerate for 5 hours.
- Preheat oven and Dutch oven: About 30 minutes before baking, preheat your oven to 500°F (260°C) using the convection setting if available. Place your Dutch oven inside to heat up as well.
- Score and bake the bread: Remove the dough from the fridge and lightly score the top with a knife as desired, usually a long central slash with smaller side slashes. Using the parchment paper, carefully transfer the dough to the preheated Dutch oven. Bake for 25 minutes with the lid on.
- Finish baking: After the initial bake, remove the lid and reduce the oven temperature to 450°F (232°C). Bake for an additional 12-14 minutes until the crust is golden and crisp.
- Cooling: Take the bread out of the Dutch oven and let it cool enough to handle. Place it on a wire rack and allow it to cool for at least 1 hour before slicing to set the crumb structure and enhance flavor.
Notes
- You can substitute other flours but maintain a high proportion of all-purpose flour to preserve the bread’s texture.
- Baking times can be adjusted to your preference: longer covered baking will produce a lighter crust, while shorter uncovered baking times yield a darker crust.
- Feeding your sourdough starter 8-12 hours before use can make it more active, but using unfed starter results in a more sour flavor in the bread.
Nutrition
- Serving Size: 1 slice (approx. 75g)
- Calories: 150
- Sugar: 0.2g
- Sodium: 320mg
- Fat: 1g
- Saturated Fat: 0.2g
- Unsaturated Fat: 0.7g
- Trans Fat: 0g
- Carbohydrates: 30g
- Fiber: 1.5g
- Protein: 5g
- Cholesterol: 0mg


