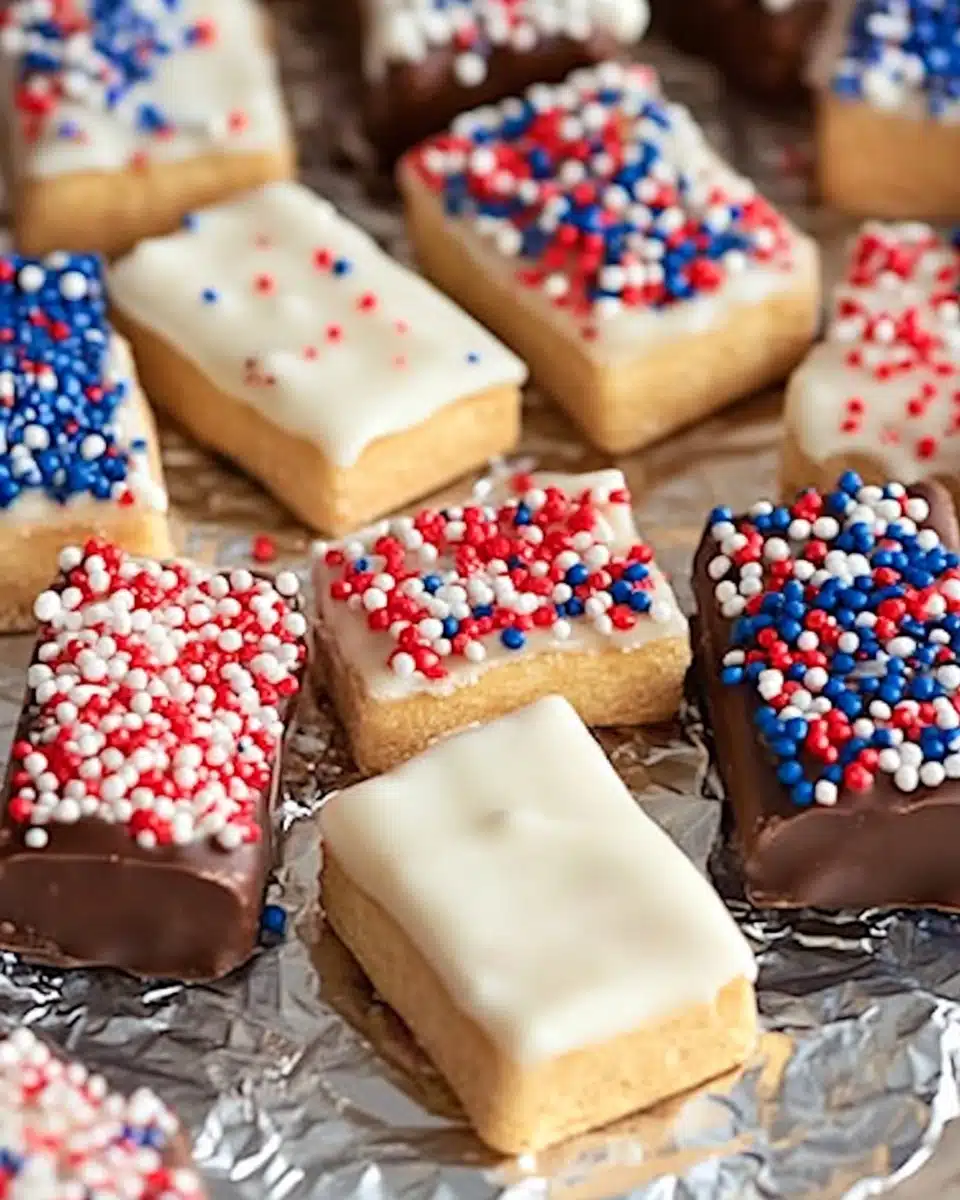
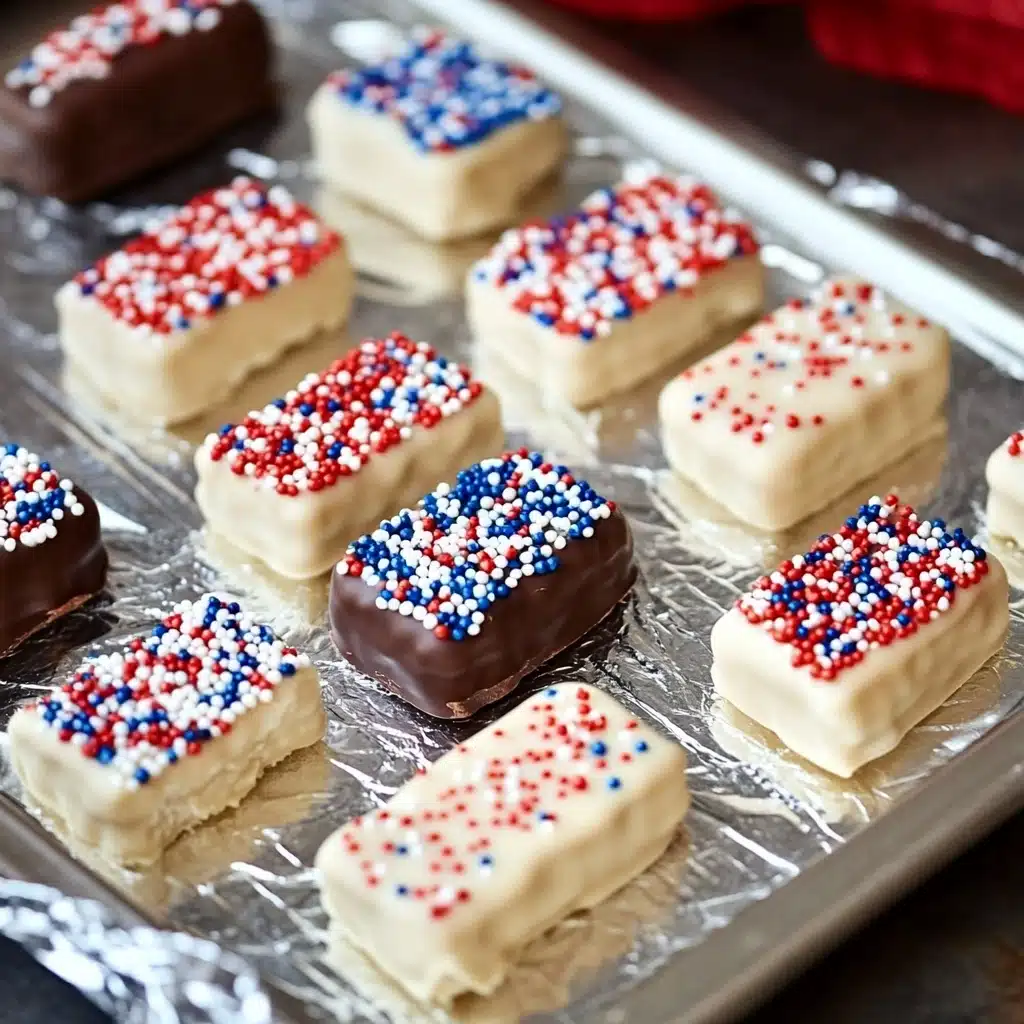
These Red White & Blue Chocolate-Dipped Sugar Wafers are a show-stopping, super easy treat that will sprinkle festive joy into any celebration! Sweet, crispy sugar wafers get a luscious dip in creamy chocolate and are showered generously with patriotic sprinkles—every bite is a delightful mix of color, crunch, and chocolatey goodness.
Why You’ll Love This Recipe
- Impressively Festive: These colorful treats look like they came straight from a bakery, but they’re totally doable at home—no decorating skills required!
- Lightning Fast: With just a handful of ingredients and a few minutes of hands-on time, you’ll have a giant platter of goodies ready in a flash.
- Customizable for Any Occasion: Just swap out the sprinkle colors and instantly adapt these beauties for any holiday, team theme, or party.
- Crunchy, Creamy, Chocolaty Perfection: That magical contrast of crispy wafers and smooth chocolate is guaranteed to win everyone over—kids and adults alike!

Ingredients You’ll Need
Everything you need for Red White & Blue Chocolate-Dipped Sugar Wafers is simple, but each ingredient is crucial for big flavor and beautiful results! A few pantry finds and your favorite festive sprinkles come together for a treat that’s both eye-catching and irresistibly snackable.
- Sugar wafer cookies (2 packages, 8–9 oz. each): The classic layered wafers provide the famous crispy bite—choose your favorite flavor or mix it up!
- White candy melts or white bark coating (1 lb. or 24 oz.): This melts down smooth and sets up with a glossy, candy-shop finish for your white chocolate layer.
- Milk chocolate candy melts or chocolate bark coating (1 lb. or 24 oz.): For a rich chocolate dip; use milk, dark, or even semi-sweet if you want to play with flavors.
- Shortening (1 tablespoon): Just a little ensures your chocolate sets with a beautiful sheen and perfect dip-ability.
- Assorted red, white, and blue sprinkles: The magic touch! I love using a mix of white non-pareils, blue jimmies, and red confetti sprinkles for a picture-perfect finish.
Variations
One of my favorite things about Red White & Blue Chocolate-Dipped Sugar Wafers is how easy it is to put your own spin on them—think different colors, flavors, or even dietary tweaks! Get creative and let these joyful treats match every occasion or craving.
- Triple Chocolate: Use dark, milk, and white chocolate coatings for a dramatic, decadent trio of flavors and colors.
- Holiday Swap: Substitute different sprinkle colors—red and green for Christmas, orange and black for Halloween, or your favorite sports team hues for game day fun.
- Gluten-Free Version: Grab gluten-free sugar wafers (many brands make them!) so everyone can happily indulge.
- Flavored Wafers: Try strawberry, lemon, or chocolate wafer cookies for an extra fun pop of flavor under that chocolate shell.
How to Make Red White & Blue Chocolate-Dipped Sugar Wafers
Step 1: Prep Your Ingredients and Work Surface
Before you start dipping, set up your workspace: line a baking sheet or your countertop with wax paper for easy cleanup and quick candy setting. Open your sugar wafer cookies and arrange your sprinkles in shallow bowls so you’re ready to decorate as soon as the wafers are coated.
Step 2: Melt the Candy Coating
In a microwave-safe bowl, combine your candy melts or bark coating (either white, milk chocolate, or both—totally your call!) along with the shortening. Microwave in 30-second intervals, stirring between bursts until the candy is completely melted, smooth, and glossy. Be patient—it’s worth it for that picture-perfect dip!
Step 3: Dip and Decorate the Wafers
Take a sugar wafer and dip about three-quarters of it into the melted coating, letting the excess gently drip back into the bowl for a neat finish. Move quickly to sprinkle on your red, white, and blue decorations while the coating is still tacky—the more, the merrier! Place each finished wafer on the wax paper to set.
Step 4: Let Them Set and Enjoy!
Continue dipping and sprinkling the rest of your sugar wafers. Let them sit out at room temperature until the candy shell is firm to the touch. Once set, your Red White & Blue Chocolate-Dipped Sugar Wafers are officially party-ready. Try not to eat half the batch before company arrives!
Pro Tips for Making Red White & Blue Chocolate-Dipped Sugar Wafers
- Smooth & Shiny Dip: Always add the shortening to your candy melts—it’s the secret to perfectly smooth, glossy chocolate that clings beautifully to every wafer.
- No-Sweat Sprinkle Trick: Sprinkle each wafer with decorations while the coating is still wet—otherwise, the sprinkles won’t stick.
- Divide & Decorate: Work in small batches to prevent the coating from setting before you sprinkle, especially if you’re crafting with kids or friends.
- Mix It Up: Use both white and milk chocolate coatings for a festive variety of stripes and colors across your serving platter.
How to Serve Red White & Blue Chocolate-Dipped Sugar Wafers
Garnishes
To make your Red White & Blue Chocolate-Dipped Sugar Wafers even more dazzling, scatter extra sprinkles around the serving tray or add a few edible stars for extra sparkle. If you’re feeling fancy, a drizzle of colored candy melts in zig-zags adds bakery-style pizzazz.
Side Dishes
These colorful treats are the ultimate sweet snack on their own, but they also make a fun addition to ice cream sundaes, fruit platters, or alongside a big bowl of summer berries. They’re perfect with lemonade or iced tea for a refreshing party combo!
Creative Ways to Present
Stand your Red White & Blue Chocolate-Dipped Sugar Wafers upright in mason jars or clear glasses for a grab-and-go centerpiece at any picnic or barbecue. Or stack them in a star shape on a platter for maximum festive flair—ribbons or flags tucked in between are such a cute touch!
Make Ahead and Storage
Storing Leftovers
Pop any leftover wafers into an airtight container, layering them between sheets of wax paper so the decorative candy coating stays crisp and gorgeous. They’ll keep their crunch for up to two weeks at room temperature—if they last that long!
Freezing
Want to make a giant batch ahead? You can freeze Red White & Blue Chocolate-Dipped Sugar Wafers! Lay them in a single layer in a freezer-safe container (again, wax paper helps), then thaw at room temperature—just be sure to keep the container sealed so condensation doesn’t spoil the candy shell.
Reheating
These wafers are best enjoyed at room temperature—no reheating needed! If your candy shell gets a little soft in a warm kitchen, pop the cookies in the fridge for a few minutes to set the chocolate before serving.
FAQs
-
Can I use other types of chocolate for dipping?
Absolutely! Feel free to use dark chocolate, semi-sweet, or even colored candy melts to match any theme. Just make sure whatever you use is made for melting and dipping—it sets better and sticks beautifully to the wafer cookies.
-
My coating is too thick—how can I fix it?
If your melted candy is a little too thick for dipping, add an extra teaspoon of shortening and stir well. This helps thin it out and ensures a smooth, even coat on every sugar wafer.
-
Can I make Red White & Blue Chocolate-Dipped Sugar Wafers ahead of time?
Definitely! These treats keep well for up to two weeks in an airtight container at room temperature, making them a perfect make-ahead dessert for parties and picnics.
-
Do I need to refrigerate the finished wafers?
No refrigeration is needed unless your kitchen is very warm—just store the finished wafers in a cool, dry spot so the candy coating doesn’t get sticky or melt.
Final Thoughts
If you’re looking to brighten up your next gathering, you simply have to try these Red White & Blue Chocolate-Dipped Sugar Wafers. They’re quick, festive, and honestly—just so much fun to make and share. Whether for July Fourth, a birthday bash, or an just because, these wafers guarantee sweet smiles all around!
Print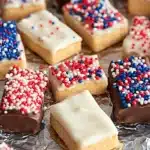
Red White & Blue Chocolate-Dipped Sugar Wafers Recipe
- Prep Time: 20 minutes
- Cook Time: 0 minutes
- Total Time: 20 minutes
- Yield: 40-60 wafers
- Category: Dessert
- Method: Dipping
- Cuisine: American
- Diet: Vegetarian
Description
These Red White & Blue Chocolate-Dipped Sugar Wafers are a delightful treat perfect for patriotic celebrations. Crunchy sugar wafer cookies are dipped in a mix of white and milk chocolate, then adorned with colorful sprinkles for a festive touch. Easy to make and even easier to enjoy!
Ingredients
Ingredients:
- 2 (8 oz. or 9 oz.) packages sugar wafer cookies
- 1 (1 lb.) package white candy melts or 1 (24 oz.) package white bark coating*
- 1 (1 lb.) package milk chocolate candy melts or 1 (24 oz.) package chocolate bark coating*
- 1 T. shortening
- Assorted red, white, & blue sprinkles (e.g., white non-pareils, blue jimmies, red confetti sprinkles)
Instructions
- Melt the chocolate coating: Combine white and milk chocolate melts with shortening in the microwave per package directions, stirring in between 30-second intervals until smooth.
- Dip the cookies: Dip 3/4 of a sugar wafer in the chocolate mixture, allow excess to drip off, then sprinkle with desired sprinkles.
- Set the wafers: Place the coated wafers on wax paper to allow the chocolate to set.
- Repeat and store: Repeat with the remaining cookies and store the finished wafers in an airtight container for up to two weeks.
Notes
- You can customize by using all white, all milk chocolate, or a mix of both coatings.
- Each 1 lb. package of chocolate coating can typically cover about 40 sugar wafers.
Nutrition
- Serving Size: 1 wafer
- Calories: 120
- Sugar: 8g
- Sodium: 50mg
- Fat: 6g
- Saturated Fat: 4g
- Unsaturated Fat: 2g
- Trans Fat: 0g
- Carbohydrates: 15g
- Fiber: 0g
- Protein: 1g
- Cholesterol: 2mg


