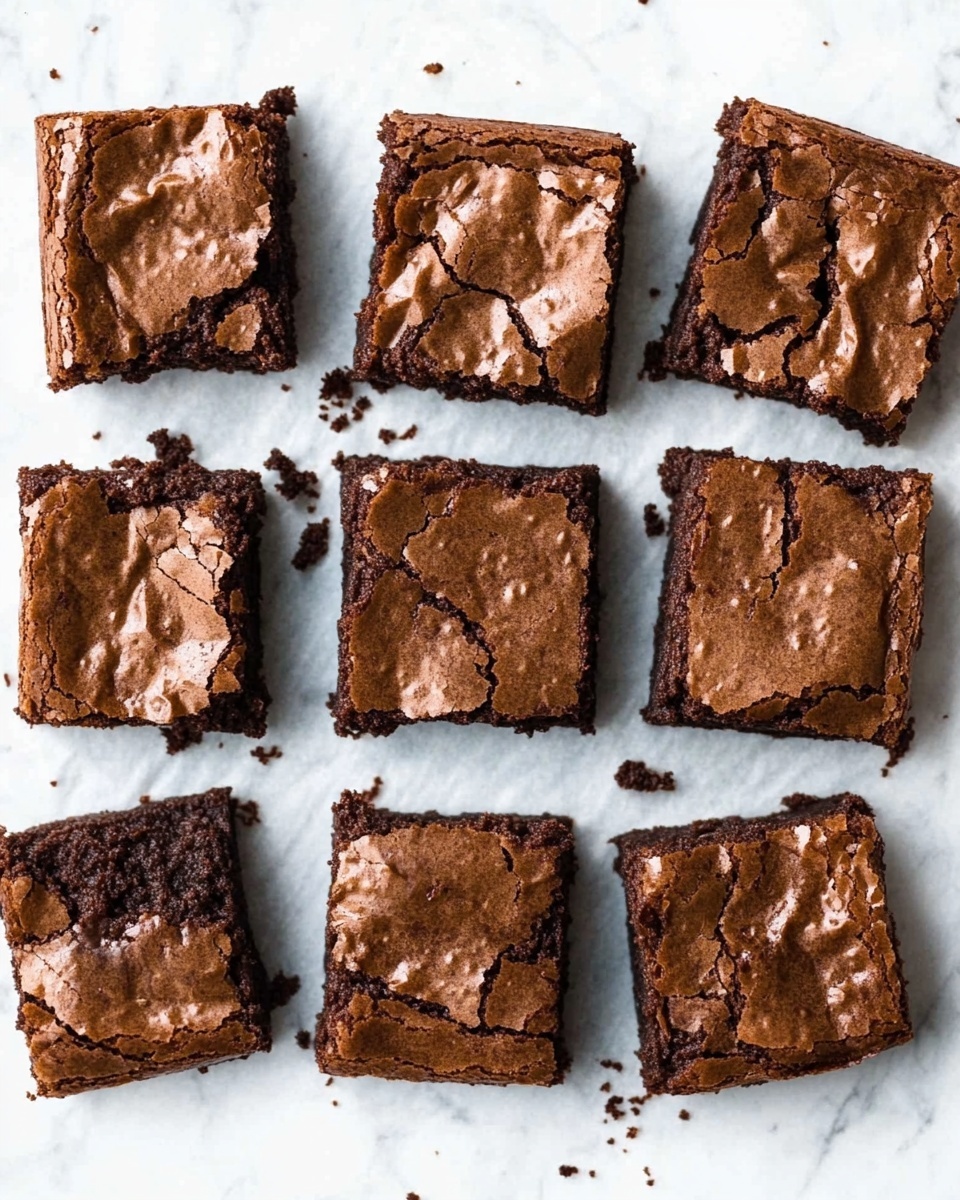
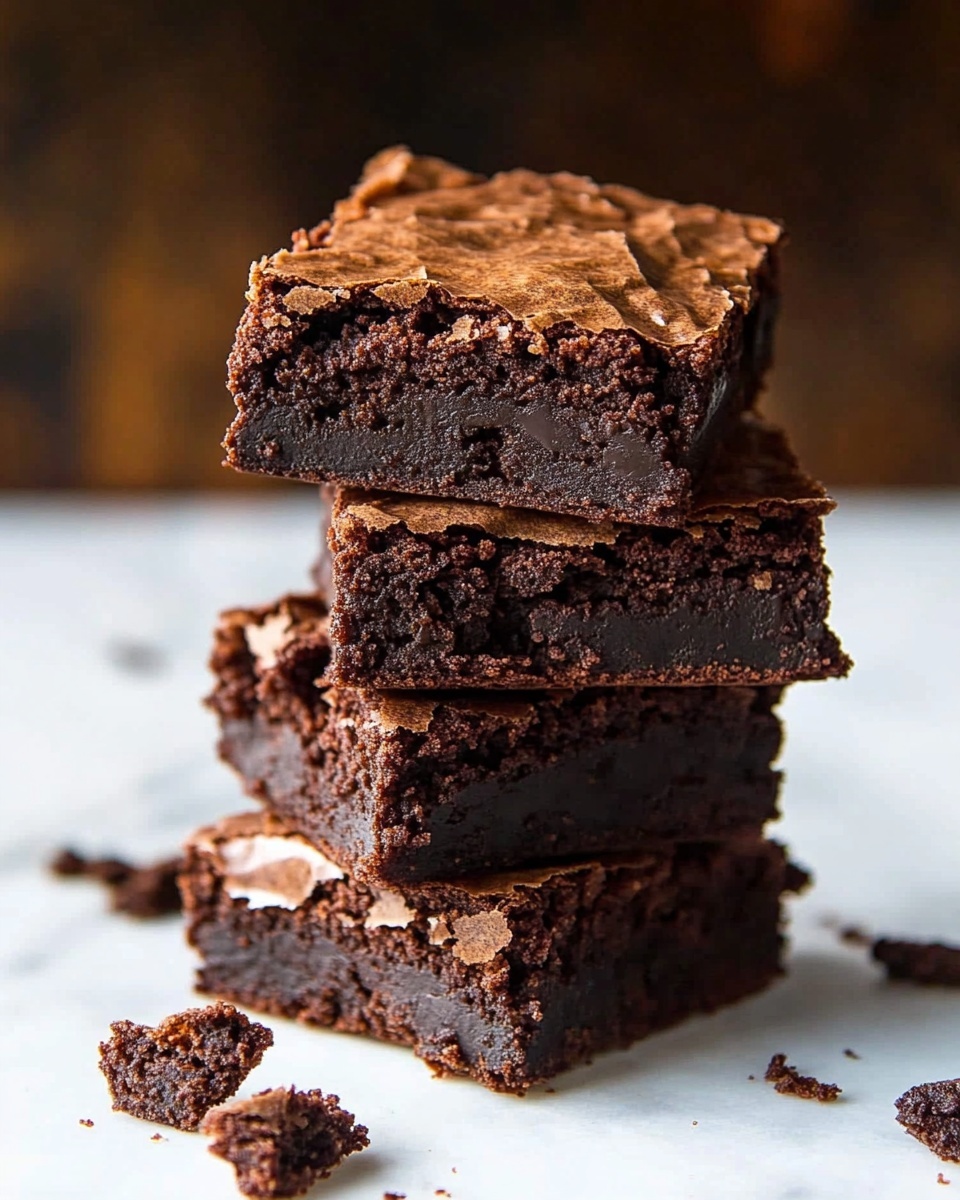
If you’re on the hunt for the ultimate chocolate fix, you absolutely have to try this Seriously Fudgy Homemade Brownies Recipe. I love how these brownies come out gloriously dense and fudgy — the kind that melts in your mouth with every bite. Whether it’s for a cozy night in or impressing guests, these brownies never disappoint and always leave everyone asking for more.
When I first tried this recipe, I was amazed by the rich chocolate flavor and that irresistibly gooey texture that’s truly next level. You’ll find that it’s a perfect treat any time you want a chocolate hit that’s heavy on texture and flavor, but surprisingly simple to make. Seriously Fudgy Homemade Brownies Recipe is worth keeping in your baking arsenal – they’re just that good!
Why You’ll Love This Recipe
- Ultra Fudgy Texture: The rich butter and melted chocolate create that dense, chewy bite that brownie lovers crave.
- Simple Ingredients: No fancy or hard-to-find items needed — just classic pantry staples coming together beautifully.
- Flexible Baking: You can easily add chocolate chips or nuts for extra crunch or gooeyness based on your mood.
- Failsafe Results: With clear steps and tips, you’ll confidently nail it on your first try – no guesswork required.
Ingredients You’ll Need
This Seriously Fudgy Homemade Brownies Recipe uses a fantastic combo of real chocolate and cocoa powder that brings both flavor and texture to the party. Using quality chocolate bars instead of just chips really elevates the brownies to gourmet territory.
- Unsalted butter: Melting it with chocolate creates a smooth base full of richness.
- Semi-sweet chocolate bar: I like to use good-quality bars like Ghirardelli for the best fudgy flavor and aroma.
- Granulated sugar: It balances the bitterness of cocoa and adds moisture.
- Eggs: They bind everything together and help create that chewy texture.
- Pure vanilla extract: Just a splash boosts the chocolate flavor and adds warmth.
- Unsweetened cocoa powder: Dutch-process works wonderfully here for smoothness, but natural cocoa also does the job.
- All-purpose flour: Properly spooned and leveled to avoid too dense or cakey brownies.
- Salt: Balances the sweetness and enhances the chocolate’s depth.
- Optional chocolate chips: I love extra melty chocolate pockets, but these are totally up to you!
Variations
One of the reasons I enjoy making this Seriously Fudgy Homemade Brownies Recipe is how easy it is to tailor it to what you and your family love. You can mix in nuts, swap out some sugar for brown sugar, or turn it into a gluten-free wonder by using a special flour blend.
- Adding nuts: I toss in chopped walnuts or pecans for a lovely crunchy counterpoint to the fudgy base — my favorite combo for extra texture.
- Brown sugar substitution: Half brown sugar and half white sugar adds a subtle molasses note and keeps the brownies super moist.
- Gluten-free version: Use a 1:1 gluten-free flour blend and you barely notice the difference, everyone loved it!
- Extra chocolate chips: Stir in a handful more chocolate chips before baking for pockets of gooey chocolate that make these brownies extra indulgent.
How to Make Seriously Fudgy Homemade Brownies Recipe
Step 1: Get Your Pan Ready
Start by preheating your oven to 350°F (177°C). Grease your 9×13-inch pan or line it with parchment paper, leaving an overhang if you can — that little trick helps with lifting the brownies out easily when they’re done. Trust me, this makes cutting neat squares way less stressful.
Step 2: Melt Butter and Chocolate
In a microwave-safe bowl, combine the butter and half of the chopped chocolate (2 ounces). Melt them gently in 30-second bursts, whisking after each to avoid overheating and getting grainy chocolate. When you have a glossy, smooth mixture, it’s time for the sugar — stir it in well.
Step 3: Add Eggs and Vanilla
Next, whisk in your eggs one at a time, making sure you fully incorporate each before adding the next. The batter will lighten a bit and look a tad dull, which is exactly what we want. Then mix in the vanilla extract – this little flavor booster is key!
Step 4: Fold in Dry Ingredients and Remaining Chocolate
Now, sift in the cocoa powder, flour, and salt to avoid lumps, then add the remaining chopped chocolate and chocolate chips if you’re using them. Fold everything together gently with a silicone spatula or wooden spoon. The batter will be thick and dense – don’t overmix, just enough to combine.
Step 5: Bake to Perfection
Spread the thick batter evenly in your prepared pan and slide it into the preheated oven. Bake for about 30 minutes, but start testing around then with a toothpick. Remember, you want a few moist crumbs clinging to the toothpick, not wet batter. This is the secret to that perfect fudgy center! Usually, my oven takes 31–32 minutes for ideal results.
Step 6: Cool Completely Before Cutting
When out of the oven, place the pan on a wire rack and let the brownies cool fully — this step is crucial. Cutting too soon can turn your brownies crumbly instead of luscious and dense. If you used parchment paper with an overhang, just lift the whole slab out for easier slicing.
Pro Tips for Making Seriously Fudgy Homemade Brownies Recipe
- Use Quality Chocolate: I’ve learned that melting premium chocolate bars instead of relying only on chips makes the brownies truly decadent and silky.
- Don’t Overbake: Checking the toothpick at 30 minutes and looking for moist crumbs ensures that perfect fudgy texture every time.
- Line Your Pan: I always use parchment with an overhang to make removing and cutting brownies clean and easy, saving me from mess and frustration.
- Fold Gently: Mixing just until combined preserves that dense fudgy bite — overmixing can lead to cakey edges.
How to Serve Seriously Fudgy Homemade Brownies Recipe
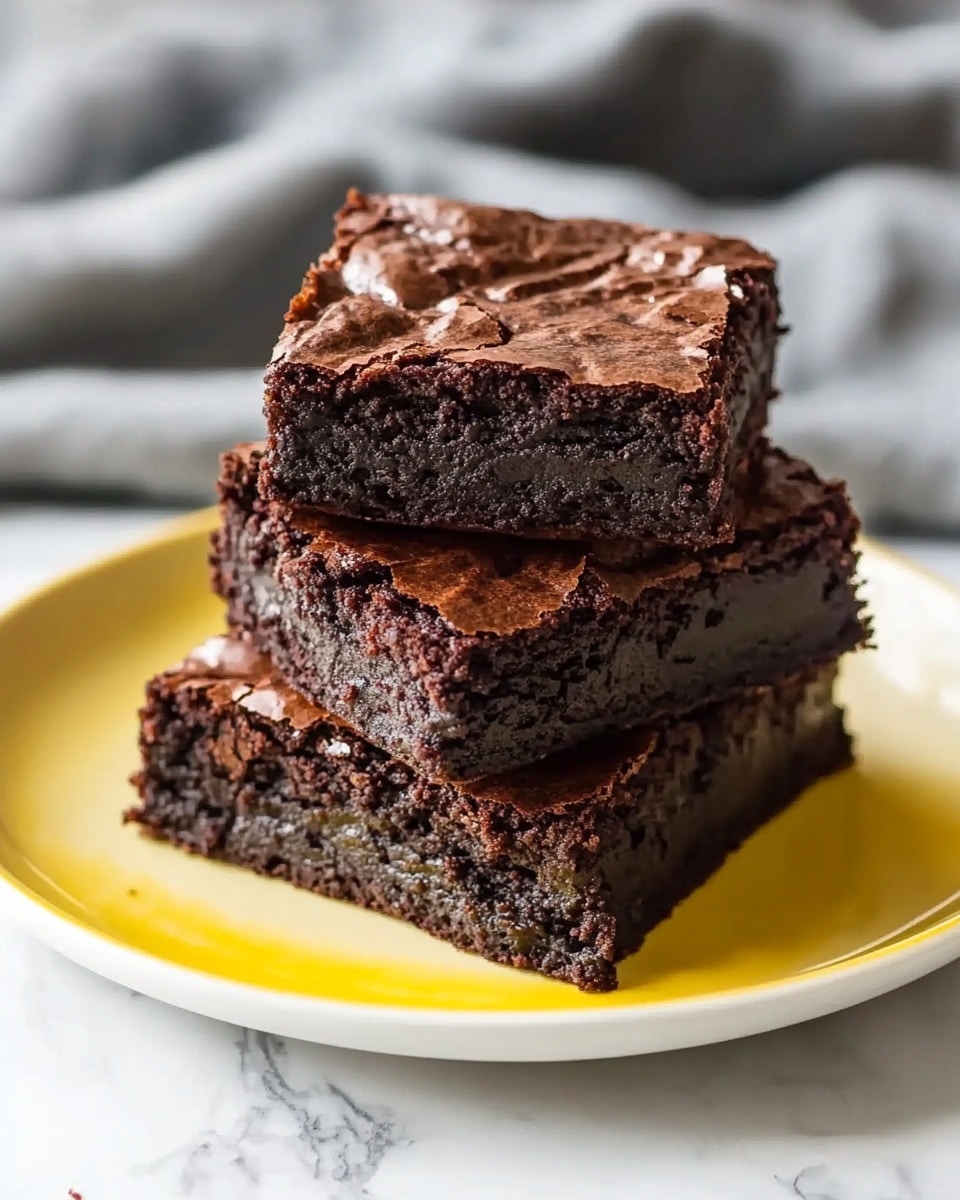
Garnishes
When serving, I often sprinkle a little flaky sea salt on top right after baking — it balances the sweetness beautifully and adds a subtle crunch. Sometimes, I dust on powdered sugar or add a scoop of vanilla ice cream alongside for the ultimate indulgence. Fresh berries or a drizzle of caramel sauce also make delightful accouterments.
Side Dishes
This recipe pairs surprisingly well with warm drinks like coffee, espresso, or a creamy hot chocolate. I’ve also served these brownies as a dessert after a light dinner with a simple fruit salad — the freshness cuts through the richness perfectly.
Creative Ways to Present
For special occasions, I like to cut these brownies into mini squares and serve them on a platter with assorted toppings like chopped nuts, mini marshmallows, and tiny chocolate chunks. Another fun idea I tried was layering them in a clear glass trifle bowl with whipped cream and fresh berries — it’s an impressive and delicious display everyone raves about!
Make Ahead and Storage
Storing Leftovers
I store leftover brownies in an airtight container at room temperature, and they stay moist and delicious for up to a week — if they last that long! Wrapping them individually also helps keep them fresh and prevents sticking.
Freezing
These brownies freeze beautifully. I wrap them tightly in plastic wrap and pop them into a sealed freezer bag. When I’m ready to enjoy, I thaw them overnight in the fridge, and the texture is almost indistinguishable from fresh-baked — a real lifesaver for busy days.
Reheating
If I want brownies warm, I microwave slices for just 15-20 seconds — that revives the fudgy feel instantly. You can also pop them in a warm oven (around 300°F) for 5-7 minutes if you want a slight crisp edge with gooey center.
FAQs
-
Can I use dark chocolate instead of semi-sweet chocolate bars in this recipe?
Absolutely! Using dark chocolate will give your brownies an even richer and more intense chocolate flavor. Just make sure to choose a quality bar with 60-70% cocoa for the best balance. The texture might be slightly less sweet but incredibly delicious.
-
How do I know when my Seriously Fudgy Homemade Brownies Recipe is done baking?
Start testing around the 30-minute mark by inserting a toothpick into the center. You want to see a few moist crumbs clinging to it — if the toothpick comes out with wet batter, give it a couple more minutes. This ensures you get that perfect fudgy center without overbaking.
-
Can I substitute different types of sugar in this recipe?
Yes, you can! I’ve successfully used a combination of brown sugar and granulated sugar to add moisture and a slight caramel note. However, using all granulated sugar is straightforward and still results in fudgy, delicious brownies.
-
What is the best way to cut these brownies neatly?
Make sure your brownies are completely cooled before cutting — I even refrigerate mine for a bit to firm up. Using a sharp chef’s knife wiped clean between cuts helps you get clean, neat squares without crumbling.
Final Thoughts
This Seriously Fudgy Homemade Brownies Recipe holds a special place in my kitchen because it’s so reliably indulgent and easy to make. Whether you’re a seasoned baker or just starting out, it’s a fantastic chocolate treat that’ll make your day better — and quite possibly your whole week! So go ahead, whip up a batch and share the joy; I bet this will become one of your favorites just like it did for me.
Print
Seriously Fudgy Homemade Brownies Recipe
- Prep Time: 10 minutes
- Cook Time: 30 minutes
- Total Time: 40 minutes
- Yield: 18 large brownies
- Category: Dessert
- Method: Baking
- Cuisine: American
Description
These Seriously Fudgy Homemade Brownies are rich, dense, and chocolatey, perfect for satisfying any chocolate craving. Made with melted butter and semi-sweet chocolate for extra fudginess, these brownies combine cocoa powder, sugar, eggs, and vanilla to create a smooth batter baked to perfection. Ideal for dessert or a snack, they come out moist with a crackly top and can be stored for up to a week or frozen for longer storage.
Ingredients
Brownie Batter
- 3/4 cup (12 Tbsp; 170g) unsalted butter
- 4–ounce (113g) semi-sweet chocolate bar, coarsely chopped and divided (2 oz melted, 2 oz folded in)
- 2 cups (400g) granulated sugar
- 3 large eggs, at room temperature
- 2 teaspoons pure vanilla extract
- 1 cup (82g) unsweetened natural or dutch-process cocoa powder
- 1 cup (125g) all-purpose flour, spooned & leveled
- 1 teaspoon salt
- optional: 1 and 1/4 cups (225g) semi-sweet chocolate chips
Instructions
- Preheat and Prepare Pan: Preheat the oven to 350°F (177°C). Grease a 9×13-inch pan or line it with aluminum foil or parchment paper, leaving an overhang on the sides to help lift out the brownies later.
- Melt Butter and Chocolate: In a microwave-safe bowl, combine the butter and half (2 ounces/57g) of the chopped semi-sweet chocolate. Melt in 30-second intervals, whisking after each until the mixture is smooth and fully combined.
- Add Sugar and Eggs: Whisk in the granulated sugar until fully combined, then whisk in the eggs one at a time along with the vanilla extract. The batter will turn light brown and appear slightly dull.
- Incorporate Dry Ingredients and Chocolate: Add the cocoa powder, all-purpose flour, salt, the remaining 2 ounces (57g) of chopped chocolate, and the optional chocolate chips. Fold together gently with a silicone spatula or wooden spoon until the batter is thick and uniform.
- Bake the Brownies: Spread the thick batter evenly in the prepared pan. Bake for 30 minutes, then test with a toothpick inserted into the center. If it comes out with wet batter, continue baking, checking every 2 minutes. When the toothpick has moist crumbs (not wet batter), they are done, typically 31–32 minutes total.
- Cool and Serve: Remove the pan from the oven and transfer it to a wire rack to cool completely before lifting the brownies out and cutting into 18 squares.
- Storage: Store leftover brownies covered at room temperature for up to 1 week. They also freeze well for up to 3 months; thaw overnight in the refrigerator and bring to room temperature before serving.
Notes
- Make Ahead Instructions: Freeze brownies for up to 3 months. Thaw overnight in the fridge, then bring to room temperature.
- Special Tools: 9×13-inch baking pan, glass mixing bowl, whisk, silicone spatula or wooden spoon, cooling rack.
- Chocolate bars: Use good quality 4-ounce semi-sweet chocolate bars like Ghirardelli, Baker’s, or Lindt; 2 ounces melted and 2 ounces chopped.
- Sugar variation: Try substituting 1/2 cup (100g) light brown sugar and 1 1/2 cups (300g) granulated sugar for a richer flavor.
- Cocoa powder: Either natural or dutch-process cocoa powder works; dutch-process gives smoother flavor.
Nutrition
- Serving Size: 1 brownie (based on 18 servings)
- Calories: 280
- Sugar: 28g
- Sodium: 150mg
- Fat: 15g
- Saturated Fat: 9g
- Unsaturated Fat: 5g
- Trans Fat: 0g
- Carbohydrates: 36g
- Fiber: 3g
- Protein: 3g
- Cholesterol: 65mg

