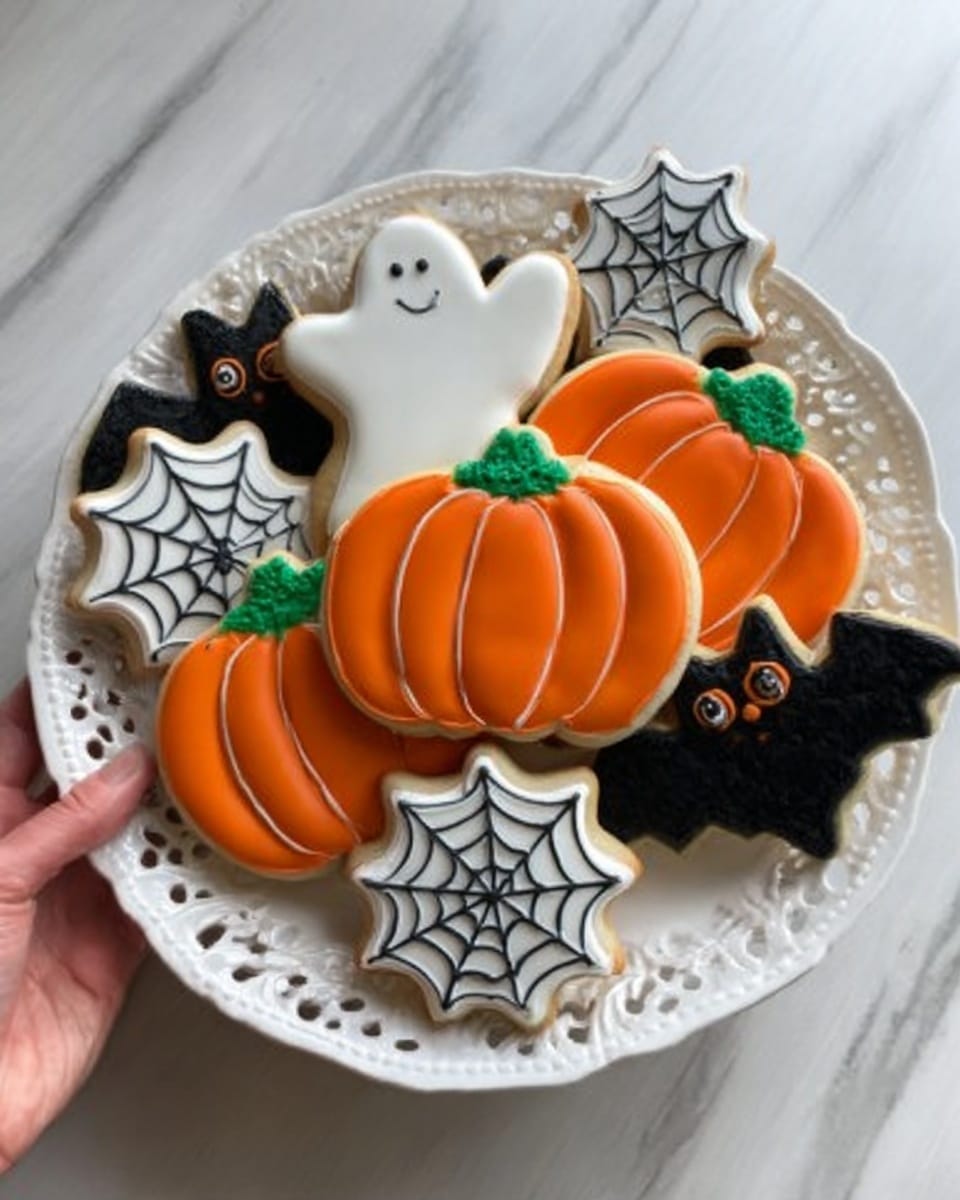
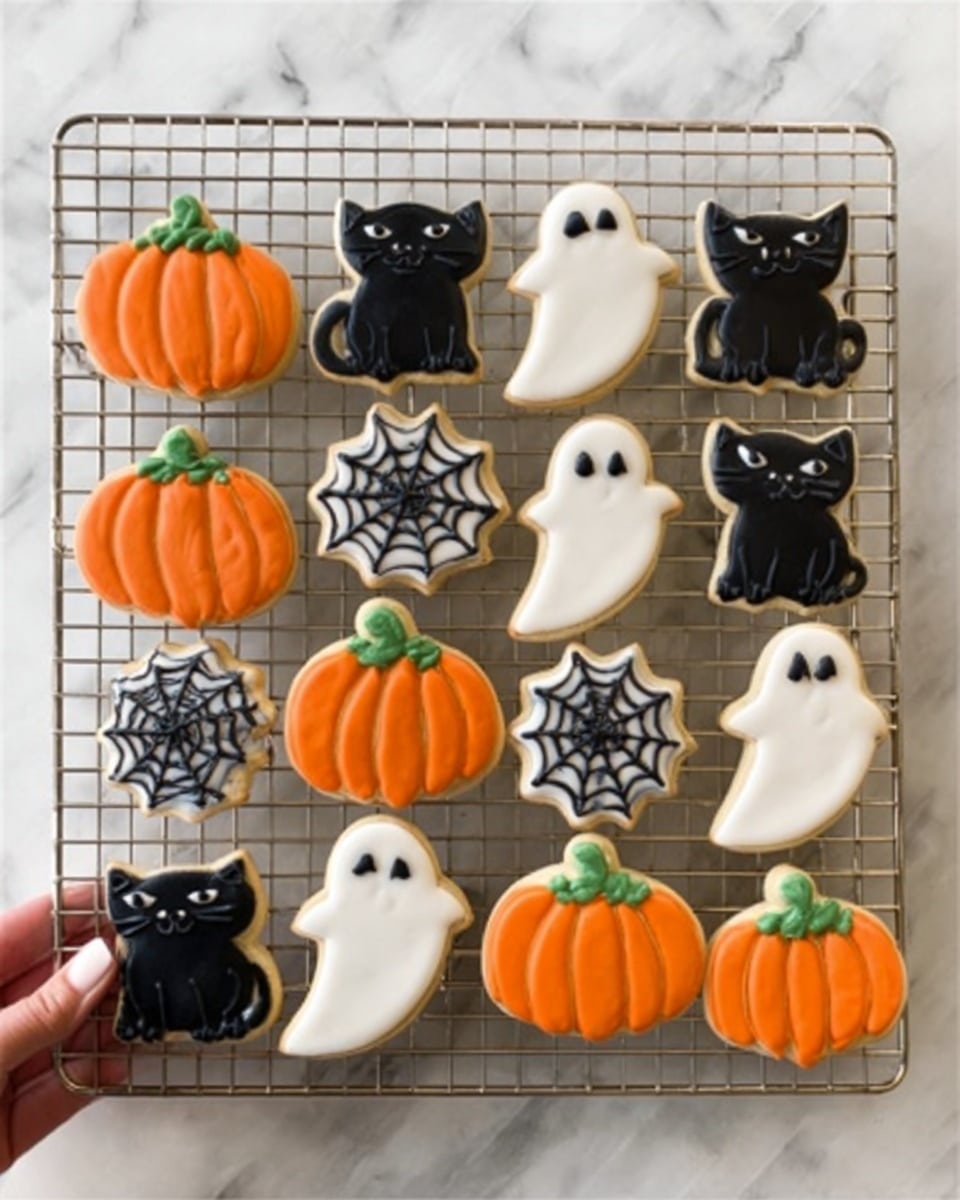
If you’re looking for an easy, crowd-pleasing treat this spooky season, you’re absolutely going to love this Simple Iced Halloween Cookies Recipe. I’ve made these cookies for years, and every time I bake a batch, my family goes crazy for them. They’re buttery, perfectly crisp around the edges, and the icing makes decorating extra fun and festive — even if you don’t consider yourself a pro baker. Stick with me here, and I’ll walk you through everything you need to know to make this recipe your new Halloween tradition!
Why You’ll Love This Recipe
- Effortless Decorating: Using store-bought cookie icing makes decorating super approachable and fun, even if icing isn’t usually your thing.
- Perfect Texture: These cookies have a buttery crumb with crispy edges that hold their shape beautifully after baking and decorating.
- Make-Ahead Friendly: You can prep the dough the day before and even freeze decorated cookies without losing that fresh-baked charm.
- Family Favorite: I promise, once you try this Simple Iced Halloween Cookies Recipe, it’ll be a hit with everyone — kids and adults alike!
Ingredients You’ll Need
These ingredients are simple pantry staples that come together quickly. I always make sure my butter is softened to room temperature—that’s key for getting a smooth dough. Also, I love grabbing good-quality vanilla and almond extract to give the cookies a subtle, cozy flavor that feels classic but special.
- Unsalted butter: Softened butter is best for creaming with the sugar to create that tender bite.
- Sugar: Regular granulated sugar gives just the right sweetness and crisp texture.
- Eggs: They bind the dough and add richness—make sure they’re at room temperature, too.
- Vanilla extract: Adds warmth and depth to the flavor—don’t skip it!
- Almond extract: Just a touch makes the cookies extra inviting and unique.
- Salt: Balances the sweetness and enhances the buttery flavor.
- Baking soda: Helps the cookies rise just enough without spreading too much.
- All-purpose flour: The main structure of the cookies—make sure to measure properly for the best texture.
- White Betty Crocker cookie icing: Using white icing makes a clean canvas for decorating spooky ghost shapes or other Halloween motifs.
- Black Betty Crocker cookie icing: Perfect for adding details or spooky touches like eyes and mouths.
- Round red sprinkles (optional): These add a fun pop of color, especially for vampire or monster-themed cookies.
- Black edible food marker: A must-have for drawing faces and finishing details once the icing dries.
- Black decorating sugar: Also called sanding sugar, it gives your cookies just a touch of sparkle and texture.
Variations
I love giving these Simple Iced Halloween Cookies a little twist depending on my mood or the occasion. It’s so easy to customize them! Feel free to change up the shapes, colors, or even flavors to match your vibe. Your Halloween party or trick-or-treat basket will look amazing either way.
- Spooky Flavors: Sometimes I swap out the almond extract for peppermint or cinnamon for a warm, cozy twist that goes great with fall vibes.
- Gluten-Free: You can substitute with a gluten-free flour blend, but I recommend chilling the dough a bit longer so it holds up well while rolling and cutting.
- Shape Variety: While ghosts are classic, I’ve had great fun making bats, pumpkins, and even witches hats with cookie cutters I already have.
- Naked Cookies: If you want to skip the icing, the plain cookies themselves are buttery and delicious, perfect for cookie sandwiches or dunking in milk.
How to Make Simple Iced Halloween Cookies Recipe
Step 1: Cream and Combine Your Ingredients
Start by beating the softened butter and sugar together in an electric mixer until light and fluffy—this usually takes around 3 minutes and is worth every second to get that perfect cookie texture. Next, add the eggs plus vanilla extract and mix until everything is well combined. Toss in the salt and baking soda, then gradually add your flour until a smooth dough forms. Pro tip: Don’t overmix here; once the flour disappears, it’s time to stop.
Step 2: Chill Your Dough
Divide the dough into two discs and wrap each in plastic wrap. At least one hour in the fridge is crucial to firm up the dough so your cookies hold their shape better while baking. I actually prefer chilling it overnight because the flavors deepen and rolling out is easier.
Step 3: Roll, Cut, and Chill Again
When you’re ready to bake, preheat your oven to 350°F. On a floured surface, roll out one half of the dough to about 1/4 inch thickness, turning the dough often to avoid sticking and keep the thickness even. Use your favorite Halloween cookie cutters to cut fun shapes, then place them on a baking sheet. For the best results, chill the cut cookies in the fridge for about 15 minutes before baking — I discovered this trick helps prevent spreading and keeps the cutest shapes intact.
Step 4: Bake Until Perfectly Golden
Bake the cookies for 8 to 11 minutes, depending on their size, just until the edges start to turn a soft golden brown. Keep a close eye—they can go from perfect to overdone quickly. Let them cool on the baking sheet for a few minutes to firm up before transferring to a wire rack to cool completely.
Step 5: Decorate and Personalize
Once the cookies have cooled, spread a thin layer of the white Betty Crocker cookie icing over each one. If you want, sprinkle on some black sanding sugar for extra texture and sparkle. Here’s the catch: let your decorated cookies sit out for at least 4 hours (or overnight) to let the icing dry and set properly before using your edible black marker to draw faces or details. This step really brings your Halloween designs to life—ghosts, spiders, pumpkins—you name it!
Pro Tips for Making Simple Iced Halloween Cookies Recipe
- Keep Dough Cold: Chilling twice—once before rolling and again after cutting—makes all the difference in keeping sharp cookie shapes.
- Use Plastic Wrap to Shape Dough: I find rolling between two sheets of plastic wrap cuts cleanup and prevents sticking.
- Let Icing Set Fully: Be patient and don’t rush the icing drying process before drawing details—you’ll avoid smudges and get crisp designs.
- Store Carefully: Store decorated cookies in a container with layers separated by parchment to keep them looking fresh and prevent sticking.
How to Serve Simple Iced Halloween Cookies Recipe

Garnishes
I love adding black sanding sugar right after icing for a shimmering effect that adds dimension without overpowering the simple white base. Sometimes I add tiny red sprinkles too—those little pops of color make vampire or monster cookies extra fun. If you’re feeling fancy, a light dusting of edible glitter can really wow guests without complicating the process.
Side Dishes
These cookies are pretty versatile, so I like pairing them with warm apple cider or a spooky punch for parties. For a Halloween gathering, a simple bowl of fresh fruit or some roasted pumpkin seeds makes for a nice balance alongside all the sweet treats.
Creative Ways to Present
One thing I’ve had a lot of fun with is arranging the cookies on a black or orange platter with some mini pumpkins and fake spider webs for an instant Halloween vibe. You can also package them in clear cellophane bags tied with festive ribbon to give as cute party favors. Personalizing the icing faces and making little “cookie monsters” is always a hit with kids.
Make Ahead and Storage
Storing Leftovers
I always store my leftover decorated cookies in a sealed container layered with parchment paper to prevent them from sticking together. You can keep them at room temperature for up to two weeks, which means you can bake ahead and enjoy them well past Halloween night.
Freezing
If I want to bulk prep, I freeze the decorated cookies in an airtight Tupperware. When it’s time to enjoy, I let them thaw fully at room temperature—and trust me, this prevents any condensation from messing up the icing’s finish. It’s one of those kitchen hacks I learned the hard way!
Reheating
You don’t really need to reheat cookies like these — they taste wonderful cold or at room temperature. But if you prefer warm cookies, I pop them in the microwave for 7-10 seconds. Just be careful not to melt the icing.
FAQs
-
Can I use a different brand of cookie icing for this Simple Iced Halloween Cookies Recipe?
Absolutely! While I recommend Betty Crocker because it dries to a nice, stackable finish without becoming hard and crunchy, you can experiment with other brands. Just look for a soft-set icing that won’t crack or crumble easily when stored or stacked.
-
Why do I need to chill the dough twice in this Simple Iced Halloween Cookies Recipe?
Chilling twice helps keep the cookies from spreading too much during baking, preserving the sharp edges of your cutouts. It also makes the dough easier to handle and less sticky, which makes rolling and cutting a breeze.
-
How long should I wait before drawing on the cookies with the edible marker?
Patience is key! Wait at least 4 hours, or better yet overnight, for the icing to fully dry and set. If you draw too soon, the lines can smudge or blend into the icing.
-
Can I make these cookies dairy-free or vegan?
You can experiment with dairy-free butter alternatives and egg replacers, but the texture might vary. If you go this route, chill the dough extra long and be gentle when rolling to keep the best shape.
Final Thoughts
This Simple Iced Halloween Cookies Recipe has become my go-to for fall festivities because it balances ease and whimsy so well. I especially love those quiet moments decorating each cookie—it’s like creating little edible memories. I can’t wait for you to try these yourself and hear how your kids, friends, or guests light up when they bite into those buttery, festive treats. Give it a go—you’ll thank yourself later!
Print
Simple Iced Halloween Cookies Recipe
- Prep Time: 20 minutes
- Cook Time: 10 minutes
- Total Time: 1 hour 30 minutes (including chilling and decorating drying time)
- Yield: 4 dozen
- Category: Dessert
- Method: Baking
- Cuisine: American
Description
These Simple Iced Halloween Cookies are buttery, crisp-edged sugar cookies decorated with smooth Betty Crocker icings and festive sprinkles. Perfect for a spooky celebration, they feature almond and vanilla extracts for a unique flavor twist, and a decorating process that keeps the icing soft yet stackable.
Ingredients
Cookie Dough
- 1 cup unsalted butter, softened
- 1 cup sugar
- 2 eggs
- 1 teaspoon vanilla extract
- 1 teaspoon almond extract
- 1/2 teaspoon salt
- 1 teaspoon baking soda
- 3 cups all-purpose flour
Decoration
- 1-2 containers white Betty Crocker cookie icing
- 1-2 containers black Betty Crocker cookie icing
- Round red sprinkles (optional)
- Black edible food marker
- Black decorating sugar (sanding sugar or sprinkles)
Instructions
- Prepare the dough: In the bowl of an electric mixer or using a hand mixer, beat the softened butter and sugar together until the mixture is light and fluffy, which takes about 3 minutes. Add the eggs, vanilla extract, and almond extract, then continue beating until all ingredients are well combined. Mix in the salt and baking soda, and then gradually add the flour, beating until a smooth dough forms.
- Chill the dough: Divide the dough into two halves. Wrap each half tightly in plastic wrap and refrigerate for at least one hour, preferably overnight, to allow the dough to firm up for easier rolling and cutting.
- Preheat the oven: Set your oven to 350 degrees Fahrenheit (175 degrees Celsius) to prepare for baking the cookies.
- Roll and cut shapes: Take one half of the chilled dough from the refrigerator and place it on a lightly floured surface. Roll the dough to a thickness of about 1/4 inch (1 cm), turning and flouring the dough as necessary to prevent sticking. Use cookie cutters to cut out your desired Halloween shapes and transfer the cut cookies onto a baking sheet.
- Chill the cut cookies: Place the baking sheets with the cut, unbaked cookies back into the refrigerator for about 15 minutes. This step helps the dough firm up so the cookies retain their shape and do not spread too much during baking.
- Bake the cookies: Bake the cookies in the preheated oven for 8 to 11 minutes, depending on their size, or until the edges just begin to brown. Remove from the oven and let cool on the baking sheet for a few minutes before transferring to a wire rack to cool completely.
- Decorate the cookies: Once cooled, frost the cookies with white and black Betty Crocker cookie icings using a piping bag or spreading knife. Sprinkle with black decorating sugar and optionally red round sprinkles. Let the frosted cookies dry for at least 4 hours to set the icing.
- Add final details: After the icing is fully dried, use the black edible food marker to draw spooky faces or other details. Allow the decorated cookies to dry completely before storing or stacking.
Notes
- The cookies have buttery flavor with crisp edges that hold their shape well after chilling.
- Betty Crocker cookie icing is recommended for convenience and produces a finish that dries soft and stackable, unlike royal icing which hardens and cracks.
- Fully decorated cookies keep well for up to two weeks.
- Cookies can be frozen in an airtight Tupperware container; bring to room temperature before opening container to avoid condensation ruining the icing finish.
Nutrition
- Serving Size: 1 cookie (based on 48 cookies per batch)
- Calories: 110
- Sugar: 7g
- Sodium: 80mg
- Fat: 5g
- Saturated Fat: 3g
- Unsaturated Fat: 2g
- Trans Fat: 0g
- Carbohydrates: 15g
- Fiber: 0.5g
- Protein: 1g
- Cholesterol: 20mg

