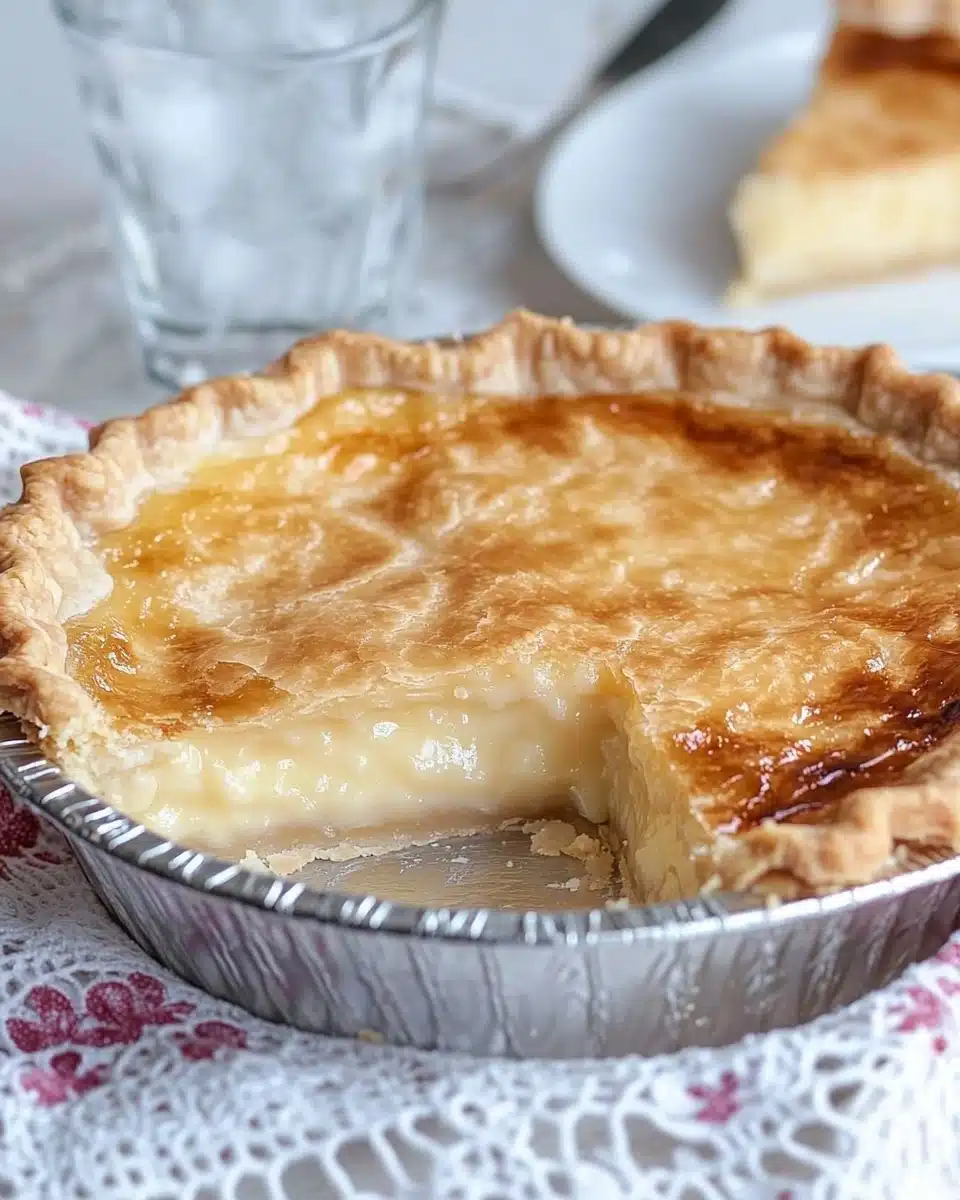
Incredibly simple yet wonderfully surprising, Water Pie is the Depression-era dessert that proves magic can happen with minimal ingredients. It’s silky, sweet, and buttery—and yes, it’s really made with water! If you’ve never tried Water Pie, prepare to fall in love with this charming slice of American culinary history.
Why You’ll Love This Recipe
- Delightfully Simple: You only need a handful of pantry staples, but the results are pure comfort and nostalgia.
- Surprisingly Silky Texture: Water Pie sets up with a gelled, custard-like filling that practically melts in your mouth.
- Endlessly Adaptable: You can tweak flavors and toppings to suit your mood or whatever you have on hand.
- A Conversation Starter: Guests will be charmed by the backstory and stunned by how tasty a dessert called “Water Pie” can be!
Ingredients You’ll Need
What I love about Water Pie is how it celebrates humble ingredients by transforming them into something remarkable. Each component serves a purpose—don’t let the short list fool you! These basics build all the flavor and texture this vintage treat is famous for.
- 1 unbaked 9-inch deep-dish pie crust: The classic flaky foundation that holds up beautifully to a liquid filling. Store-bought or homemade both work!
- 1 1/2 cups water: Believe it or not, water is the star ingredient—forming a delicate “custard” as it bakes with the thickener and sugar.
- 4 tablespoons all-purpose flour: This helps thicken the filling until it gels, so the pie slices up cleanly once chilled.
- 1 cup sugar: Simple granulated sugar sweetens the pie just enough, balancing the mildness of the water and flour.
- 2 teaspoons vanilla extract: A splash of vanilla gives the pie its warm, nostalgic aroma and round flavor.
- 5 tablespoons butter, cut into 5 pieces: Pats of butter melt into the top, adding richness and a glossy, golden finish.
Variations
One of my favorite things about Water Pie is how easy it is to put your own twist on it. Whether you want to make this dessert vegan, jazz it up with extra flavors, or suit your family’s dietary needs, this recipe is wonderfully flexible.
- Lemon or Almond Extract: Swap out half of the vanilla extract for lemon or almond for a different flavor accent.
- Brown Sugar: Replace white sugar with brown sugar for deeper, caramel notes and a hint of molasses.
- Dairy-Free & Vegan: Use a vegan pie crust and swap in plant-based butter to keep things dairy-free while still rich and comforting.
- Spice It Up: Add a pinch of cinnamon or nutmeg to the sugar and flour for a warm, cozy flavor boost.
How to Make Water Pie
Step 1: Prep the Pie Crust
Preheat your oven to 400°F (204°C) and place your deep-dish pie crust—still unbaked—on a sturdy baking sheet. This not only helps with easy handling but also catches any potential drips, keeping your oven mess-free. The crust acts as the bowl for your liquid filling, so make sure it’s deep and sturdy.
Step 2: Pour in the Water
Pour exactly 1 1/2 cups of water straight into the pie crust. It might look unusual, but trust the process—this forms the base of the unique Water Pie filling.
Step 3: Add Dry Ingredients
In a small bowl, blend together your flour and sugar. Carefully sprinkle this mixture evenly over the water. Resist the urge to stir—letting the sugar and flour “float” is what creates the signature gelled texture as it bakes.
Step 4: Layer Flavors & Bake
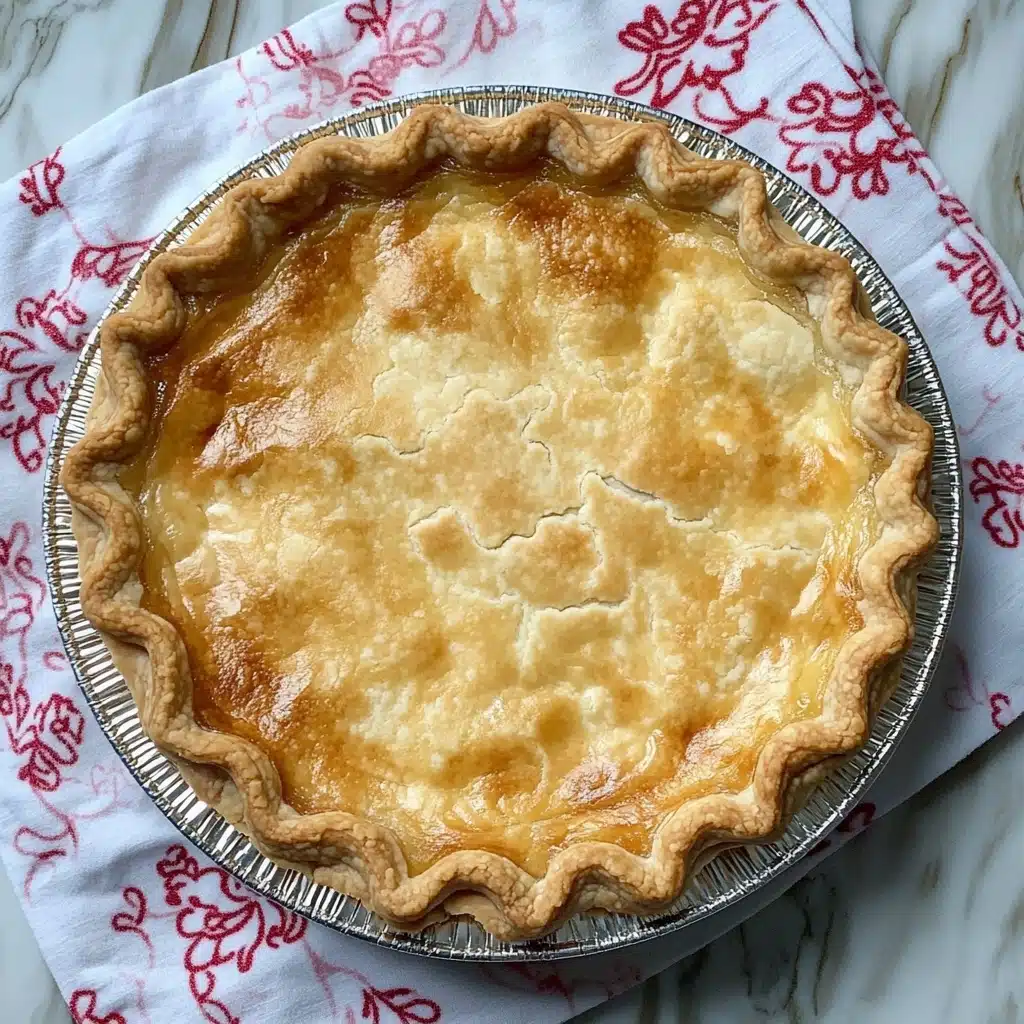
Next, drizzle the vanilla extract right over the surface. Dot with the five pieces of butter, distributing them so each section will be beautifully buttery as it bakes. Slide the whole thing into the oven and bake at 400°F for 30 minutes.
Step 5: Lower Heat & Continue Baking
After 30 minutes, reduce your oven temperature to 375°F. If the edges of your crust look golden, gently cover them with foil or a pie shield to prevent burning. Continue baking for another 30 minutes—this is where the Water Pie magic happens!
Step 6: Cool & Chill
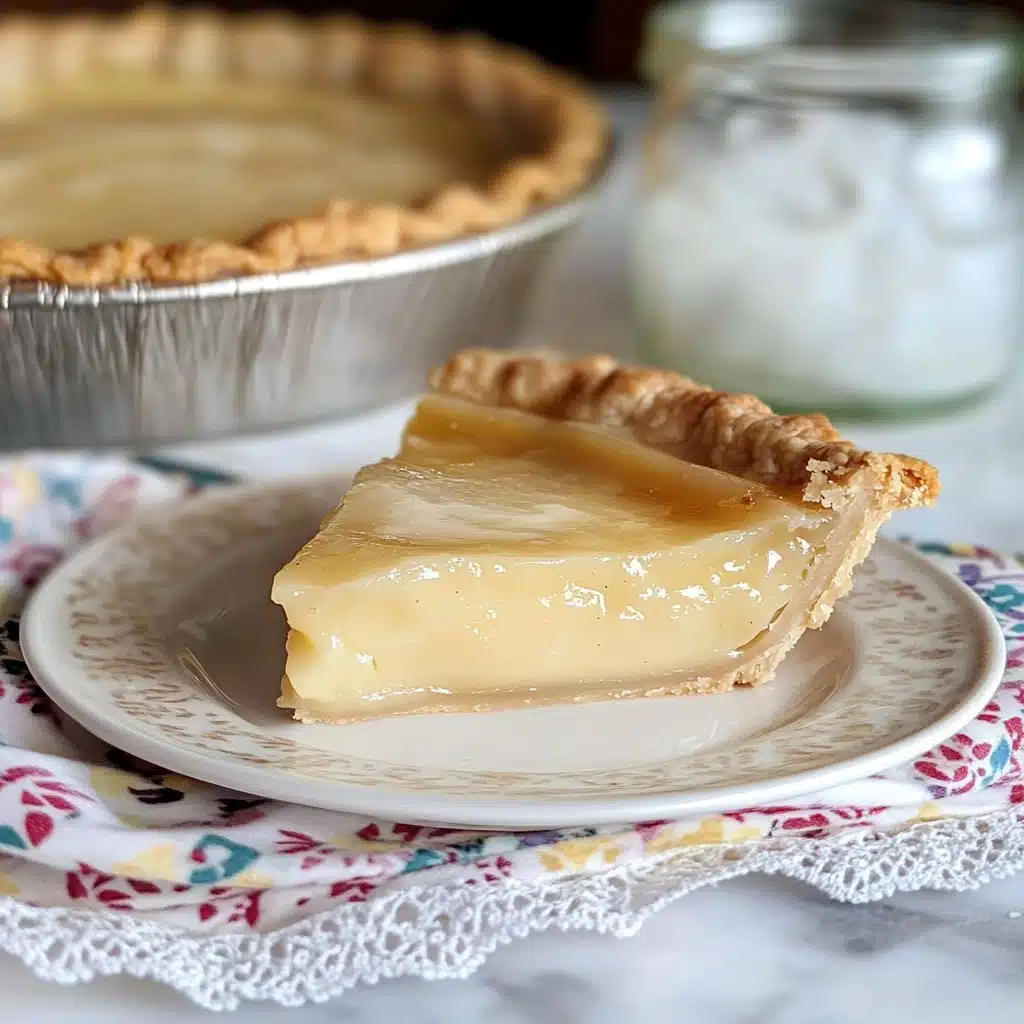
Your pie won’t look “set” when it first comes out (it’ll seem watery), but don’t worry. Cool it completely at room temperature, then refrigerate until thoroughly cold—at least a few hours. As it chills, the filling transforms into that beautifully gelled, scoopable Water Pie everyone raves about.
Pro Tips for Making Water Pie
- Chilling is Key: Don’t cut your Water Pie until it’s thoroughly chilled—this cooling time is essential for the filling to gel and slice cleanly.
- No Stir Zone: After sprinkling in your dry mixture, leave it undisturbed! Stirring disrupts the delicate thickening process.
- Shield That Crust: Keep an eye on your pie crust’s edges and cover them with foil mid-bake if they start to brown early for that perfect, golden finish.
- Butter Placement: Distribute the pats of butter evenly over the surface—this ensures every portion is infused with rich buttery flavor.
How to Serve Water Pie
Garnishes
A classic slice of Water Pie looks elegant on its own, but for a little flair, try a dusting of powdered sugar, a dollop of whipped cream, or a drizzle of warm caramel sauce. Fresh berries also amp up the old-fashioned charm and add a juicy pop of color.
Side Dishes
This gentle, buttery-sweet dessert is wonderful after a hearty Sunday lunch or a simple soup supper. Serve it alongside a mug of coffee, spiced tea, or even with a scoop of vanilla ice cream for extra indulgence.
Creative Ways to Present
For special occasions, try cutting Water Pie into cubes and stacking them parfait-style in mini glasses with layers of whipped cream. Or, make individual mini pies in ramekins for a fun, retro dinner party dessert that’s sure to spark conversation!
Make Ahead and Storage
Storing Leftovers
Wrap leftover Water Pie tightly with plastic wrap or store in an airtight container in the refrigerator. It will stay fresh and luscious for up to 4 days—if it lasts that long, of course!
Freezing
Though best enjoyed fresh, you can freeze Water Pie for up to 2 months. Chill completely, wrap well, and thaw overnight in the refrigerator before serving. The texture may become slightly softer, but the flavor will still be lovely.
Reheating
If you’d like to serve your pie warm, let slices sit at room temperature for 10-15 minutes or gently microwave individual portions for just a few seconds. Overheating can liquefy the filling, so go slow and steady to keep that signature Water Pie texture.
FAQs
-
Does Water Pie really taste good, or is it just a novelty?
Water Pie is surprisingly delicious! The combination of flour, sugar, butter, and vanilla bakes into a sweet, custard-like filling with a subtle but comforting flavor. It might sound odd, but it tastes like a buttery vanilla pudding in a pie shell—old-fashioned and very satisfying.
-
Why is my Water Pie still liquid after baking?
This is totally normal! The filling will be quite watery when you first take it out of the oven. It needs time to cool and then fully chill in the fridge to set properly. Don’t try to cut it before it’s cold and gelled—you’ll get perfect slices once it’s chilled.
-
Can I use a regular (not deep-dish) pie crust for this recipe?
A deep-dish crust is best because the filling needs room to “puff” and gel as it bakes. A regular shell might overflow or be a bit shallow—if using a regular crust, leave out a few spoonfuls of water to avoid spillover (but the texture might be a tad different).
-
Is Water Pie vegan or can it be made vegan?
It’s easy to make Water Pie vegan: simply use a dairy-free pie crust and swap the butter for a vegan stick-style butter. The pie’s texture and flavor will remain the same dreamy and nostalgic!
Final Thoughts
I can’t recommend Water Pie enough if you’re craving simple comfort or want to share a piece of culinary Americana. It’s a reminder that the most heartwarming desserts are often the most humble—so give Water Pie a try, share it with family, and marvel at just how magical the basics can taste.
Print
Water Pie Recipe
- Prep Time: 15 minutes
- Cook Time: 1 hour
- Total Time: 1 hour 15 minutes
- Yield: 1 pie (about 8 servings)
- Category: Dessert
- Method: Baking
- Cuisine: American
- Diet: Vegetarian
Description
This Water Pie recipe is a simple and delicious dessert that magically transforms a few basic ingredients into a delightful treat. With a unique gelling process, this pie surprises with its texture and flavor.
Ingredients
Pie Crust:
- 1 9-inch deep-dish pie crust, unbaked
Filling:
- 1 1/2 cups water
- 4 tablespoons all-purpose flour
- 1 cup sugar
- 2 teaspoons vanilla extract
- 5 tablespoons butter, cut into 5 pieces
Instructions
- Preheat Oven: Preheat the oven to 400°F and place the unbaked pie crust on a baking sheet.
- Add Water: Pour water into the pie crust.
- Prepare Filling: In a small bowl, mix flour and sugar, then sprinkle over the water in the crust. Do not stir.
- Add Flavor: Drizzle vanilla extract over the water and place butter pieces on top.
- Bake: Bake at 400°F for 30 minutes, then reduce heat to 375°F. Optionally cover crust edges to prevent burning and bake for an additional 30 minutes.
- Cool and Chill: The pie will appear watery but will set as it cools. Let it cool completely, then refrigerate until chilled before serving.
Nutrition
- Serving Size: 1 slice
- Calories: 178 kcal
- Sugar: 17g
- Sodium: 108mg
- Fat: 7g
- Saturated Fat: 4g
- Unsaturated Fat: 2g
- Trans Fat: 0g
- Carbohydrates: 29g
- Fiber: 0g
- Protein: 1g
- Cholesterol: 15mg


